In Start&Stop mode, counting the produced parts requires a second measuring point, wired to a specific input of the module. This article covers the wiring and the tablet configuration.
1. Wiring the relay
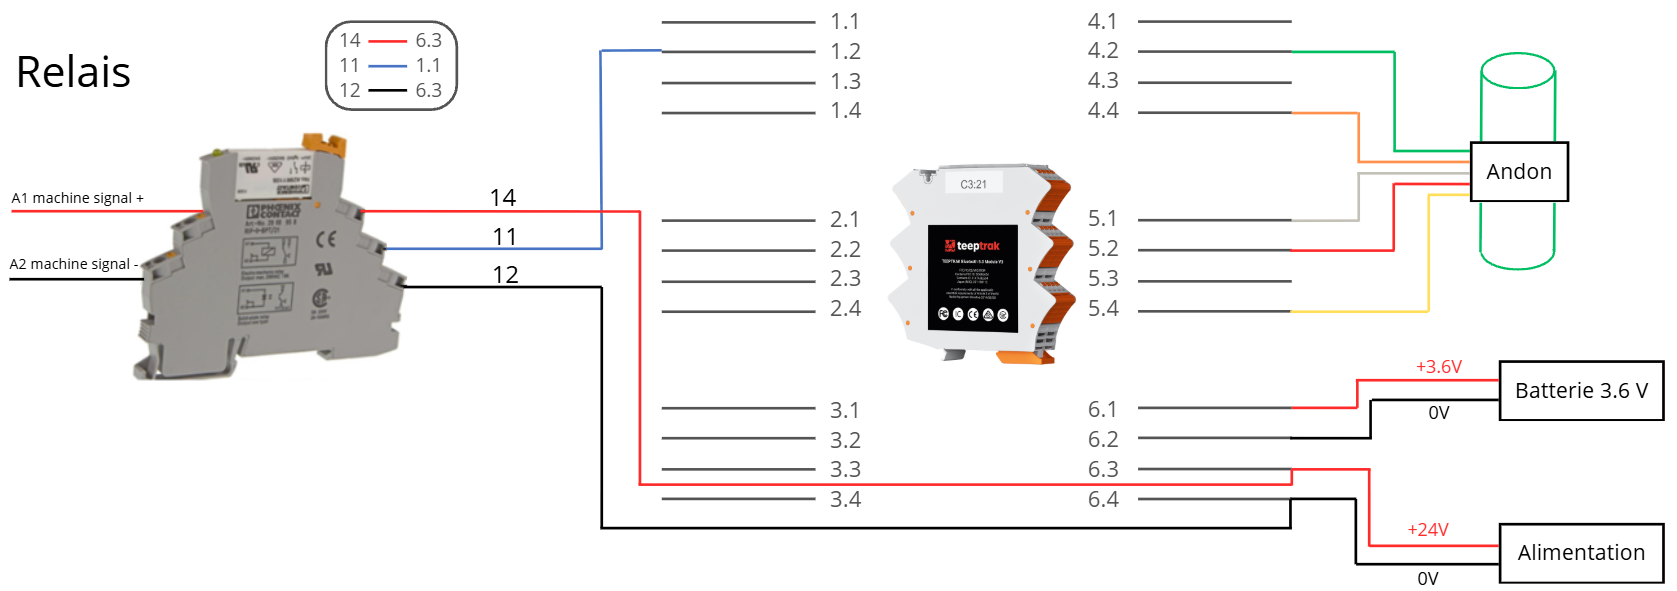
For the product count, the relay must be connected to input 1.2 of the module. Input 1.1 is reserved for monitoring the performance of your machine.
2. Enabling the option on the tablet
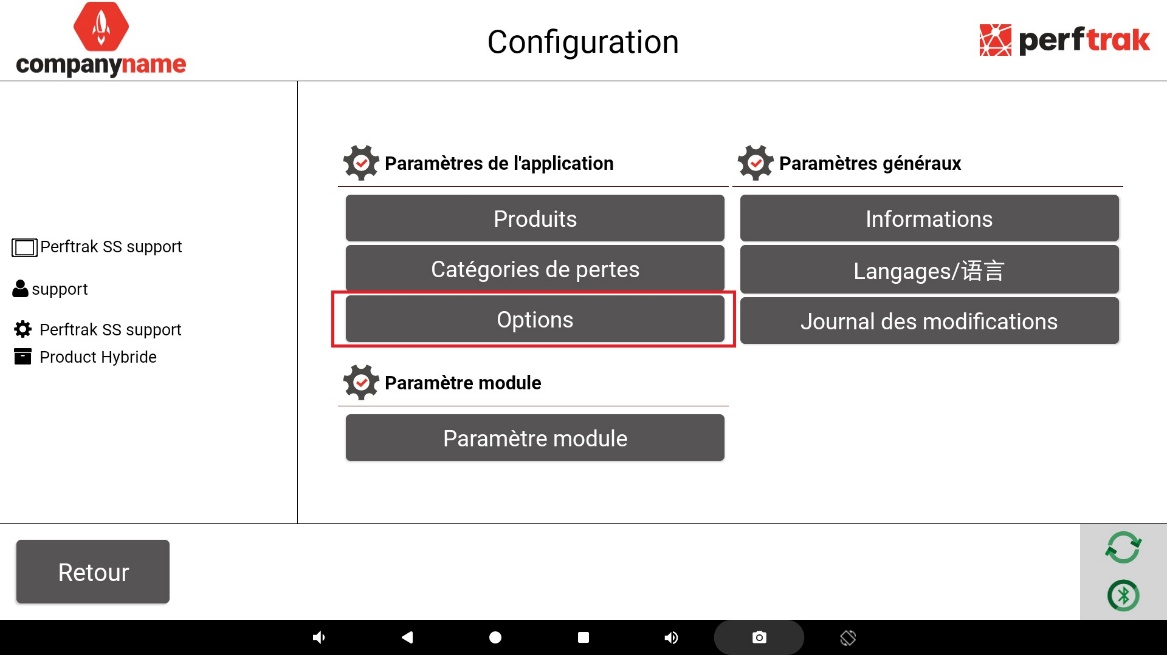
Open the tablet settings with the cogwheel icon at the bottom right of the main page, then click Options.
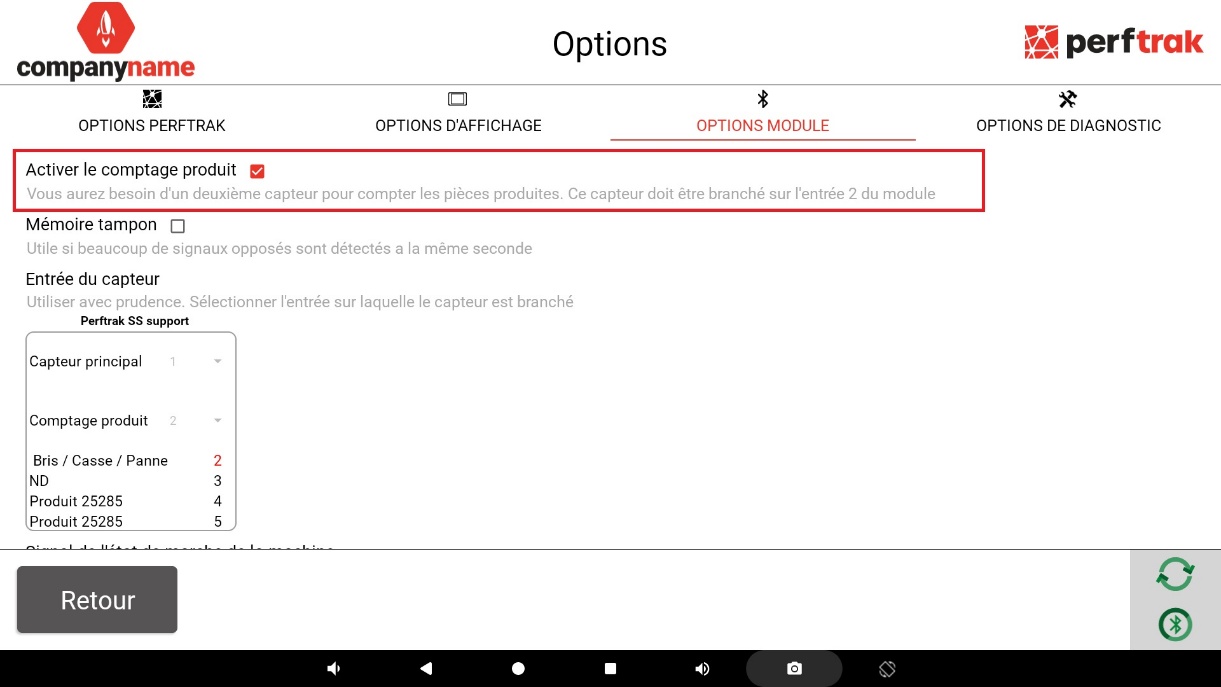
In the Module options section, tick Activate product counting.
3. Disconnecting the tablet from the module
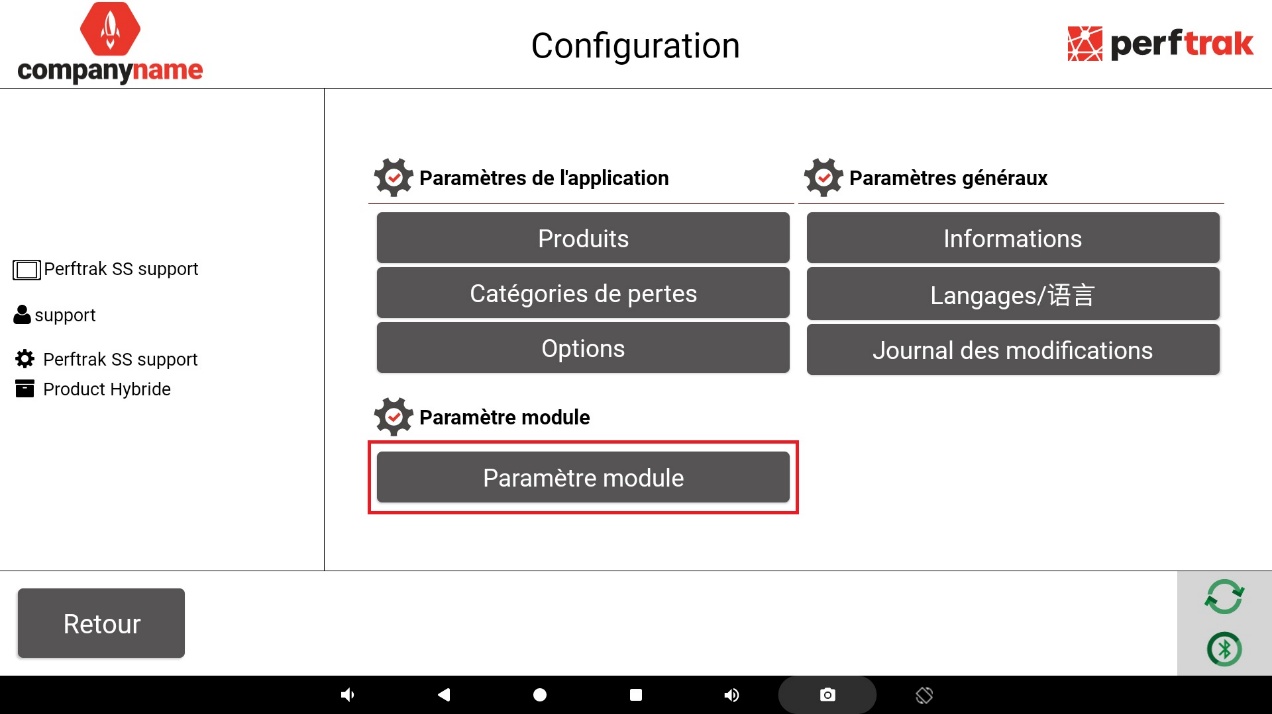
Once the option is enabled, and after checking that your measuring point — sensor or relay — is correctly wired to input 1.2, you have to disconnect the tablet from the module to finalise the configuration.
Go back to Options, open the Module setting section, and click Disconnect at the bottom left of the page.
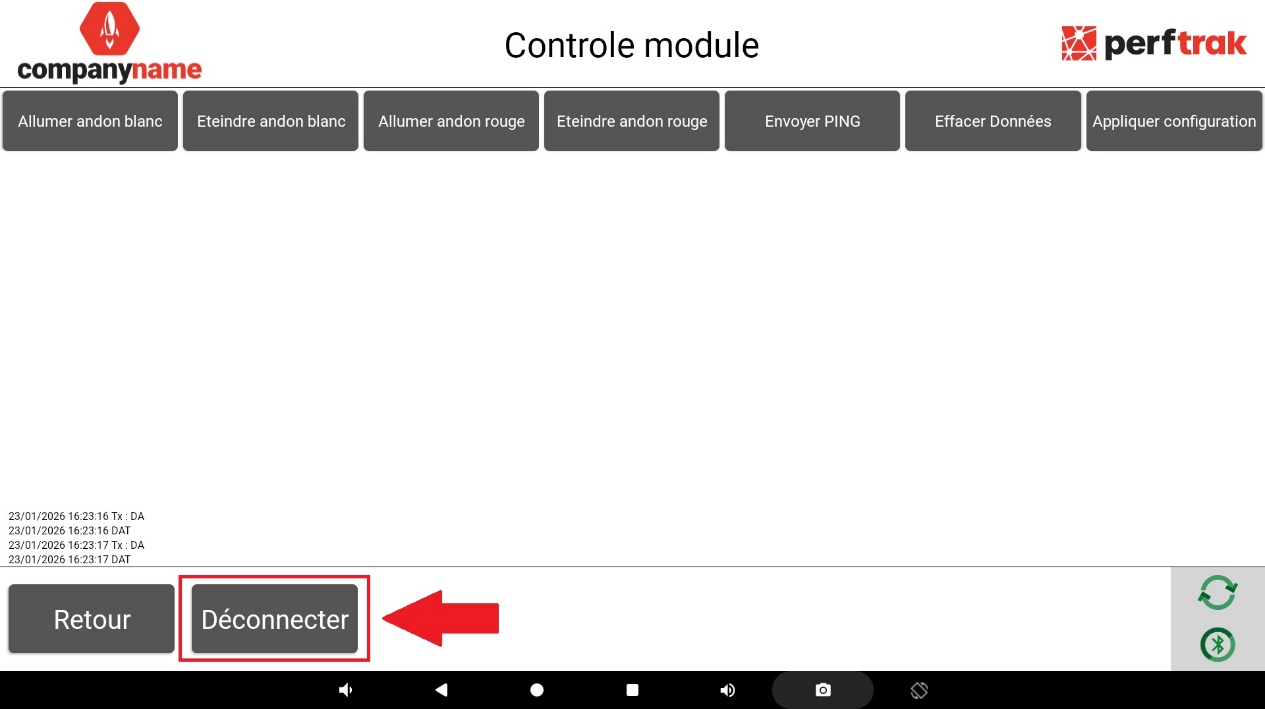
4. Assigning the input to the product count
Go back to Options > Module options to assign the right module input to the product count.
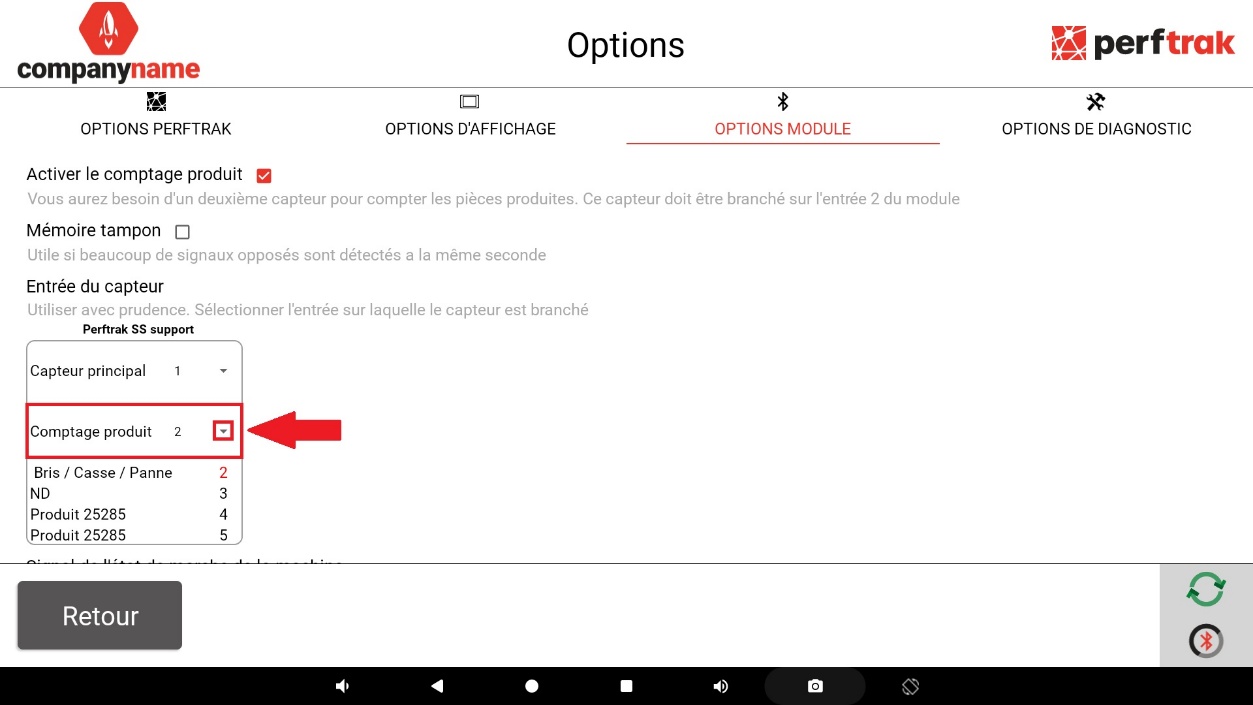
Click the small arrow to the left of Product count and select the corresponding input.
As a reminder, the product count must be performed on input 1.2.
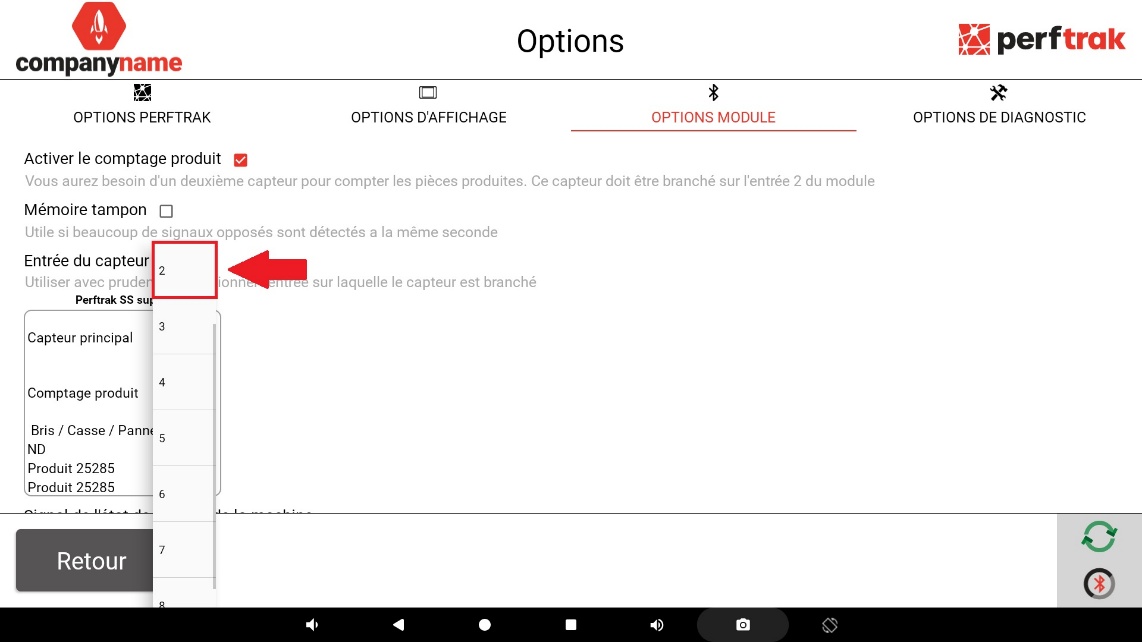
5. Reconnecting the tablet
You can now reconnect the tablet to the module from Options > Module setting. The last Bluetooth device connected is easy to identify: a red star is displayed next to the hexadecimal code of the module.
The product count is now operational.