On the tablet, launch the PaceTrak application and log in with the credentials of one of the operator accounts configured on the website. Make sure the configuration authorisations have been enabled for that account.
From the main interface, click the cogwheel (parameters) to check that the configurations made on the website have been synchronised: Machine (workstation), Products (your routings) and Loss categories.
Reminder: after any modification of a routing or a loss tree on the website, remember to refresh the corresponding tab on the tablet, then quit and relaunch the application.
1. Losses filled in automatically
In the Options tab, Loss configuration > Configure lets you validate (or not) the automatic filling-in of certain loss categories: compaction time exceeded, suspension and inter-routing time.
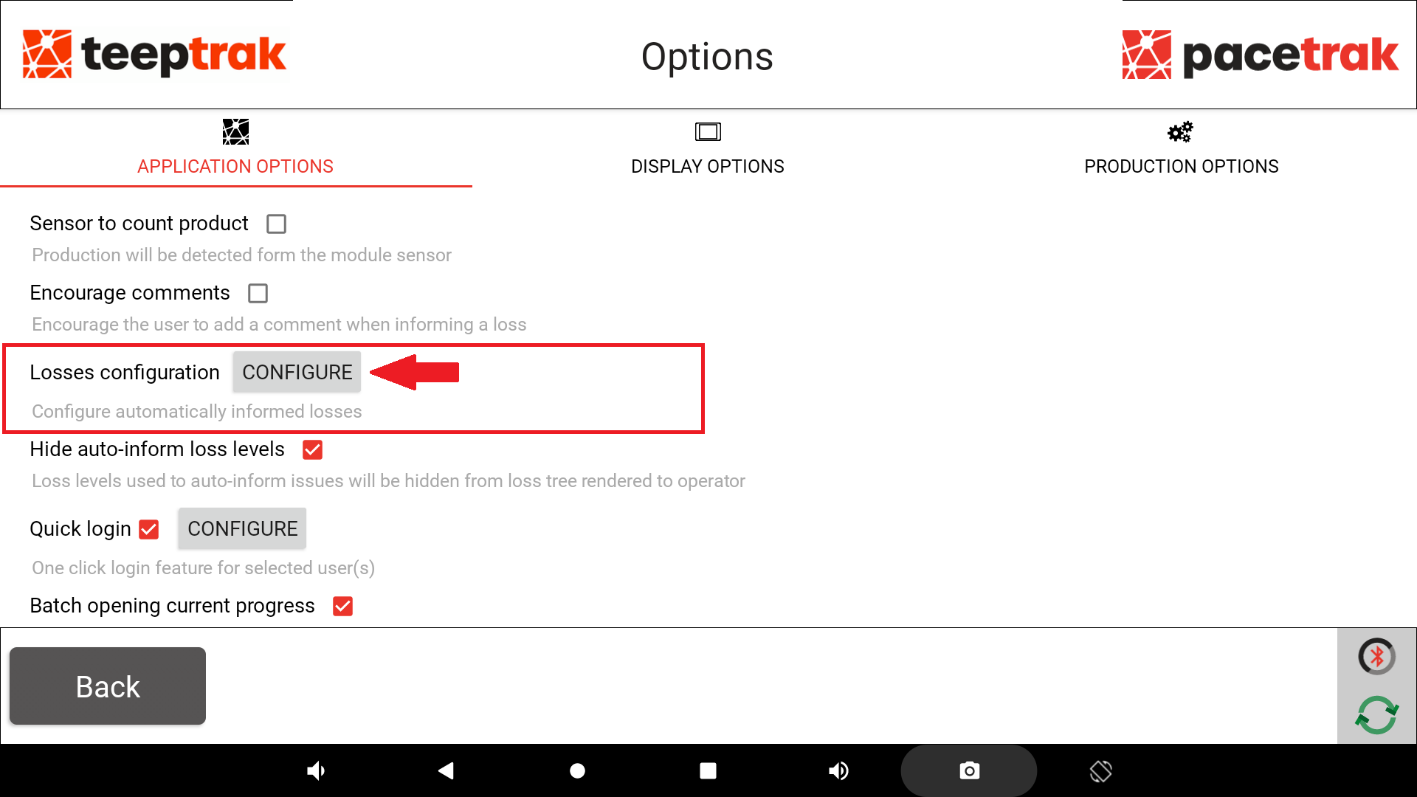
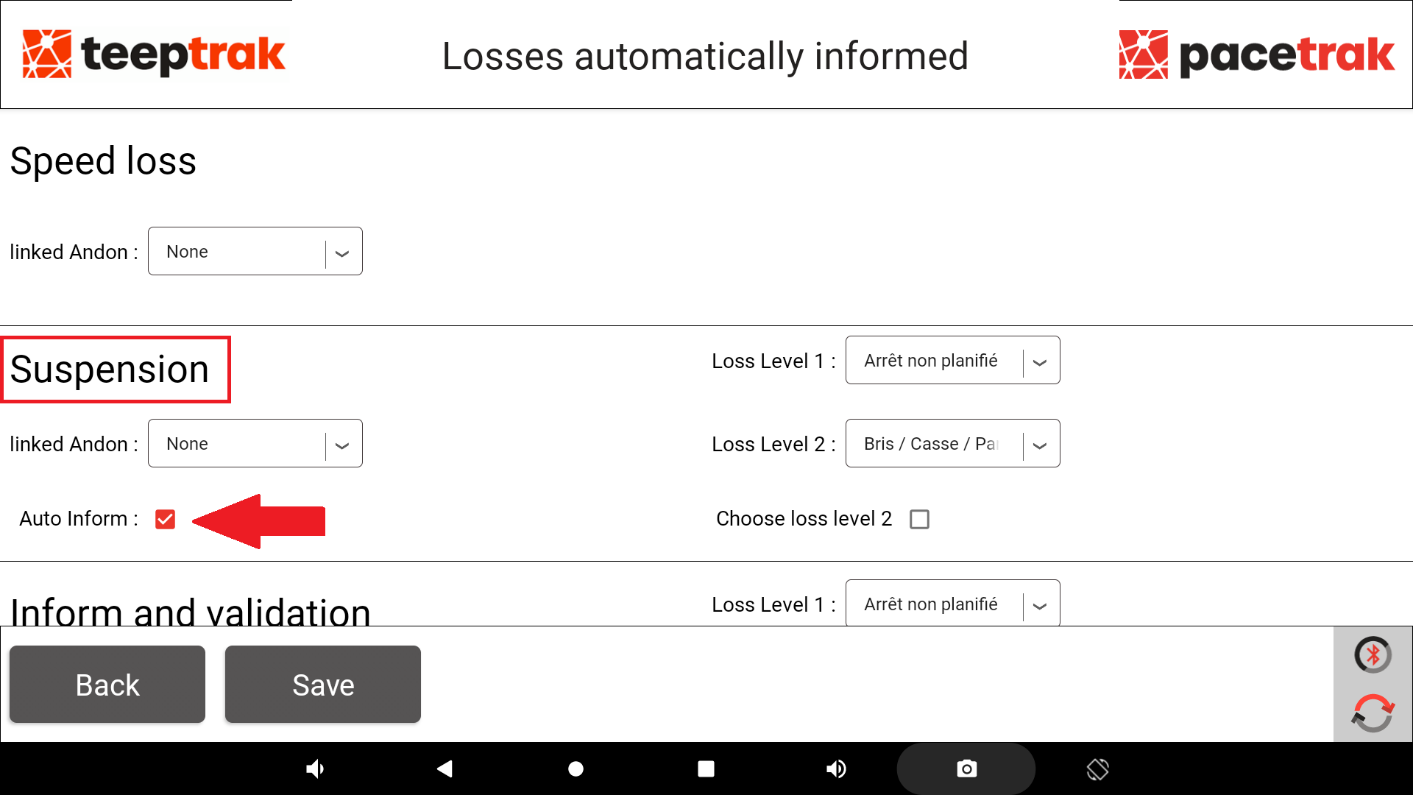
For each type (Speed loss, Suspension, Report and validation, Inter-product time), you can tick Auto Inform and define the level 1 and level 2 causes that will be assigned automatically.
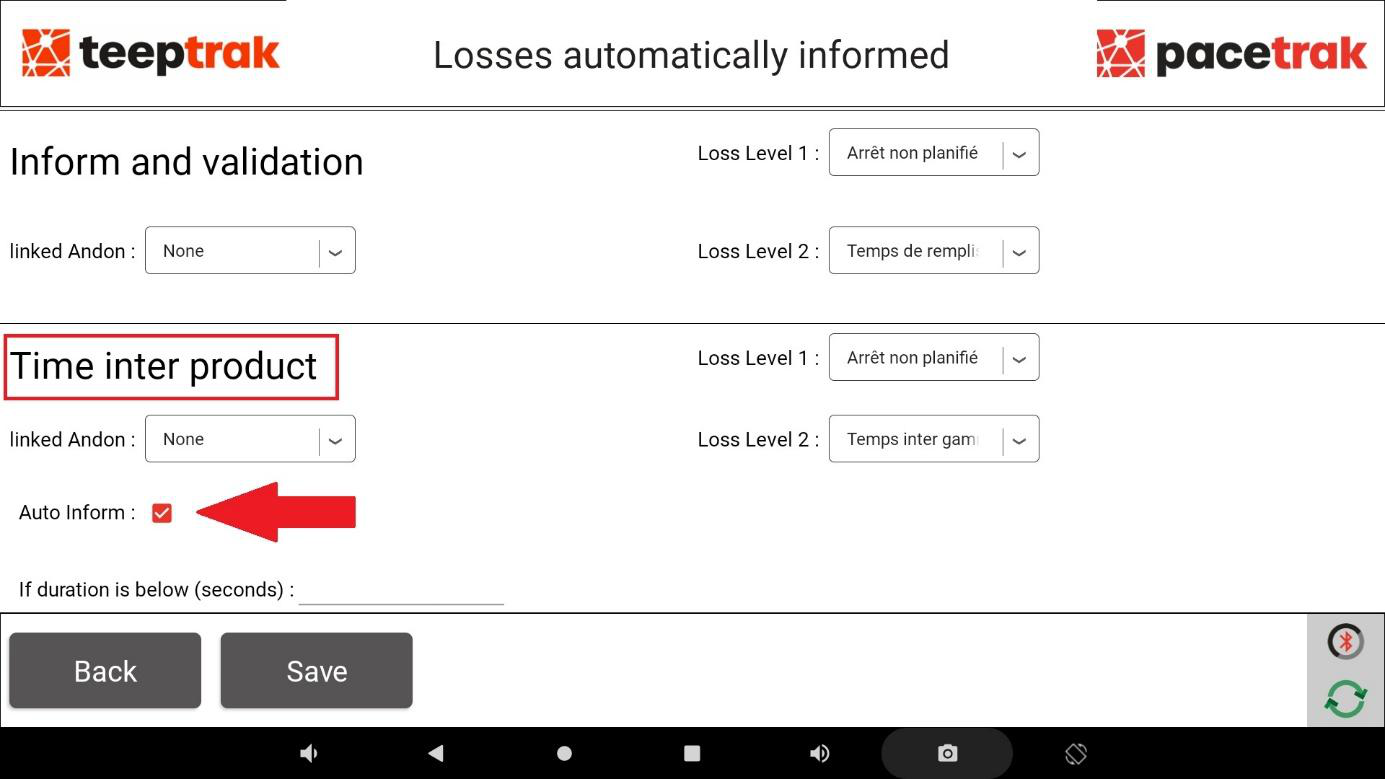
Configure each tab according to your situation, then click Save.
2. Only with PaceTrak Automatic (sensor)
Go to Application settings > Product and choose one of the routings you created. From the main interface, click the configuration icon in the bottom right-hand corner, then Bluetooth Configuration (at the very bottom of the parameters), and choose the TeepTrak module installed on the machine from the list of available Bluetooth networks. The module reference (the first 4 characters) can be found on the label affixed to the module. Wait until a list of operations appears on the screen, confirming the connection.
3. Colour codes of the light column
- Red Andon lit: a malfunction causing a loss is in progress.
- White Andon lit: the operator still has a loss to enter on the tablet.
- Blue light on the module: the module is connected to the tablet via Bluetooth (PaceTrak Automatic only).
Installation is now complete!