Path: Administration > Planning > Shifts
Overview
The Shifts feature lets you configure team rotation schedules, in order to track performance by team.
1. Creating a team
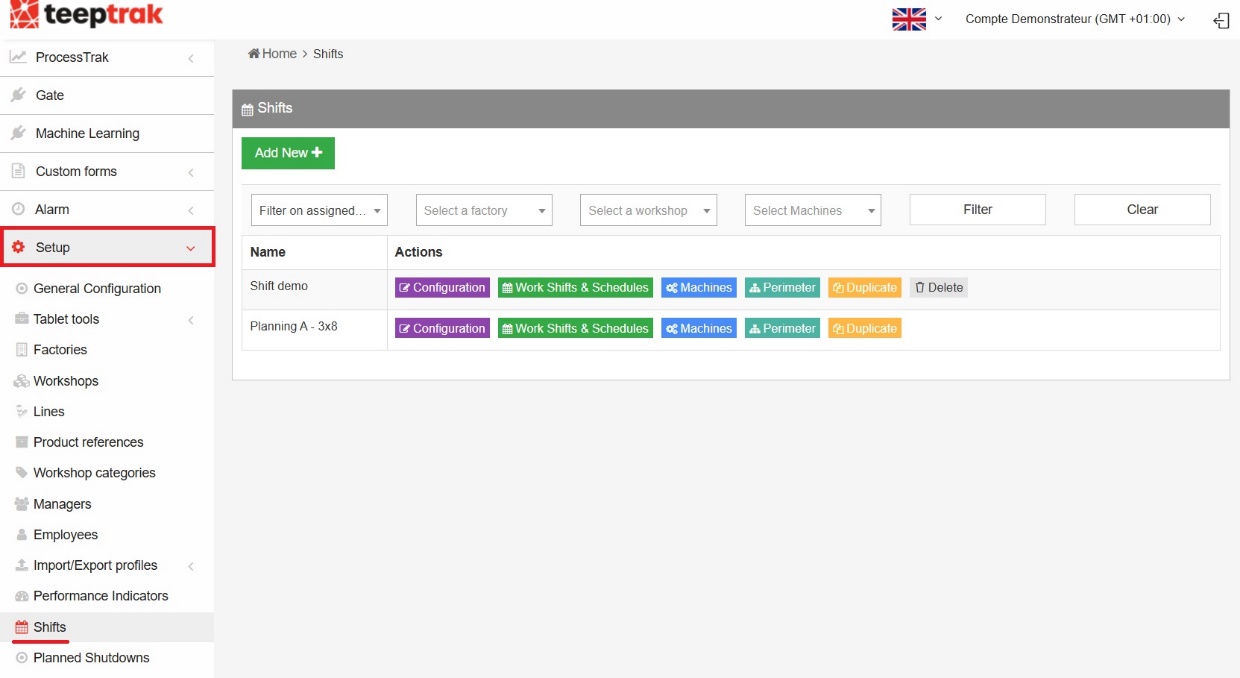
Go to Administration > Planning > Shifts, then click Add New.
Enter the team's name, the time zone, the shift start date and time, the number of days the shift will be active, and the option to account for daylight saving changes if necessary.
It is recommended to set the start time to the start time of the next morning shift.
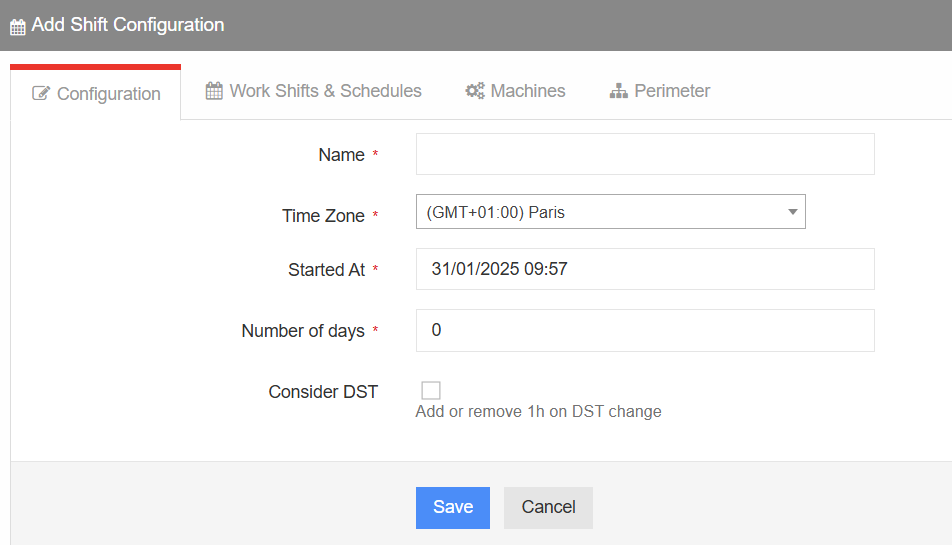
Save your selection. You will be redirected to the team schedule configuration page.
2. Creating the work shifts
Before setting up your schedule, you need to configure your work shifts. Click Add new work shift, on the right of the page.
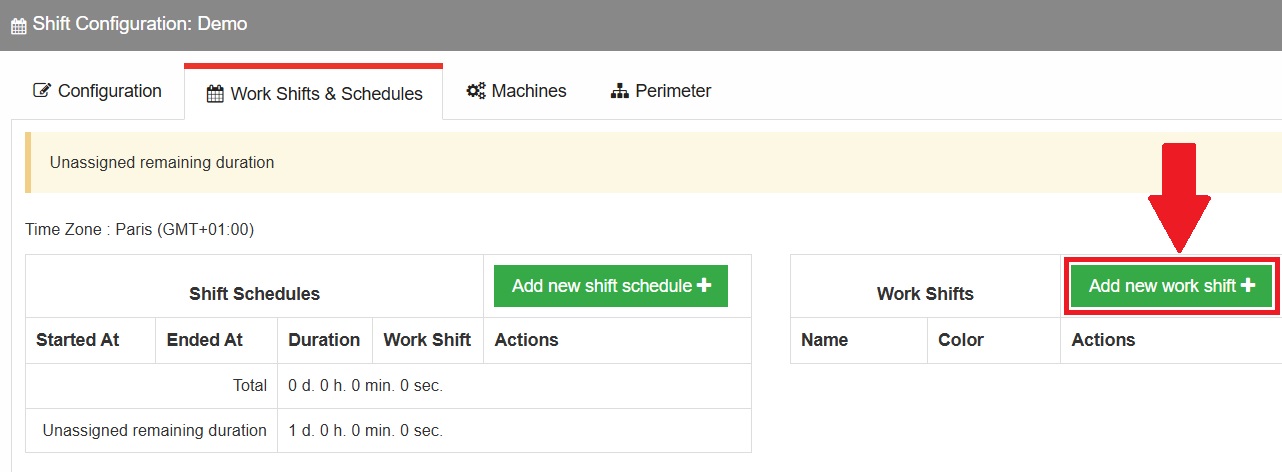
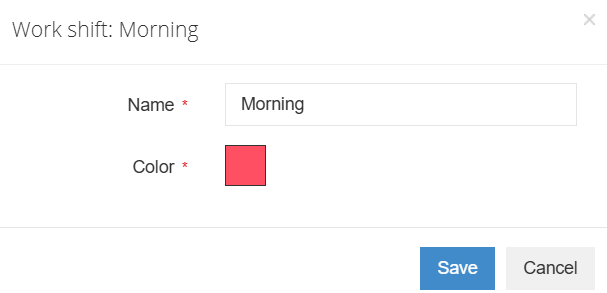
Name your work shift and assign it a colour by clicking the grey square. The list of your shifts appears in the dedicated table; to change one, click Edit.
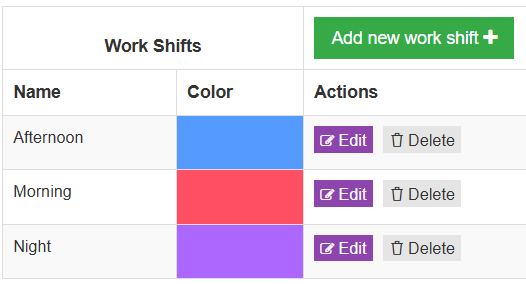
3. Building the schedule
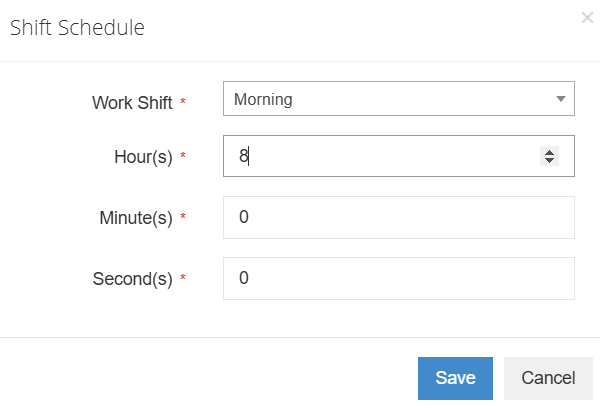
Once all the work shifts are configured, click Add new shift schedule. Enter the shift concerned and its duration.
A summary table is then generated, displaying the date, the start and end times of each shift, and their total duration. This configuration applies over the number of days defined at the start — 1 in our example.
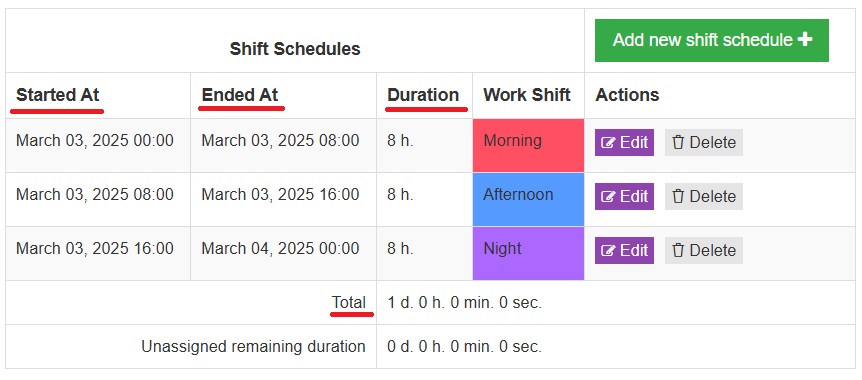
In the example above, we configured a 3x8 schedule for one day. Once the schedule comes to an end, it starts over in a loop. If you create a two-week schedule — one week in 3x8 and one in 2x8, for instance — the following weeks are automatically reassigned according to the same pattern.
Adding planned shutdowns
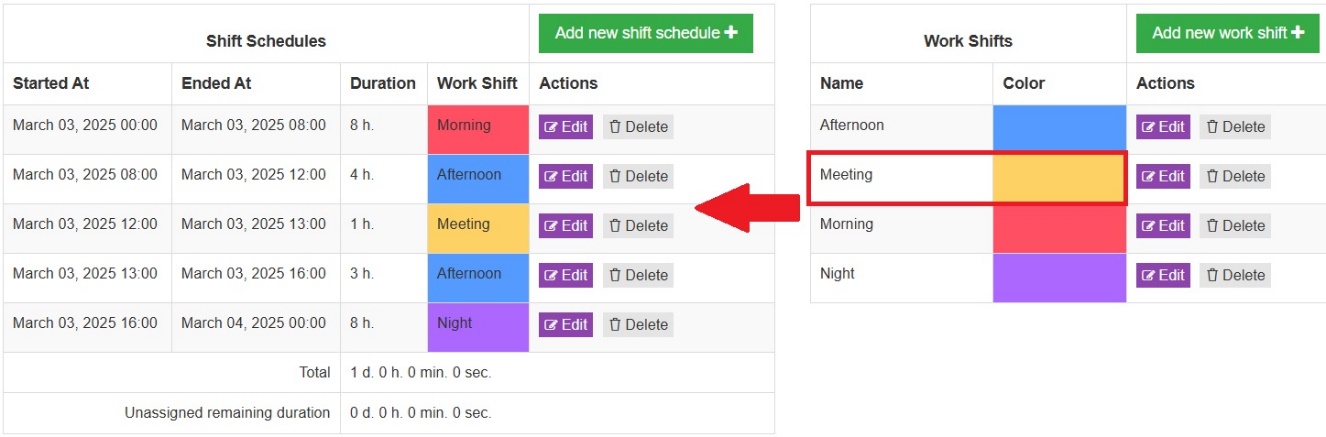
If your factory is closed at weekends, or if a one-hour break is scheduled every day, these periods must also be configured as work shifts.
Example of a planned shutdown for a one-hour meeting:
Unassigned remaining duration
Always complete the schedule until it matches the number of days configured at the start. At the bottom of the summary table, the unassigned remaining duration shows what is left to cover. In the example below, the schedule spans two days but only 24 hours have been assigned.
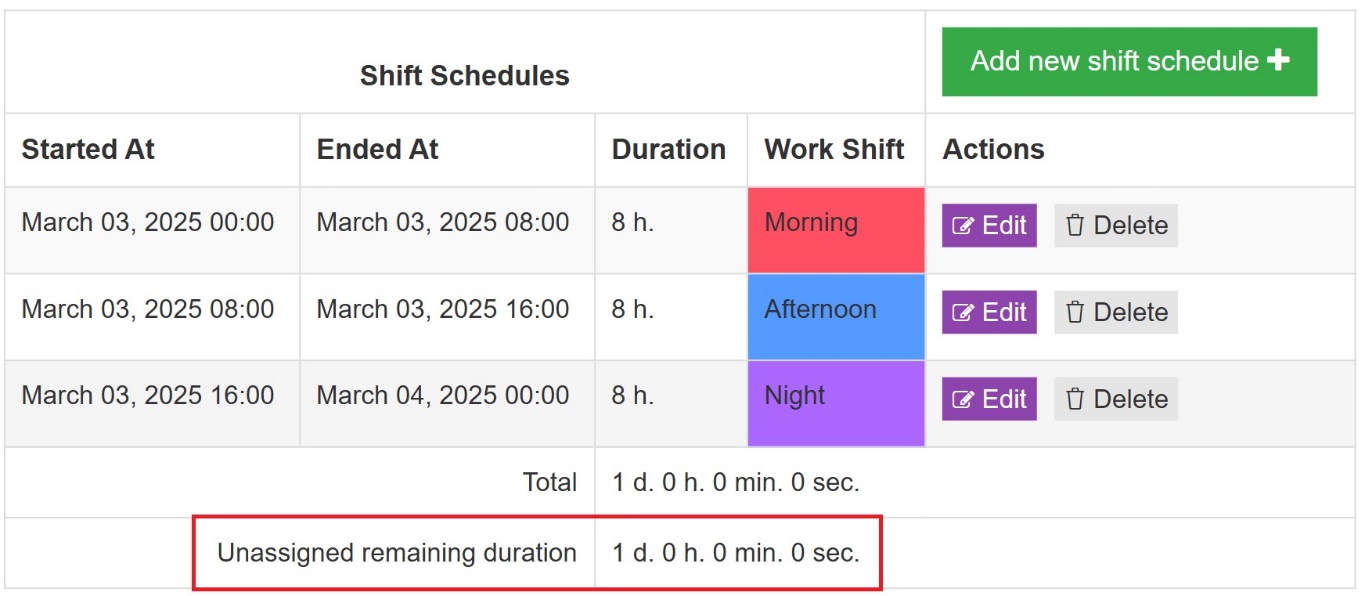
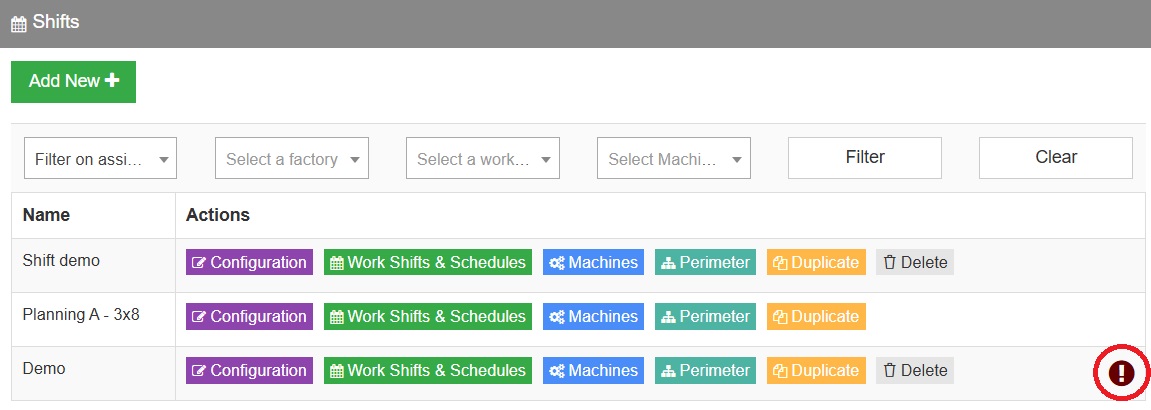
In that case, the schedule cannot be applied. On the home page, an exclamation mark appears to the right of the schedule line to point out the missing information.
Once your work shifts and schedules are finalised, do not forget to save by going back to the Setup tab.
4. Assigning the schedule
Go to the Perimeter tab to assign the schedule to one or more reference factories or workshops.
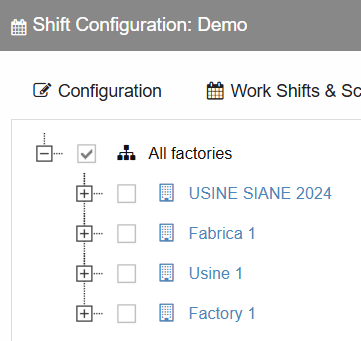
Note: the Machines tab will be used next. It is normal at this point that no machine has been assigned to this configuration yet.
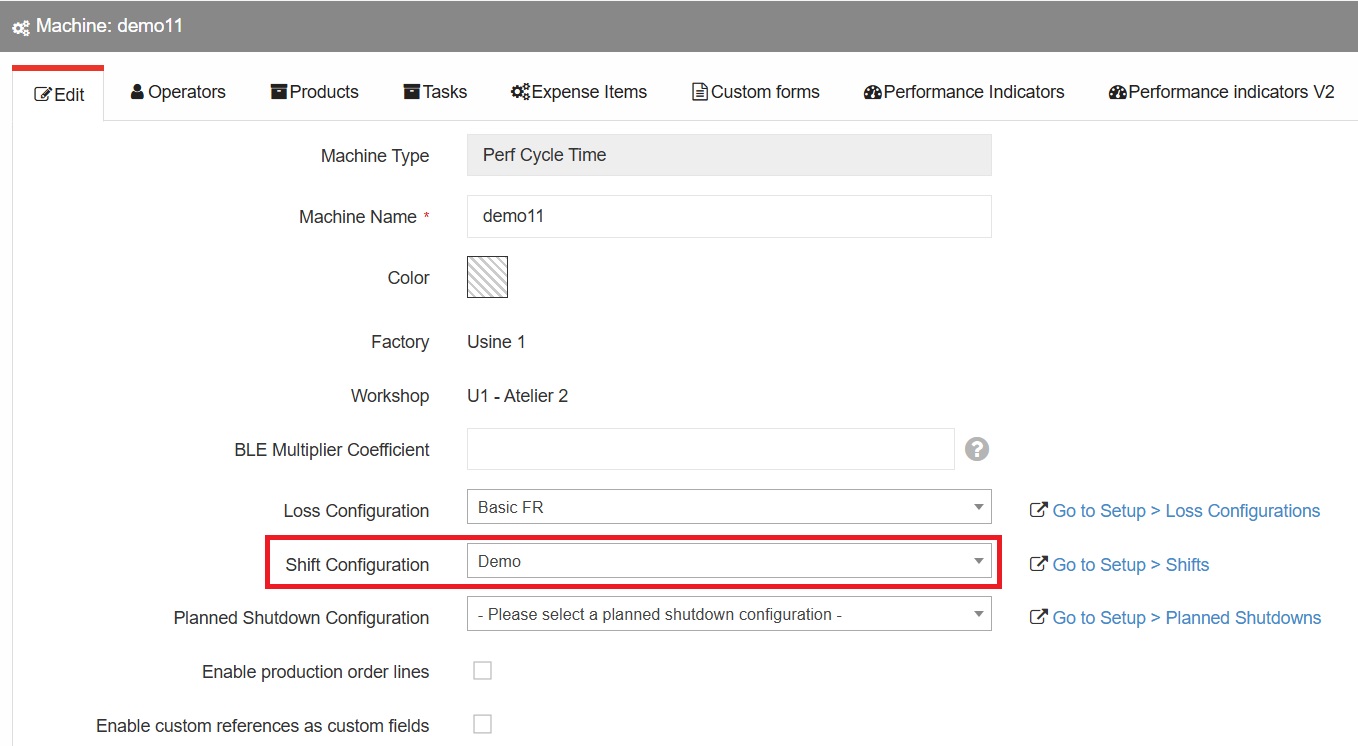
Then go to Administration > Licenses & Machines > Machines. Select the machine you want and click Edit, on the right of the table.
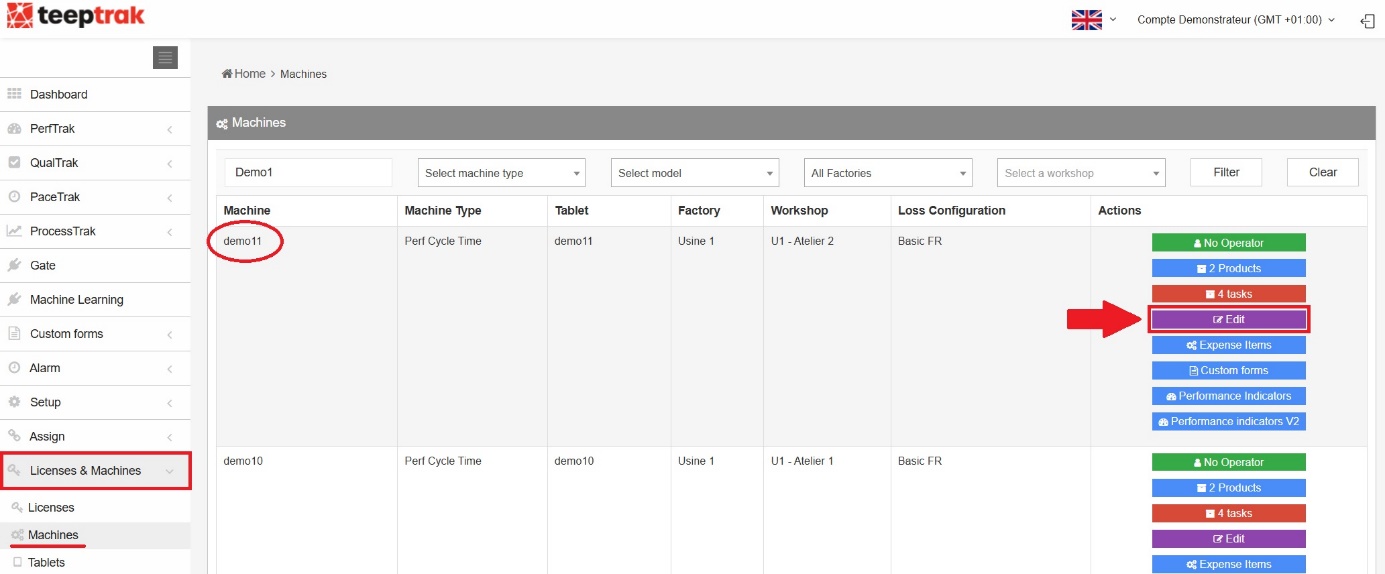
Once in the Edit tab, find the Shift Configuration section. Select the schedule you have just configured and save.
Important notes
Analysis by team is only available in the automatic reports.
When teams change over on the tablet, the operator has to log out and log back in with the credentials of the new team or station.