1. General points
The Flow configurations tab is where you create and set up the way data is exported. To start, click "New flow configuration".
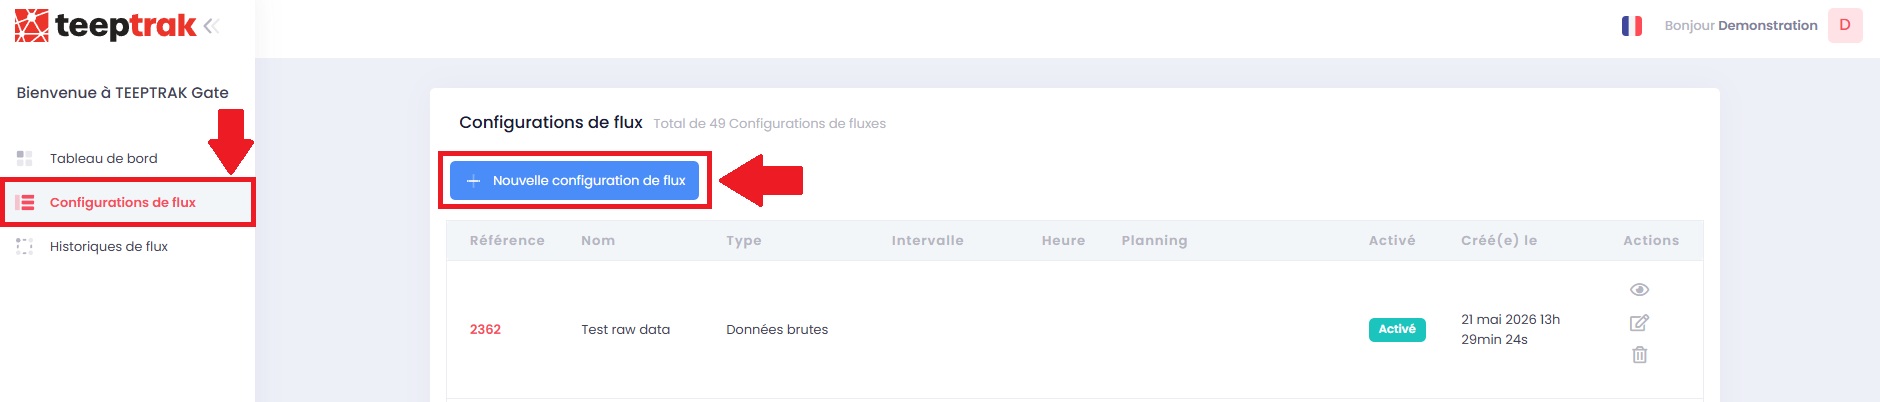
Elements to configure
- Type of information — the source of the data to export
- Machines — select one or more source machines
- Sending frequency — date and time of the export requests
- Extraction period — data range or custom interval
Available types of information
- Dashboard KPIs
- Simplified losses
- Consolidated losses
- Product counts
- Custom form
- Raw data
- PerfTrak cycle time products
- PerfTrak start/stop products
- Production orders
- Manager
- Event
2. Configuring a flow
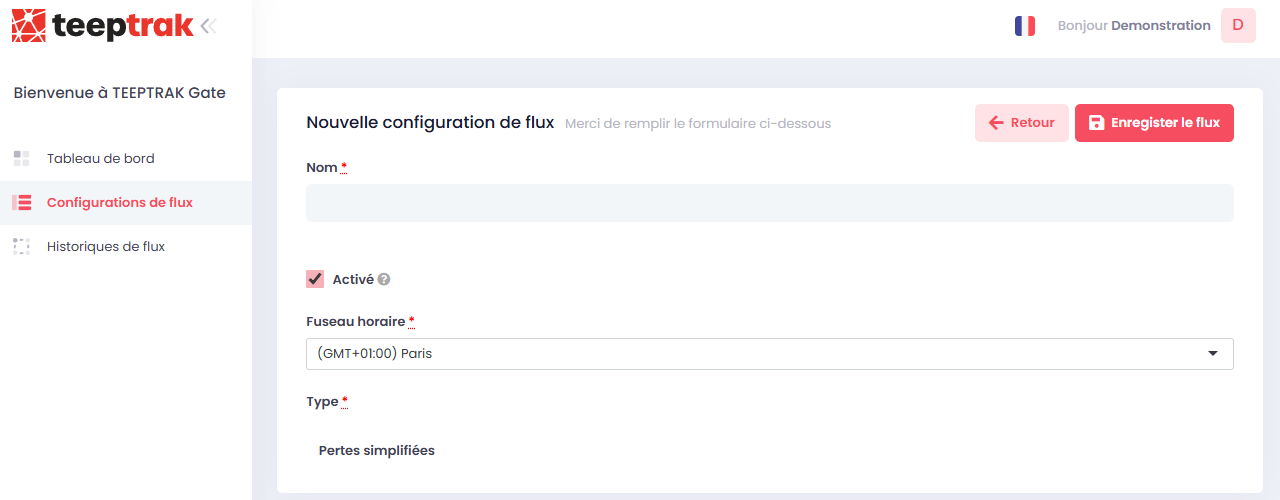
Each type of information has its own specific settings. All flows, however, require the following parameters.
Mandatory parameters
- Time zone — mandatory for every flow
- "Enabled" box — tick it to allow the data to be sent
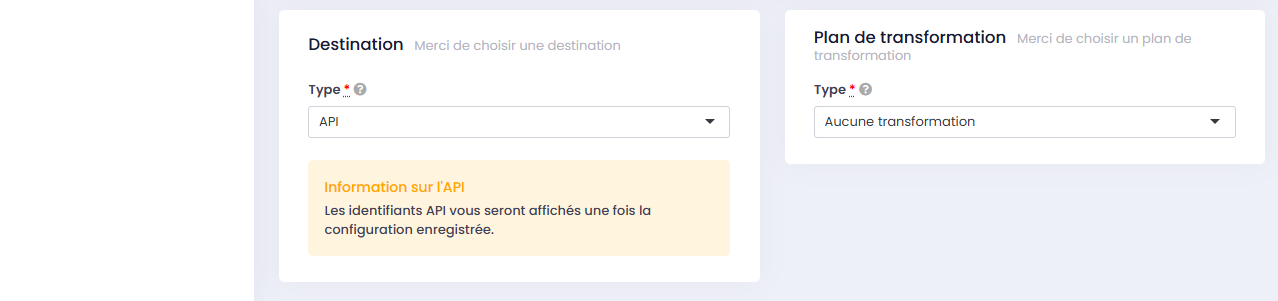
- Destination — where to receive the data (API, Google Drive or Microsoft Azure)
- Transformation plan — export format (JSON or CSV)
Optional parameters
Depending on the type of information, the following parameters may be required:
- Frequency — schedule, time and days of sending
- Source:
- Interval — the data extraction period
- TEEPTRAK machines — up to 25 machines per flow
- TEEPTRAK export profile — a profile configured beforehand on teeptrak.net
Type-specific configuration
| Type | Additional configuration |
|---|---|
| Dashboard KPIs | Select an "On period" dashboard (real-time data cannot be used) |
| Custom form | Specify the form concerned by the export |
3. Matrix of the extraction sources
| # | Source | Available intervals | Frequency | Destination | Format |
|---|---|---|---|---|---|
| 1 | Dashboard KPIs | Last hour, day, week, month, custom interval | Every 15 min, hourly, daily, weekly, monthly, per shift | API, Google Drive, Microsoft Azure | JSON, CSV |
| 2 | Simplified losses | Not configurable | Not configurable | API only | Not granted |
| 3 | Consolidated losses | Last hour, 2 h, 6 h, 8 h, 12 h, 24 h, per shift, custom interval | Every 15 min, hourly, daily, weekly, monthly, per shift | API, Google Drive, Microsoft Azure | JSON, CSV |
| 4 | Product counts | Last hour, 2 h, 6 h, 8 h, 12 h, 24 h, per shift, custom interval | Every 15 min, hourly, daily, weekly, monthly, per shift | API, Google Drive, Microsoft Azure | JSON, CSV |
| 5 | Custom form | Not configurable | Not configurable | API only | Not granted |
| 6 | Raw data | Not configurable | Not configurable | API only | Not granted |
| 7 | PerfTrak cycle time products | Not configurable | Not configurable | API only | Not granted |
| 8 | PerfTrak start/stop products | Not configurable | Not configurable | API only | Not granted |
| 9 | Production orders | Not configurable | Not configurable | API only | Not granted |
| 10 | Manager | Not configurable | Not configurable | API only | Not granted |
| 11 | Event | Not configurable | Not configurable | API only | Not granted |
4. Configuration examples
Dashboard KPIs

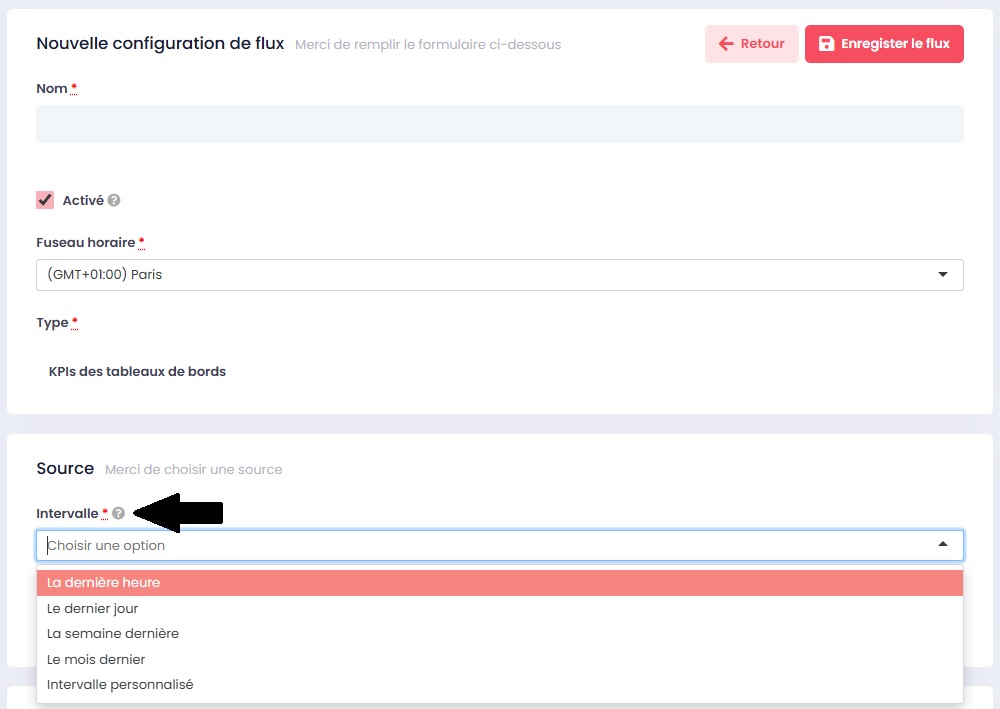
Step 1 — Select the interval
- Last hour
- Last day
- Last week
- Last month
- Custom interval
Step 2 — Choose the dashboard
Select your reference "On period" dashboard.

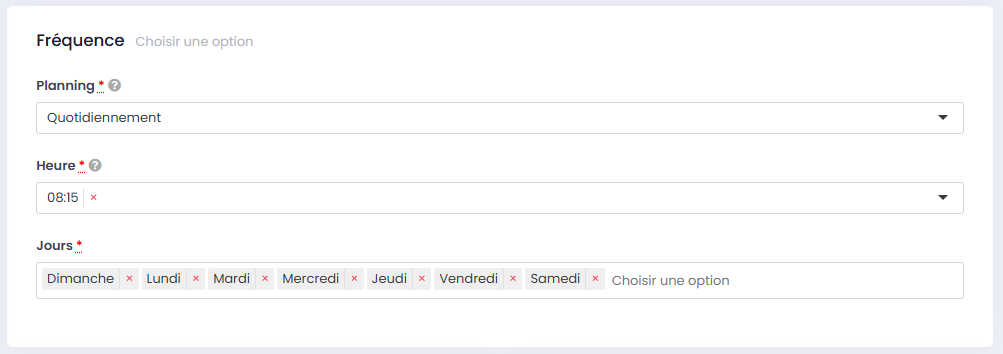
Step 3 — Configure the sending frequency
- Every 15 minutes
- Hourly
- Daily
- Weekly
- Monthly (by selecting a reference day of the month)
- Per shift (at every shift change)
Step 4 — Define the time and the days
Select the sending time and the days concerned. You can deselect certain days.
Step 5 — Choose the destination and the format
- Destination: API, Google Drive or Microsoft Azure
- Format: JSON or CSV
Step 6 — Save
Click "Save the flow" in the top left corner of the screen.
Product count

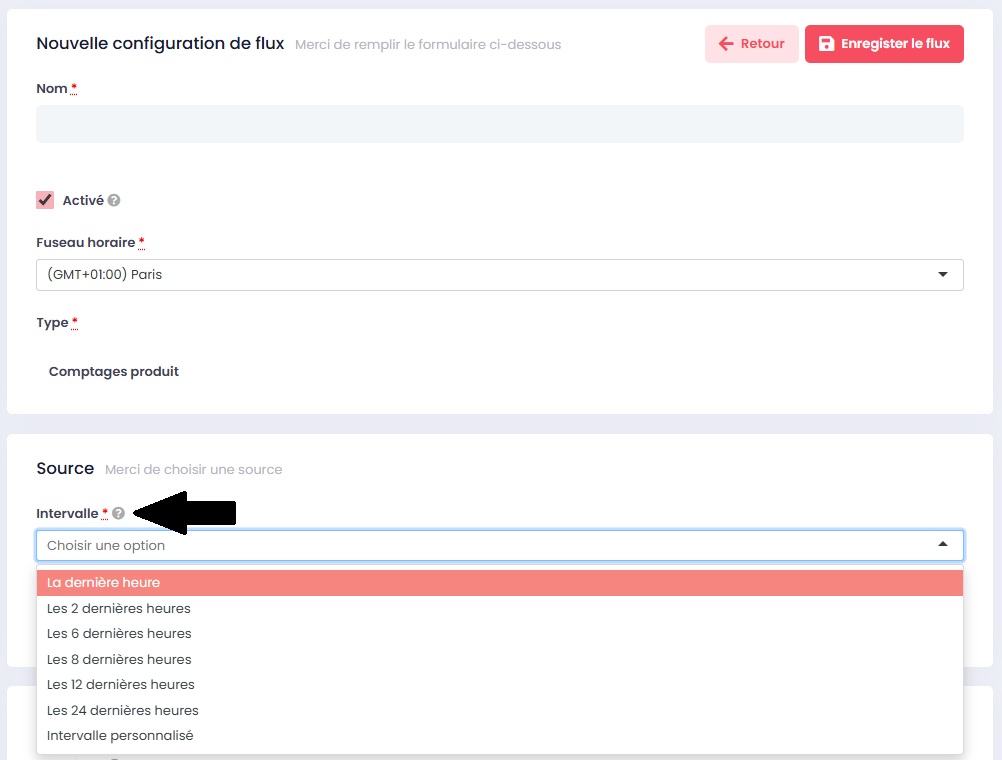
Step 1 — Select the interval
- Last hour
- Last 2 hours
- Last 6 hours
- Last 8 hours
- Last 12 hours
- Last 24 hours
- Custom interval
- Per shift
Step 2 — Choose the machines
Select the machines concerned by the export. Maximum 25 machines per flow.

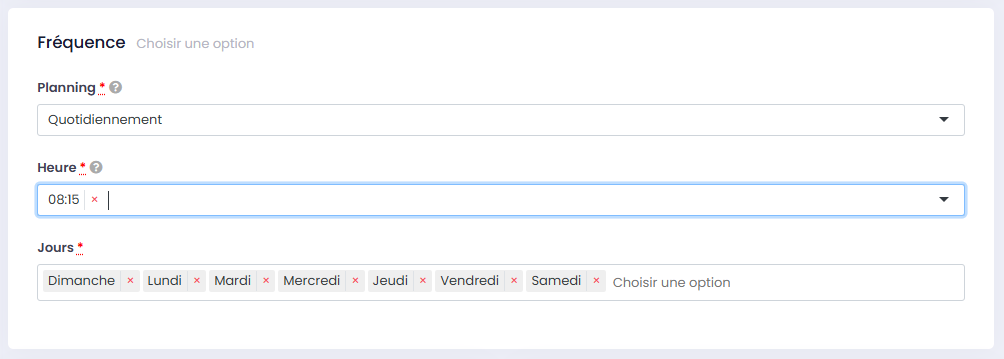
Step 3 — Define the time and the days
Select the sending time and the days concerned. You can deselect certain days.
Step 4 — Choose the destination and the format
- Destination: API, Google Drive or Microsoft Azure
- Format: JSON or CSV
Step 5 — Save
Click "Save the flow" in the top left corner of the screen.