It is possible to detect the sequence of the sub-routings of a routing automatically, using sensors dedicated to each sub-routing. This feature requires the configuration of signals, to be assigned both to their corresponding sub-routings and to an input of the module. With a multi-module configuration, you can automate up to 30 different signals.
1. How it works
In an automated complex routing, each sub-routing is associated with a signal (the same signal can be assigned to several sub-routings). A sub-routing ends as soon as the signal associated with it is detected, which automatically triggers the start of the next sub-routing.
- Out-of-order signals: the signals must be received in the order defined when the routing was configured. A signal received before its turn is ignored, and the sub-routing in progress continues until the correct signal is received.
- Manual action takes priority: if the operator clicks Finish task before a signal is recorded, the sub-routing ends and the next one starts.
2. Configuration
1. Creating the routing
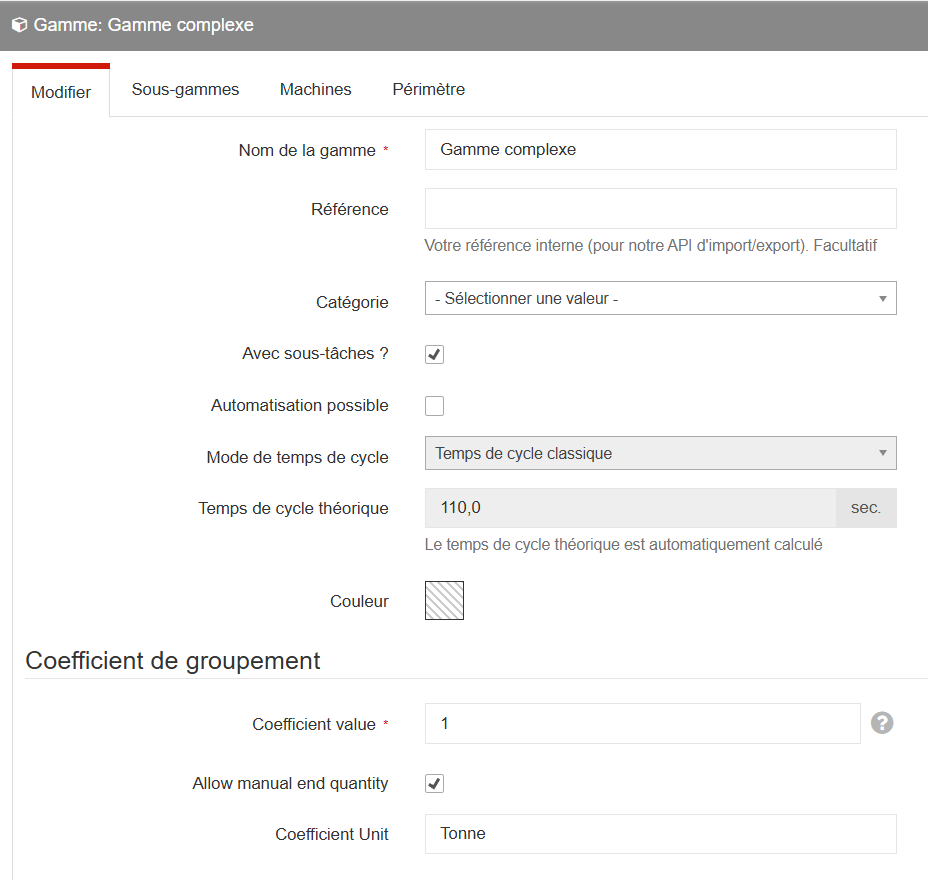
In PaceTrak > Ranges > Add, choose the product name, its theoretical execution time and, if needed, a colour. Make sure to tick both the "With subtasks?" and "Automation possible" boxes to enable the feature, then save. Then select the perimeter (no machine is assigned at this stage, which is normal).
2. Creating the sub-routings
In the table of routings, click Sub-routings on the row of the product concerned.
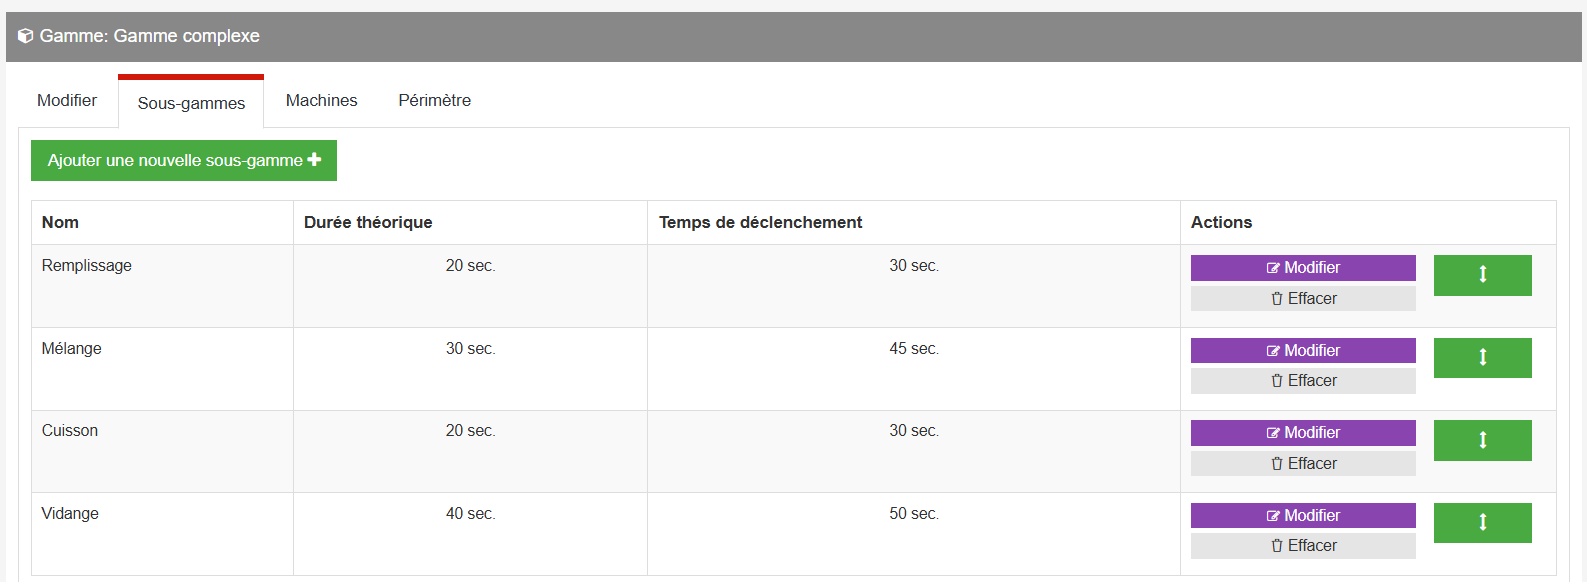
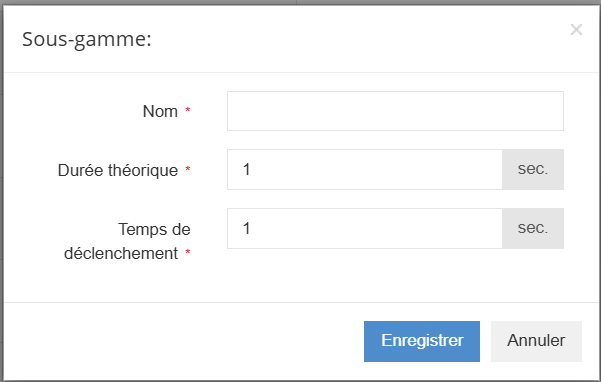
Click Add a new sub-routing, fill in its name, its theoretical duration and its trigger time, then save. The green arrows let you adjust the order in which they appear on the tablet.
3. Assigning the routings to the machines
In PaceTrak > Work Sequences to Workstations, drag the product onto the corresponding machine.
4. Creating the signals
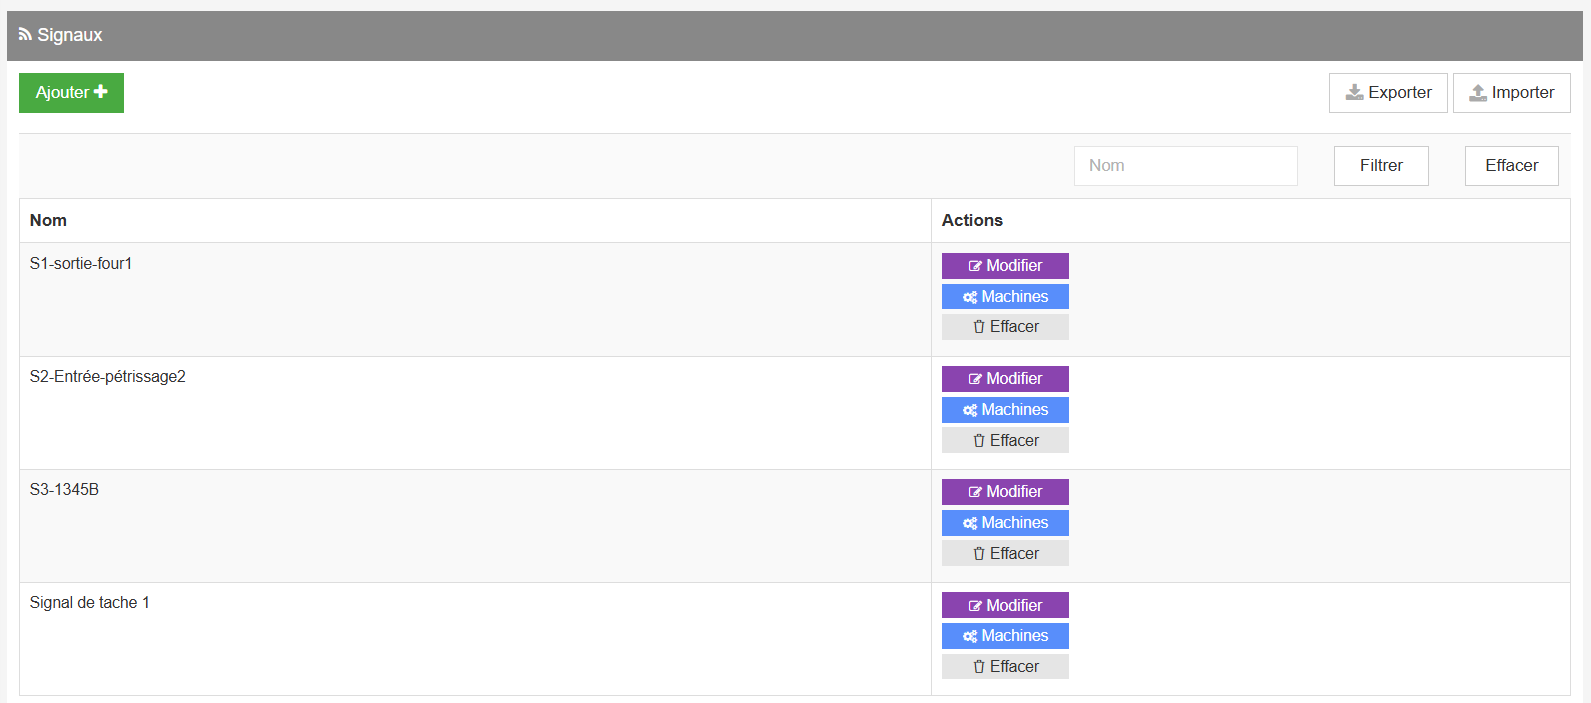
In PaceTrak > Signals > Add, choose the name of the signal (for example the name of the module input concerned). Then click Machines and switch the buttons from OFF to ON to assign the signal to its reference machine(s).
5. Assigning the signals to their input
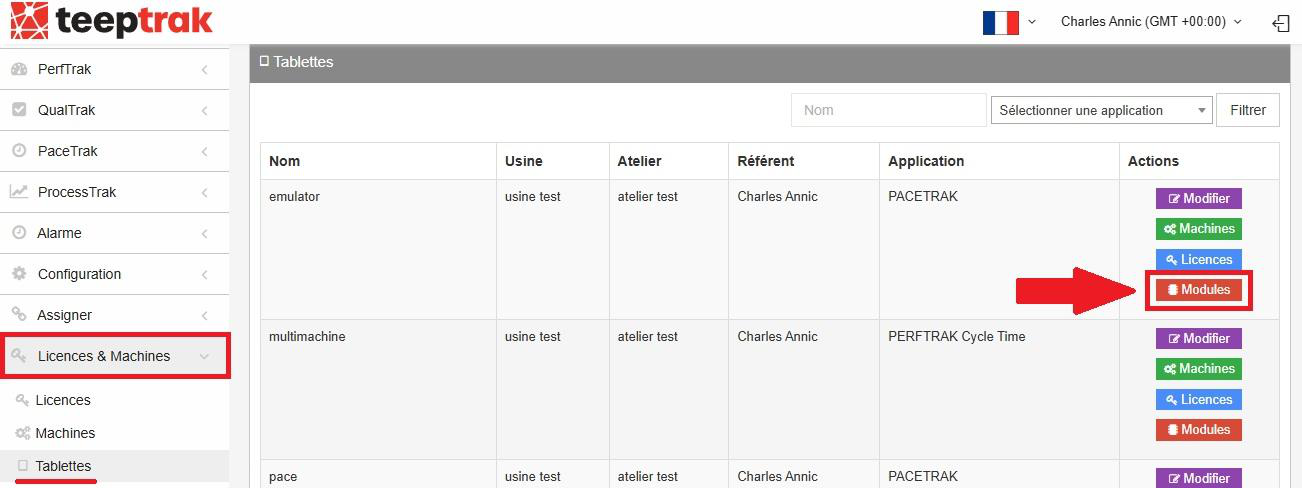
A signal must be assigned to at least one input of the module. In Licenses & Machines > Tablets, click Modules on the row of the tablet concerned.
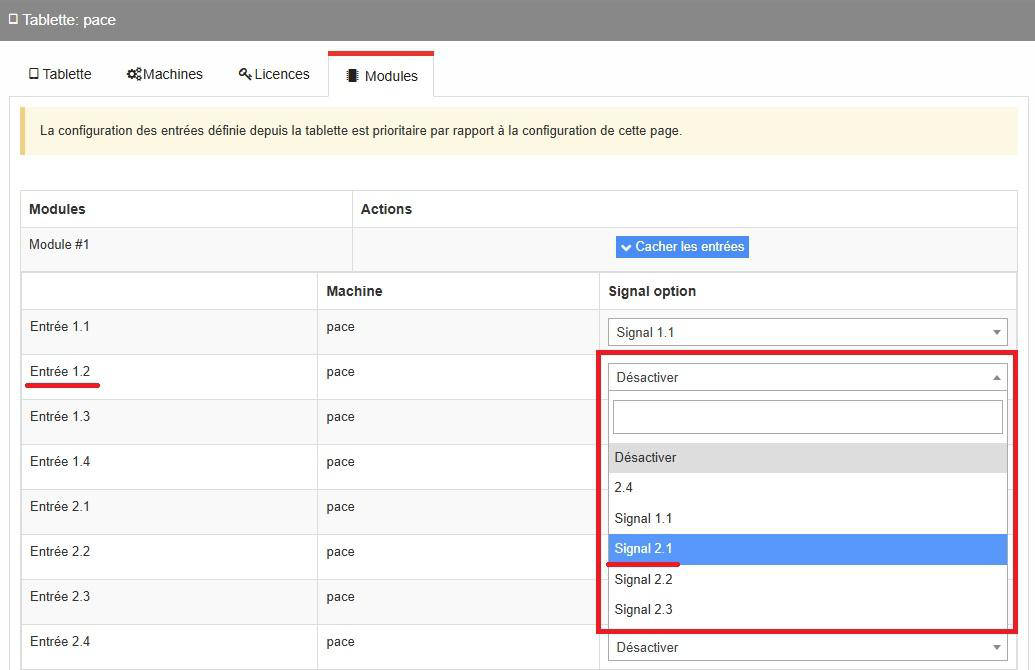
Click Show inputs to assign its signal to each input.
Note: an input can only have one signal, but a signal can be associated with several inputs of the module. The input configuration defined from the tablet takes priority over the one on this page.
6. Automating the sub-routings
Go back to PaceTrak > Ranges and click Automations on the row of the routing concerned. A table lists your machines, the associated sub-routings and the configured signals: define, for each sub-routing, the signal that will indicate its end.
The same signal can be used for several sub-routings.
3. On the tablet
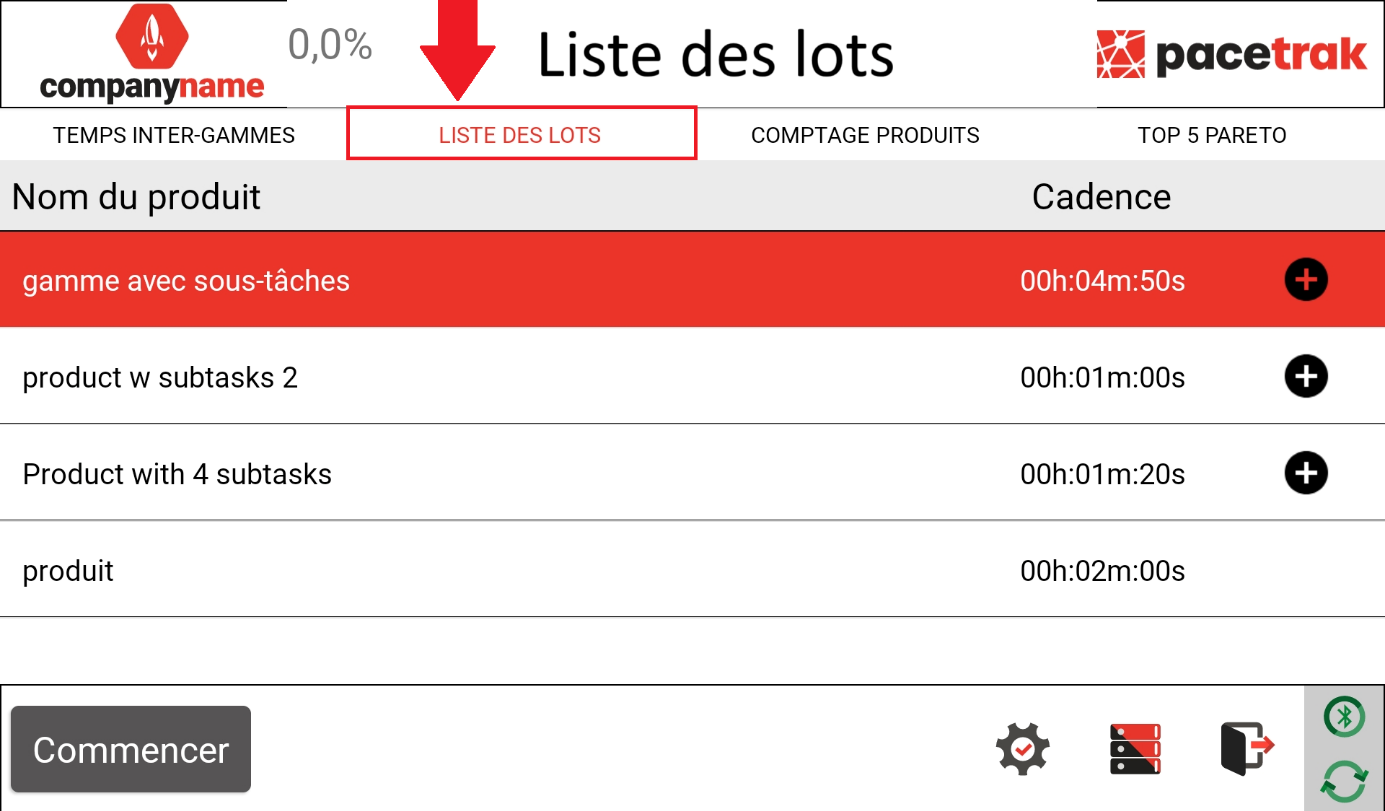
Log in on the tablet, click the Batch list tab and select the routing to launch.
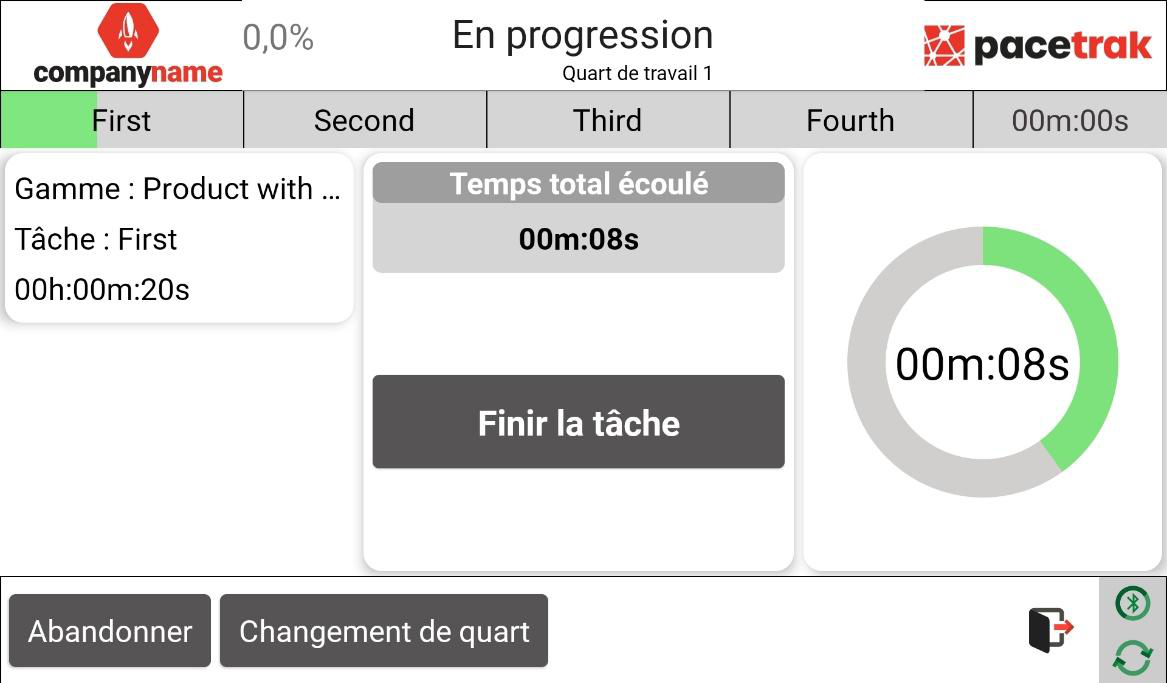
The list of sub-routings is displayed at the top, in the order defined on the platform. Each sub-routing ends automatically when its signal is detected, but the operator can still click Finish task. The circle on the right follows the usual colour code: green (normal time), orange (approaching the end of the theoretical cycle time), red (trigger time exceeded, a loss is in progress).
Once all the sub-routings have been performed, a table summarises those that recorded variances: time "lost" in red, time "gained" in green. The sub-routings that respected their cycle time are not listed.
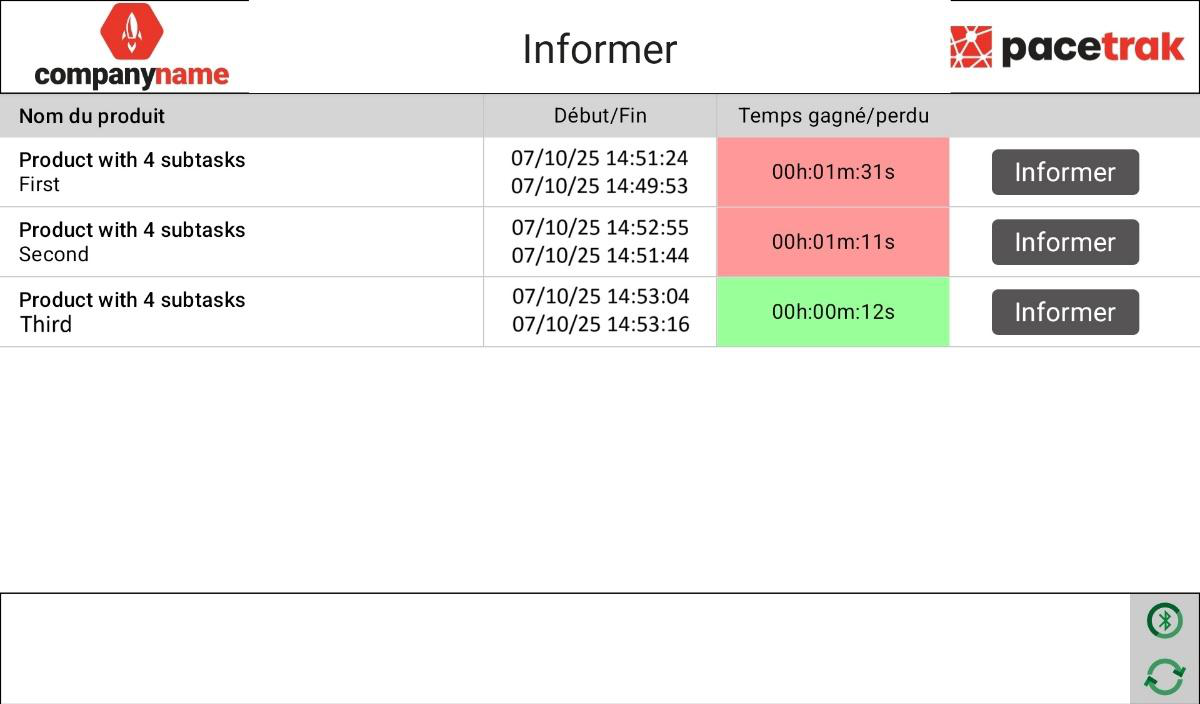
Click Report to qualify each variance: the level 1 cause on the left, the duration in red in the level 2 column on the right, then enter the duration to assign. The time still to be explained is displayed at the top.