Custom forms let you collect structured information from the operators directly on the tablet: free text, numbers or predefined answers. This article covers the configuration of a form on the platform, the configuration of its triggers, its assignment to a perimeter, and its use on the tablet.
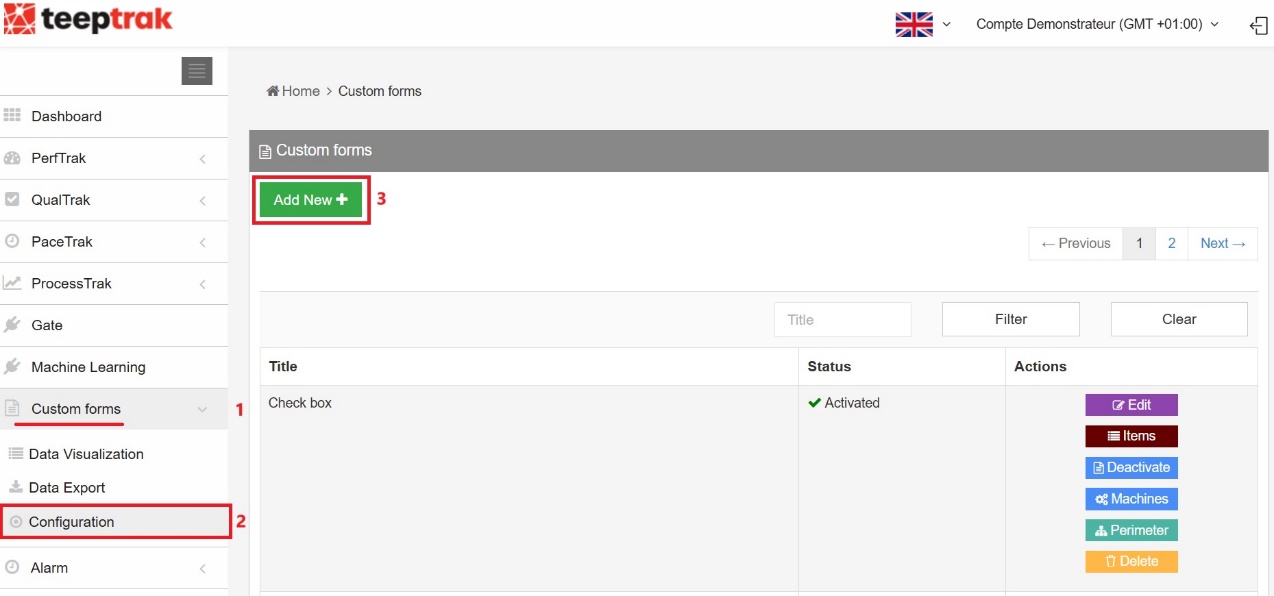
To configure your forms, go to the dedicated Custom Forms tab and click Configuration. Then click the Add New sub-tab to start the configuration.
Configuring the form
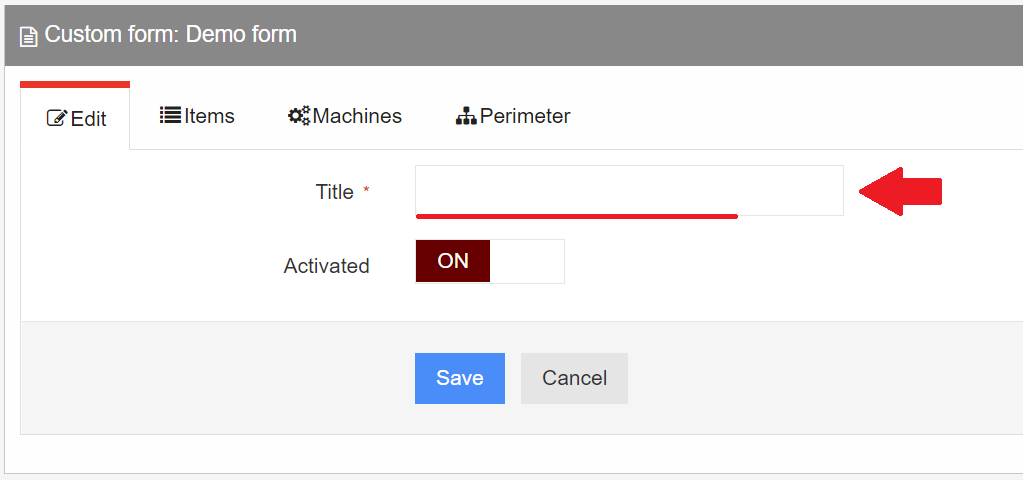
You are taken directly to the Edit sub-tab, from which you can add a title and activate or deactivate your new form.
In the Items tab, you can add 3 types of fields:
the text (or free) field,
the numeric field,
a drop-down list, to add extra text or numeric fields.
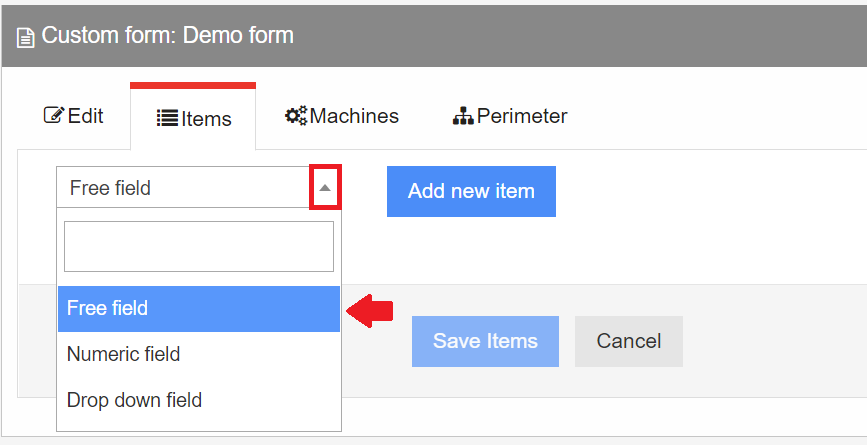
Once you have selected your item, click Add new item to create the first building block of your form.
As an example, we configured a "Demo form" including the three possible types of elements (text, numeric and drop-down field).
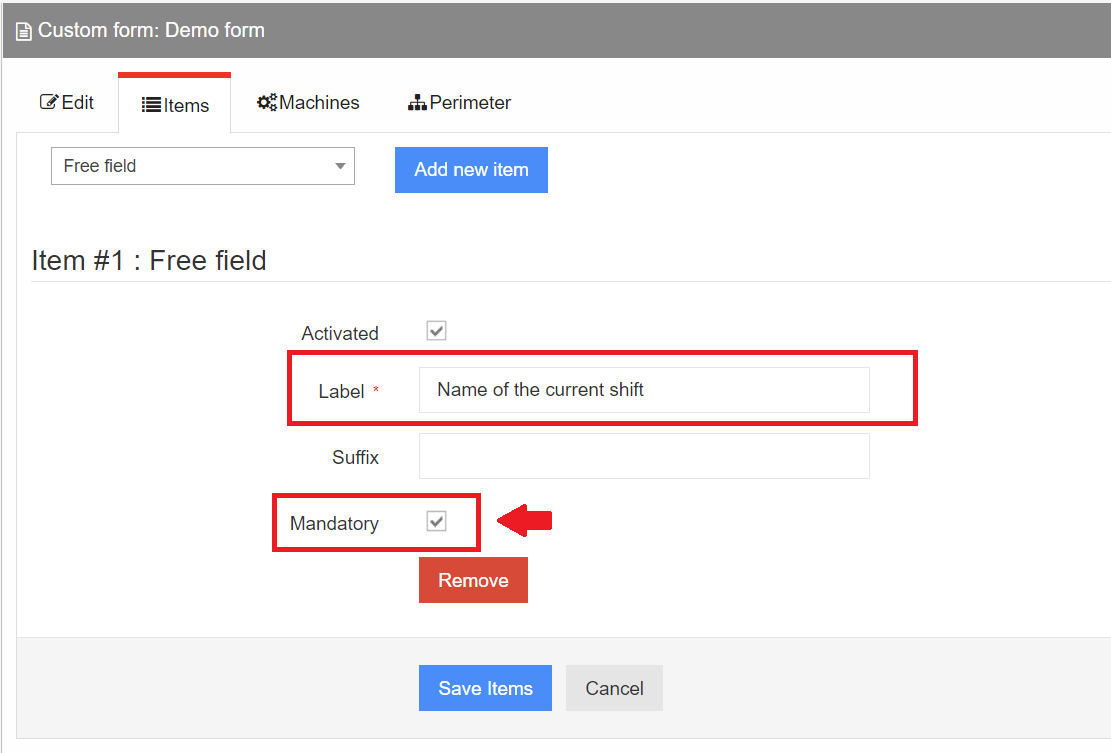
1. The first building block of this form includes the text field "Name of the current shift", on which the Mandatory box is checked. This means that the operator will not be able to skip this step and will have to fill in this section.
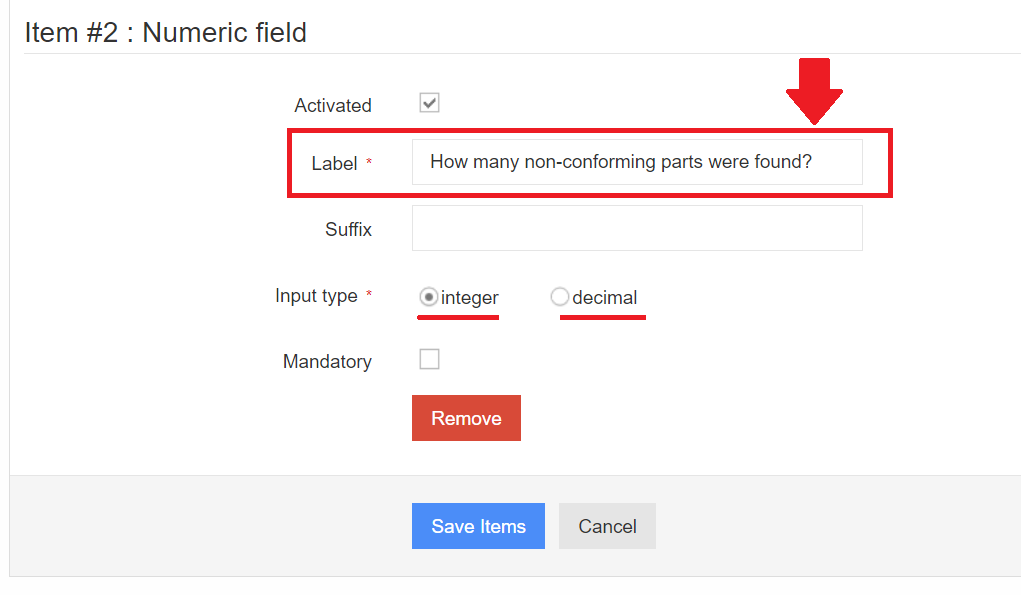
2. Then we add the numeric field, asking the following question: "How many non-conforming parts were found?"
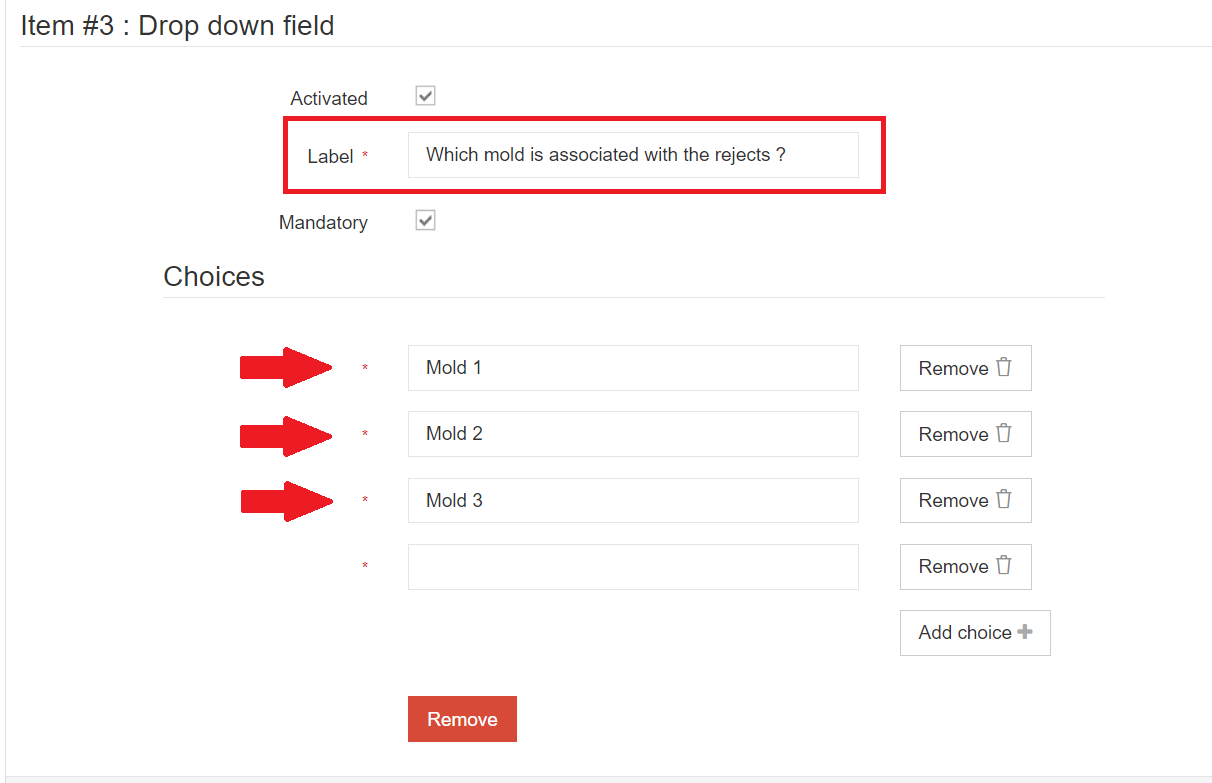
3. Finally, we include a drop-down field section at the end, asking the following question: "Which mold is associated with the rejects?" Three answers are possible: "mold 1, 2 or 3."
Once your form is finalised, remember to save your selection.
Note: the Activated box can be unchecked later if you wish to remove this section from your form.
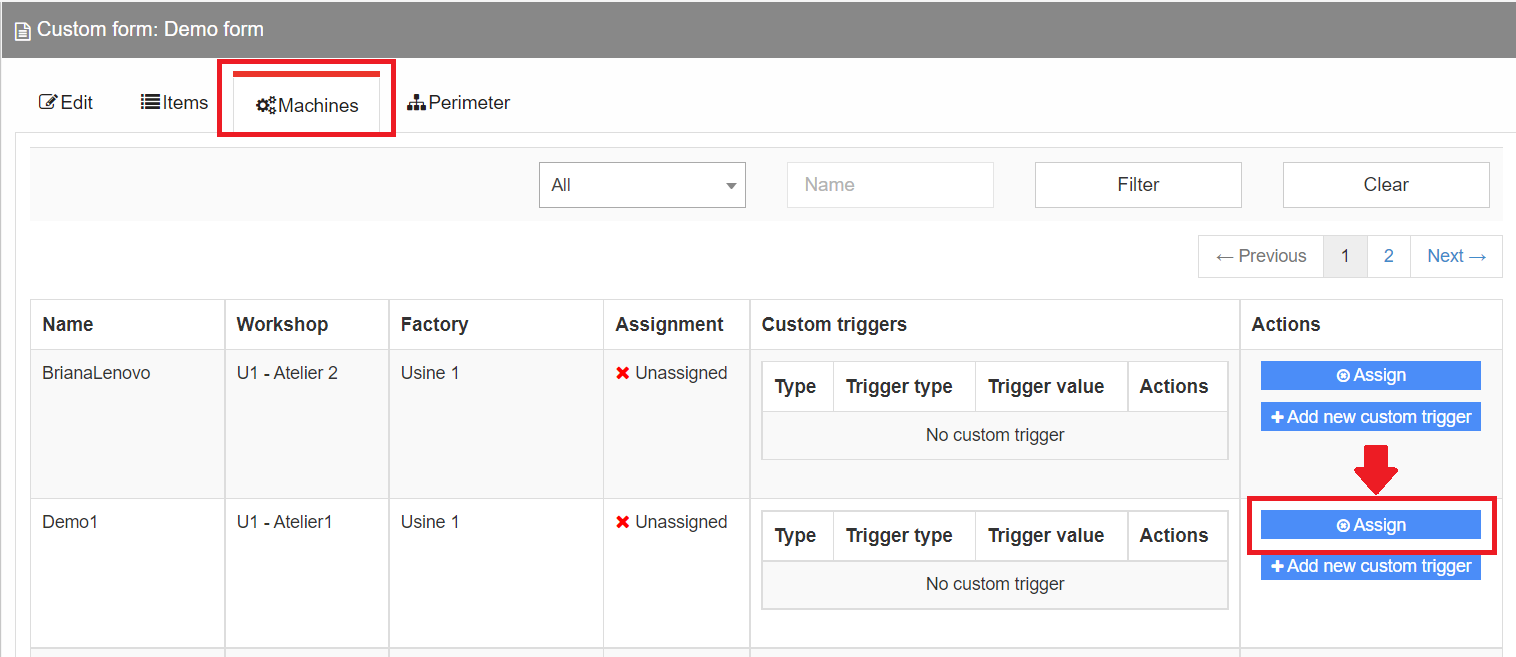
You then need to go to the Machines tab to assign your form to its reference machine.
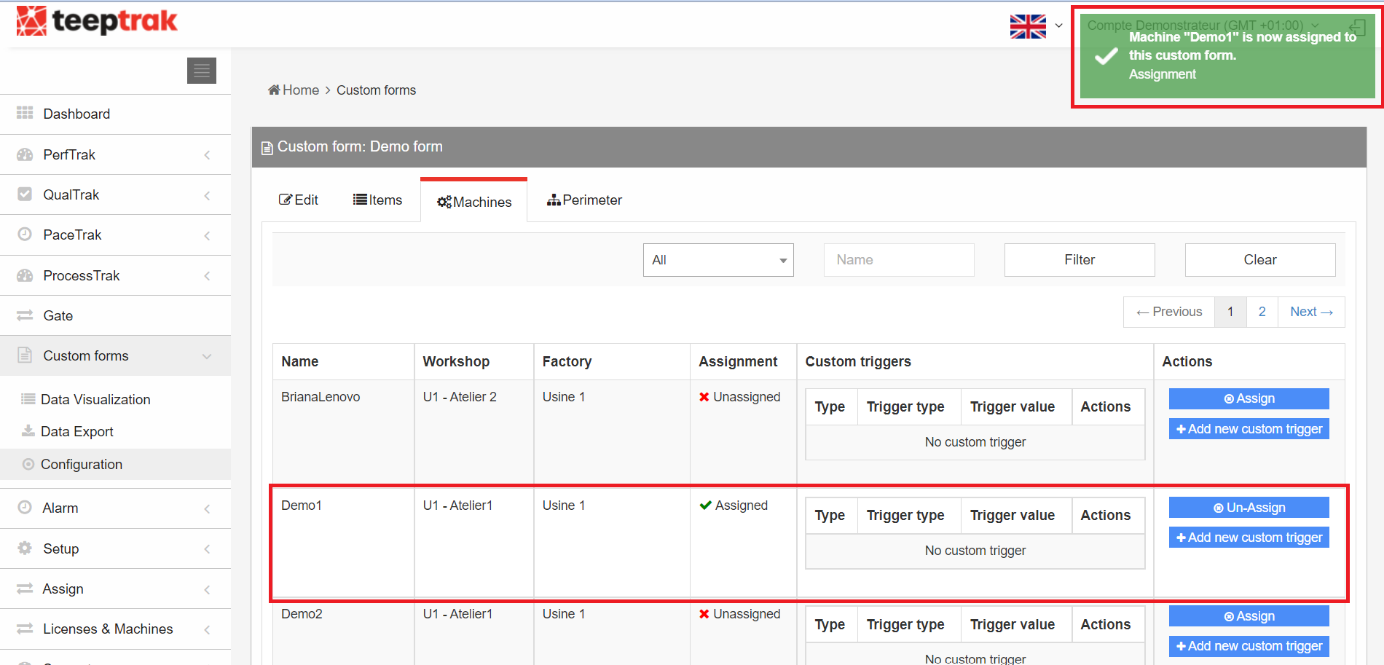
By clicking the Assign tab, the system associates the created form with the machine of your choice. A green frame confirms that the association has been taken into account.
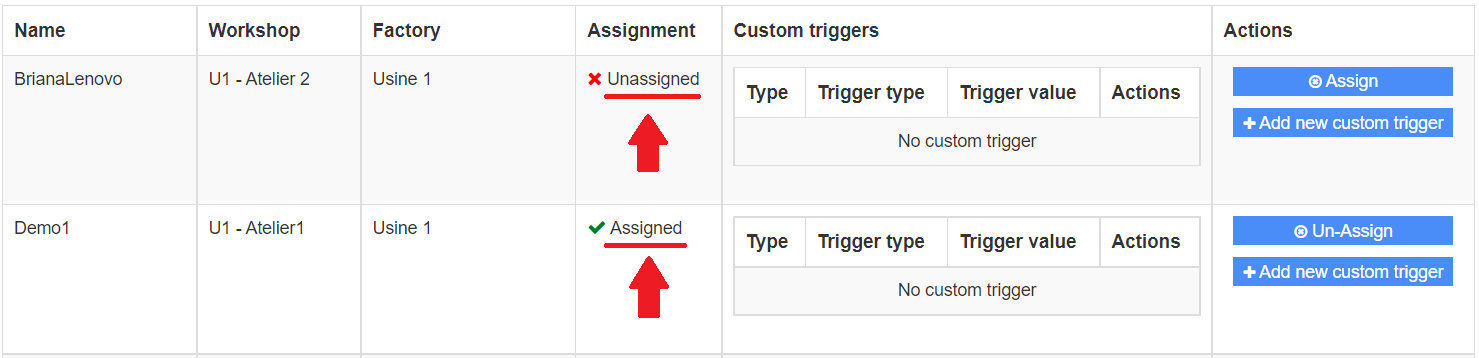
The Assignment column lets you check at a glance whether the form has correctly been assigned to its reference machine, with the words Assigned and Unassigned.
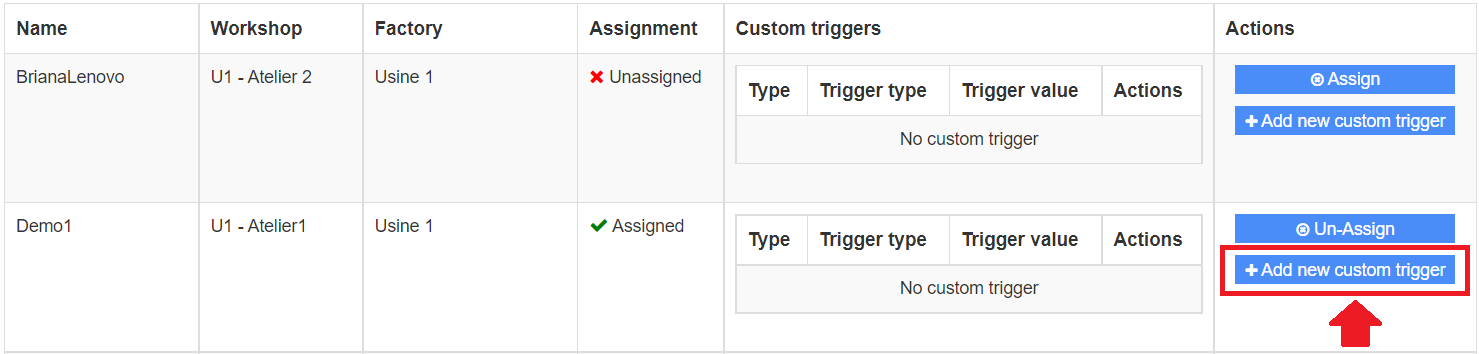
You can also add a trigger to your form by clicking the Add new custom trigger sub-tab on the right of the tab.
Configuring the triggers
You can configure several types of triggers:
Time
Quantity
Before change over
After change over
On shift change
On loss information
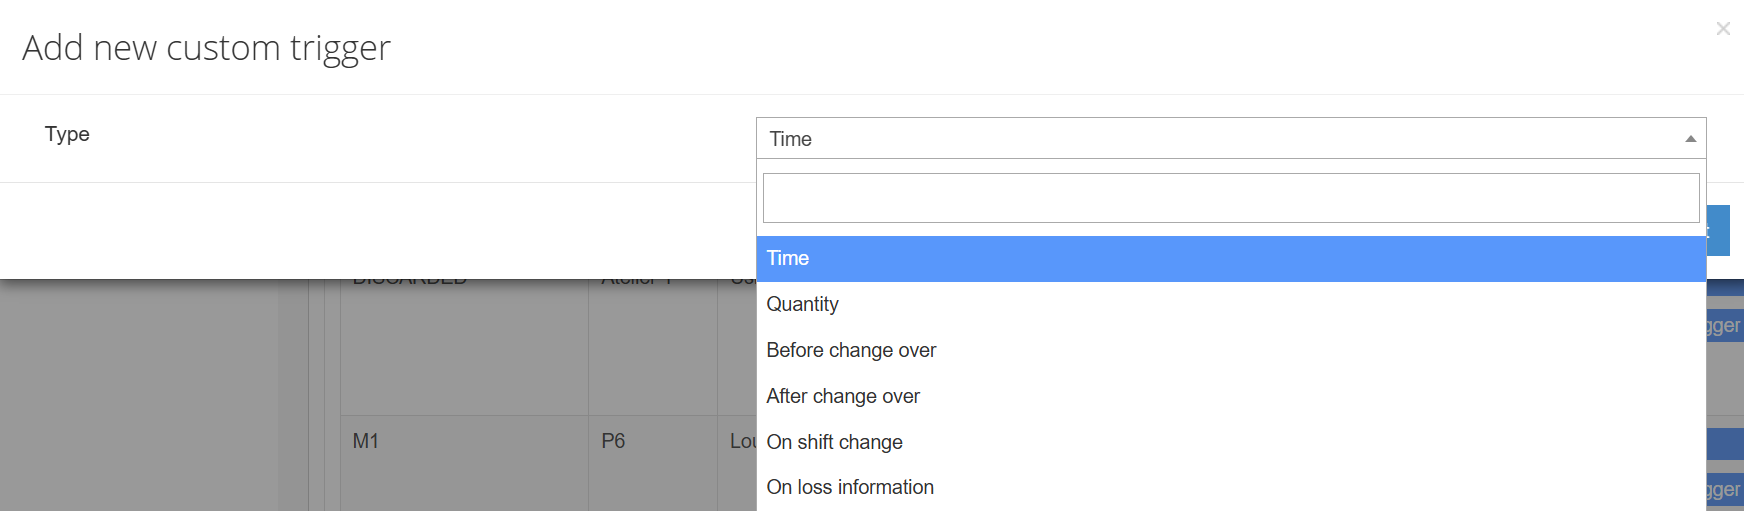
Time

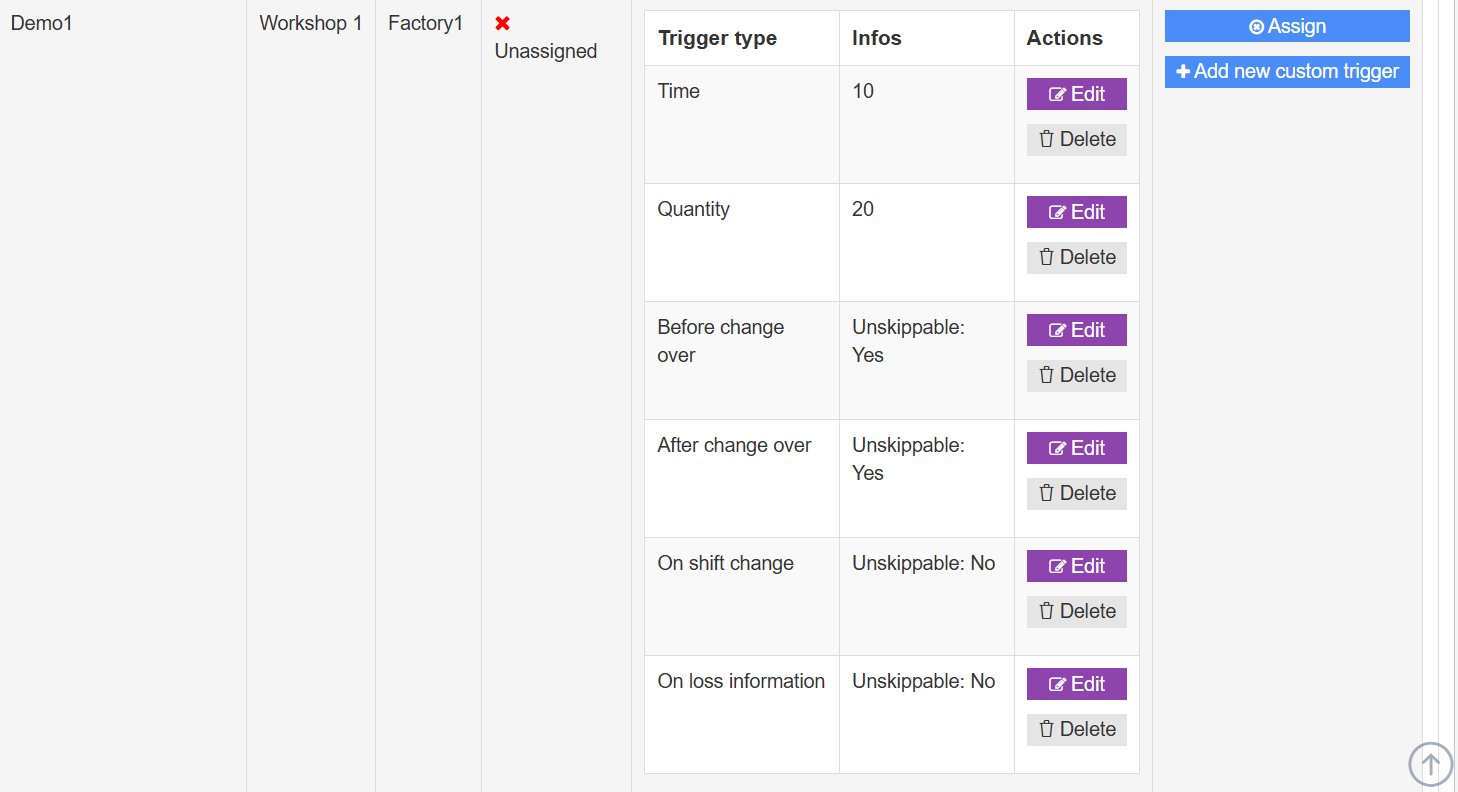
In our example, the trigger time is set to 10 seconds. This means that, if the duration exceeds 10 seconds, the form will be automatically activated and the operator will have to answer the prompted questions.

Quantity
In this case, the form is triggered as soon as 20 units/pieces are produced on the line. The operator will then be required to complete the form.

Before / after change over
By setting up a trigger before or after a product change, the operator will be required to complete the form at the start or at the end of the new product run.
You can choose to make this mandatory by checking the Unskippable box.

On shift change
Just like with the triggers before and after change over, you can choose to make it mandatory or optional after clicking the Next button.
On loss information
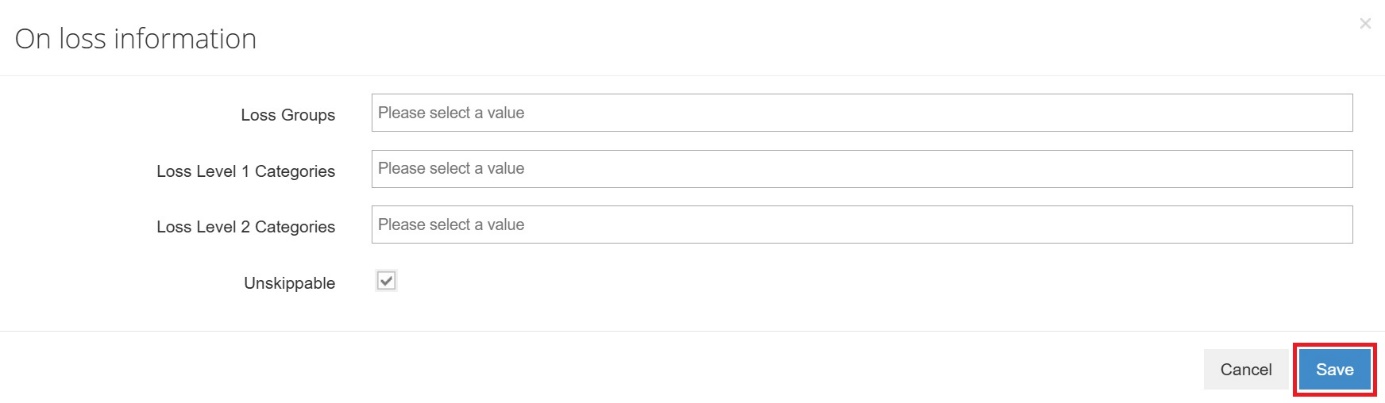
For this type of trigger, you need to specify which type of loss you want, according to its group and its level 0, 1 and 2 loss categories. You can also choose to make it mandatory.
When the configuration is over, you will find all the triggers in the Machines tab, as shown in the example below. You can edit or delete them if needed.
Assigning the form to the right perimeter
As with several features available on the configuration platform, assigning the form also requires specifying its perimeter of application.
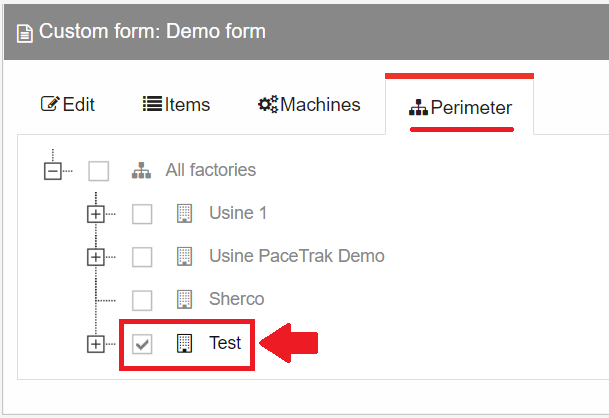
You can choose to assign the form to a perimeter ranging from several factories to a single workshop.
In our example, we chose to assign the "Demo form" to the "Test" factory and specified that it only applies to the perimeter of the "Test" workshop.
Using the form on the tablet
Selecting the tab
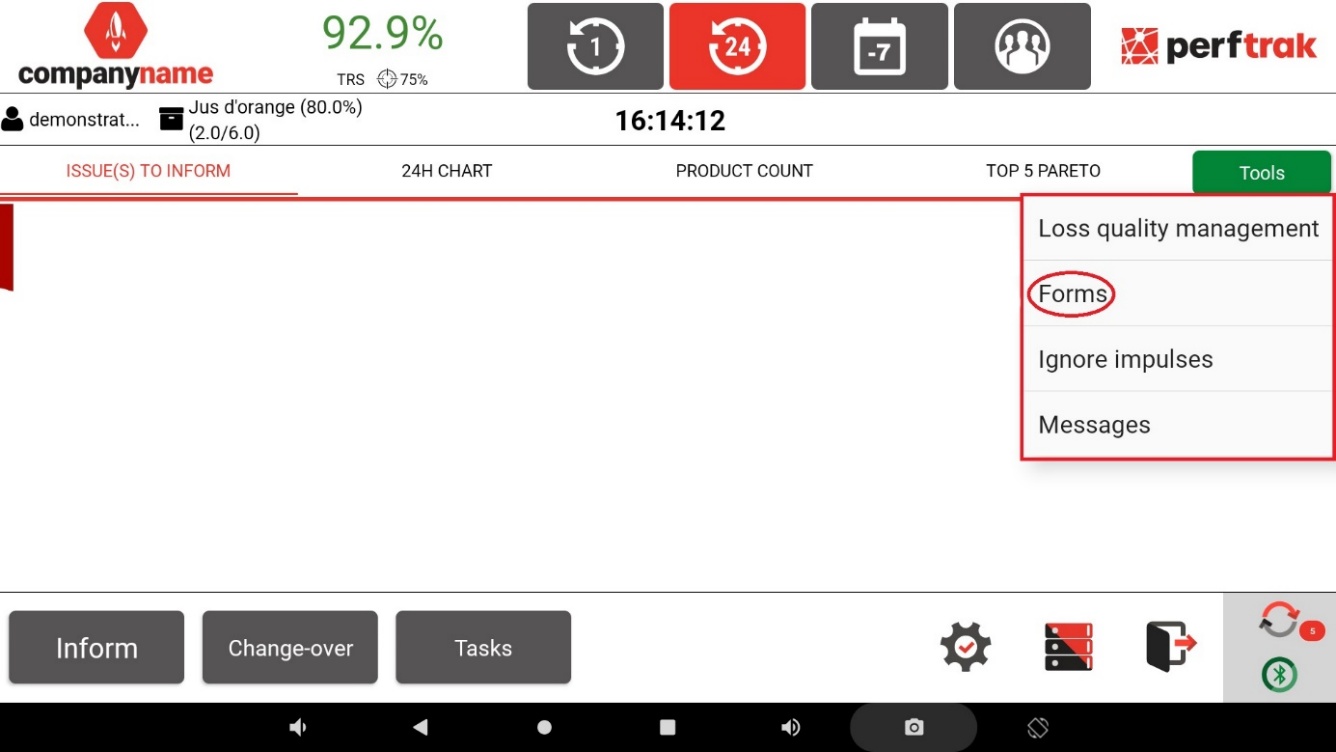
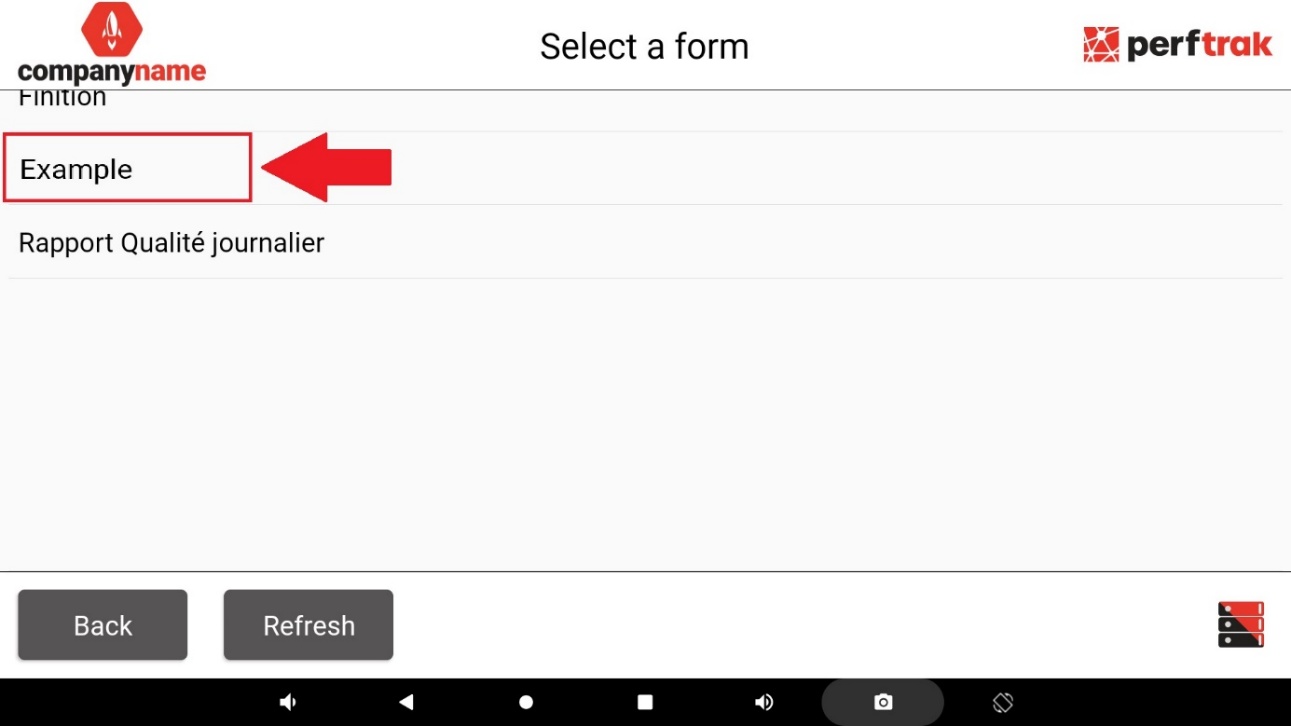
To access your forms list, go to the main page of the tablet and select the Tools tab, followed by the Forms sub-tab.
Selecting the form
The list of preconfigured and assigned forms is displayed on this page. Select your reference form from the list (in our example, it is called "Example").
Filling out your reference form
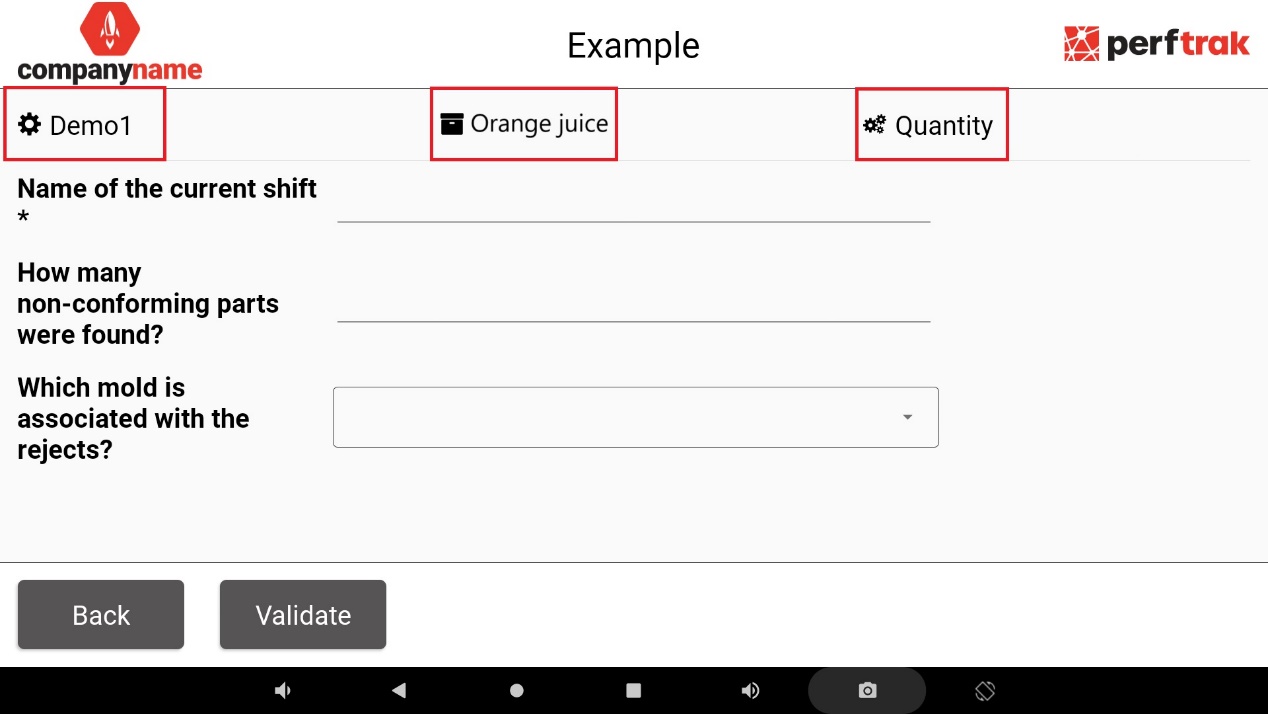
At the top of the page, the tablet displays the name of the machine — "Demo1" —, the name of the product the form applies to — "Orange juice" — and the trigger type of the form — "Quantity".
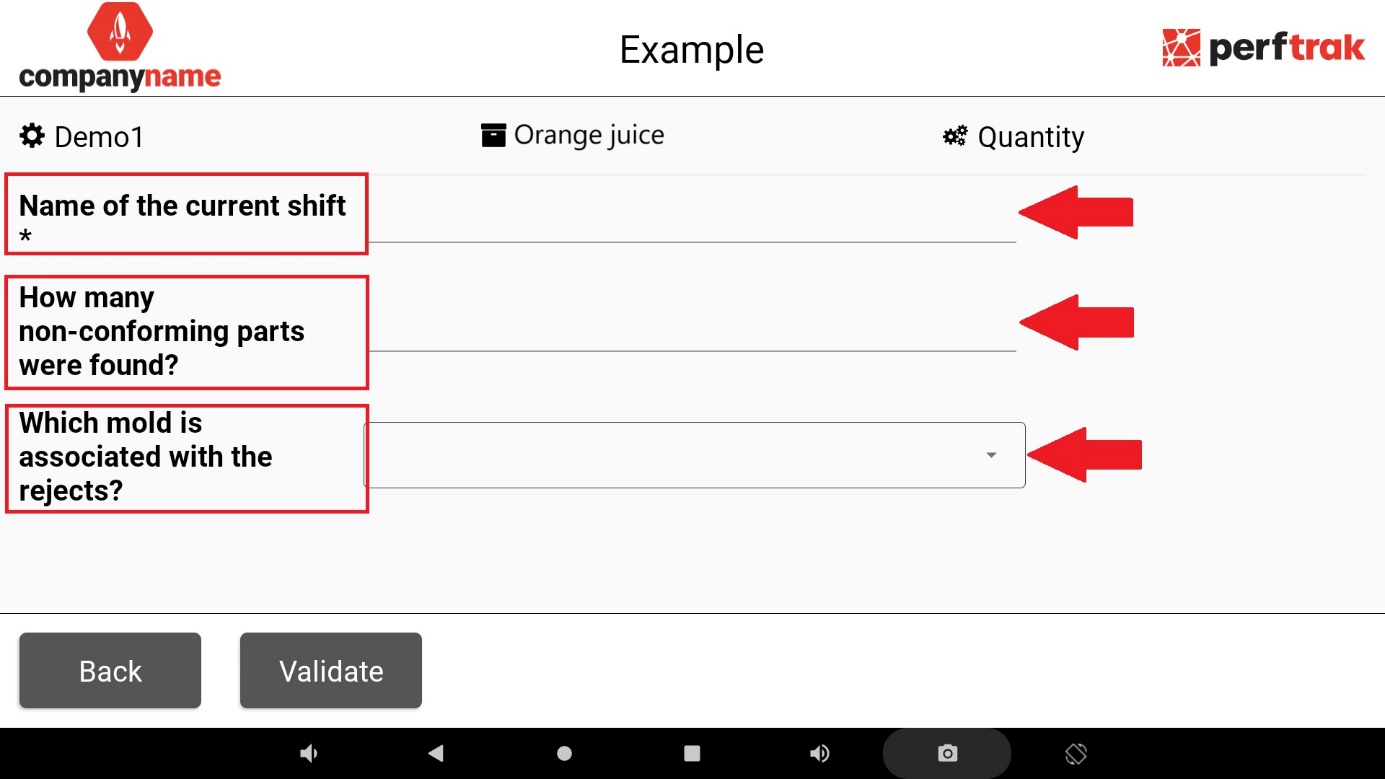
As configured on the platform, all the associated sections are displayed on the first page, ready to be filled out. An asterisk indicates that the section is mandatory, meaning a response is required.
The first two sections must be completed using a free field (text or numeric), unlike the last section, which provides a drop-down list. It is now possible to enter negative numbers.
Simply validate your selection to complete your form.
Displaying periodic trigger forms
Forms with periodic triggers (configured on time or quantity thresholds) will appear on the main page once their alert threshold condition is met (production of x quantity or passage of x duration).
The form title is displayed along with the Fill Form button, to notify the operator that the form needs to be completed.
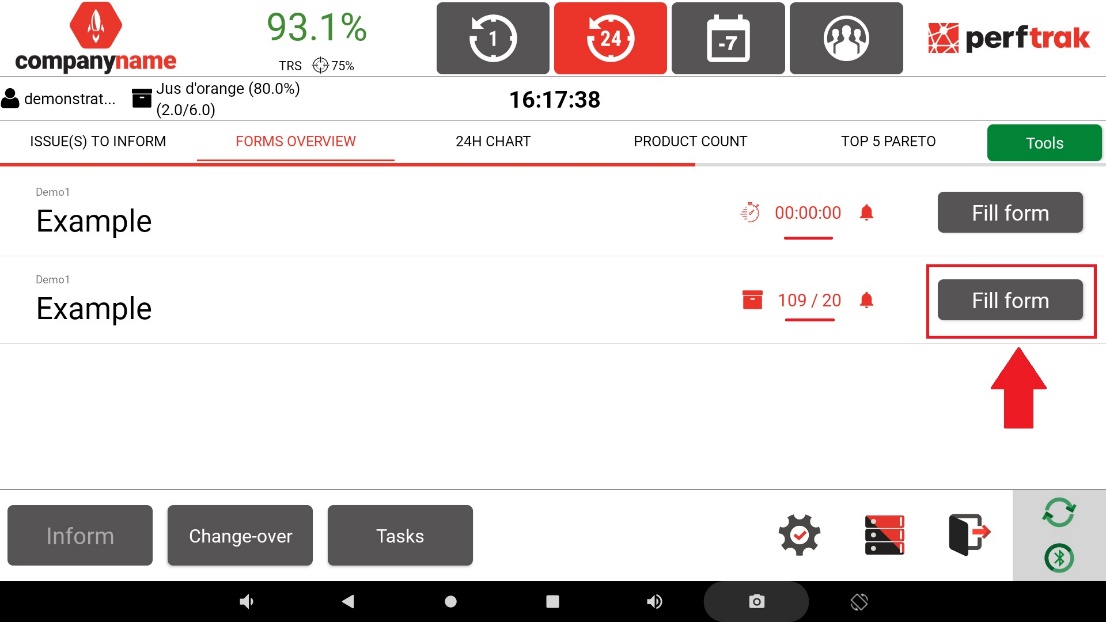
The operator simply clicks the Fill Form button to complete the fields. Once all the sections are completed, the form disappears from the menu.
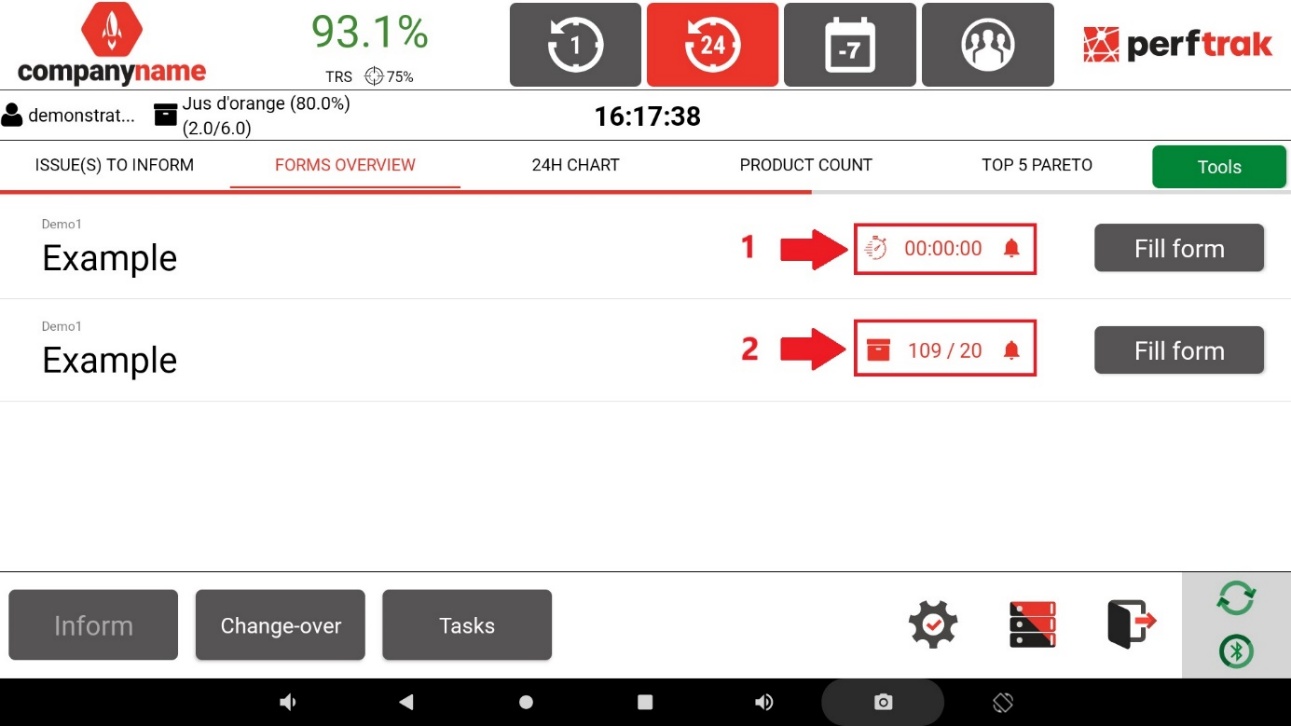
In the Forms Overview tab, the list of forms with periodic triggers is displayed according to their trigger type (quantity reached or duration exceeded).
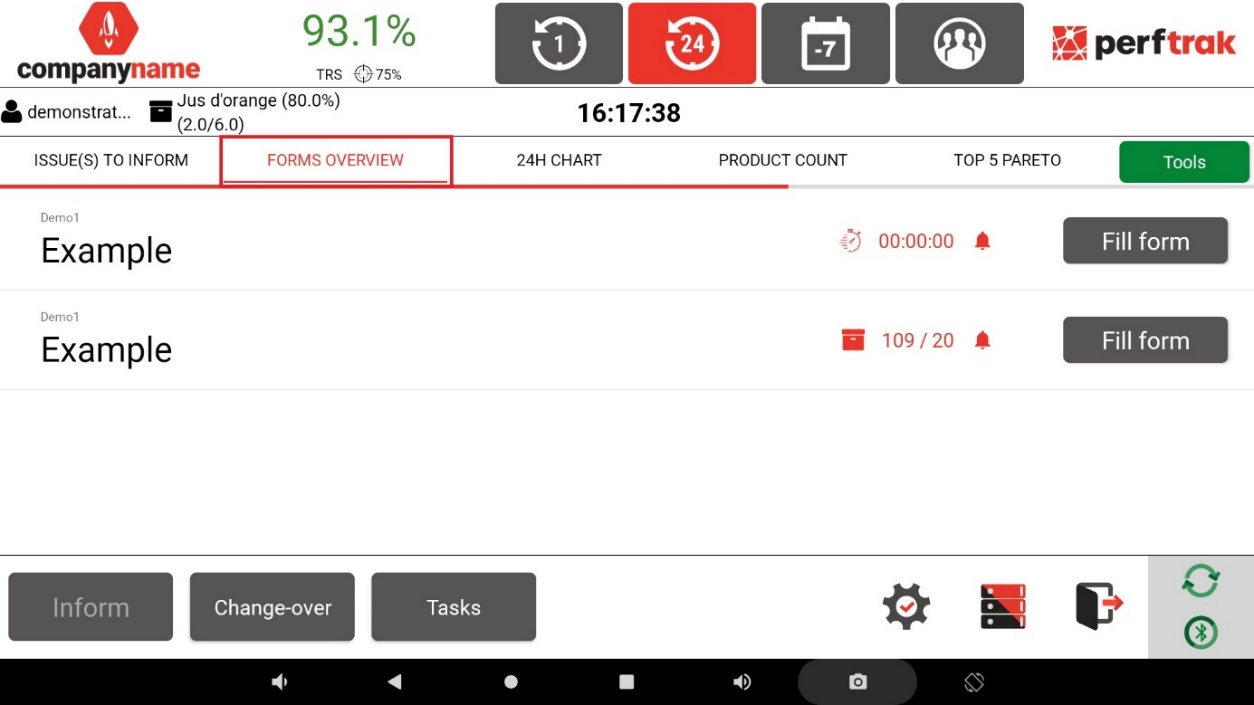
In the example below, the first form is triggered when a time limit is exceeded, counting down from a specified duration. In contrast, the second form is triggered by the production of a specific quantity (every 20 units produced).
Displaying forms triggered by events
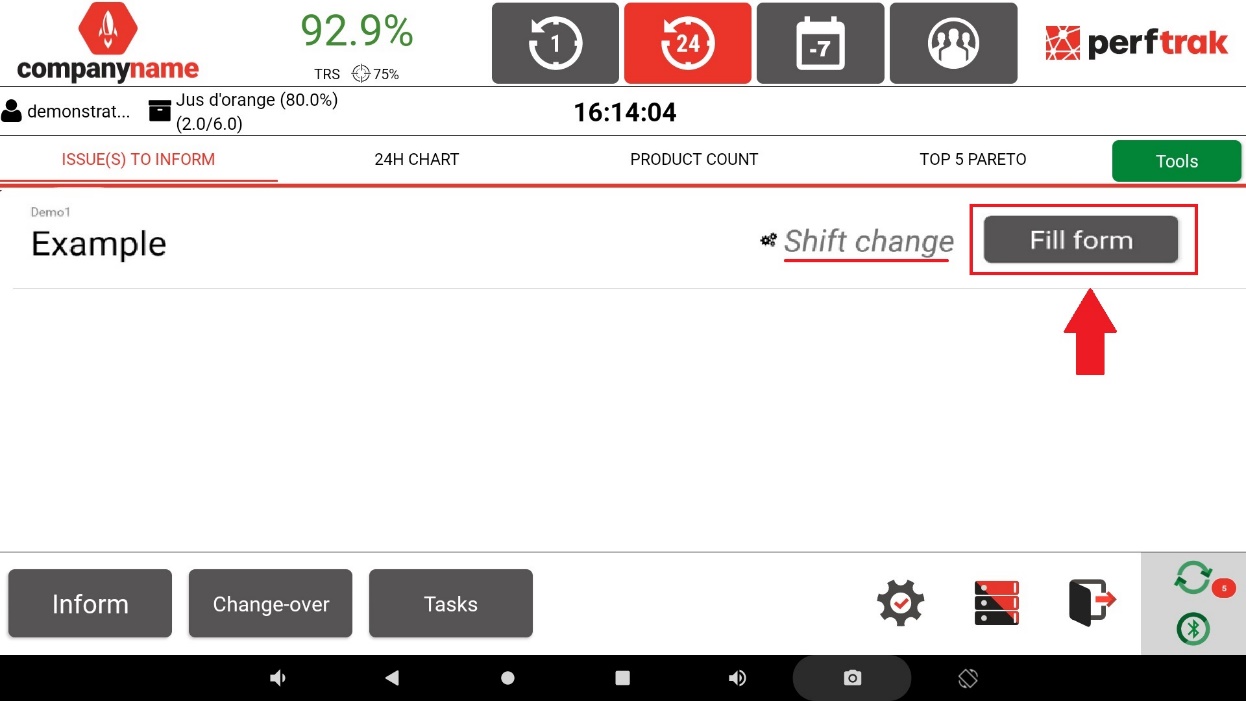
The custom triggers before/after change over, on shift change or on loss information appear through a notification on the home page.
Editing forms via the loss history
Select the Tools tab in the top right corner of your screen, then choose Forms. As previously mentioned, the list of your forms is displayed on the page.
In the bottom right corner of the screen, this symbol gives you access to the history of completed forms.

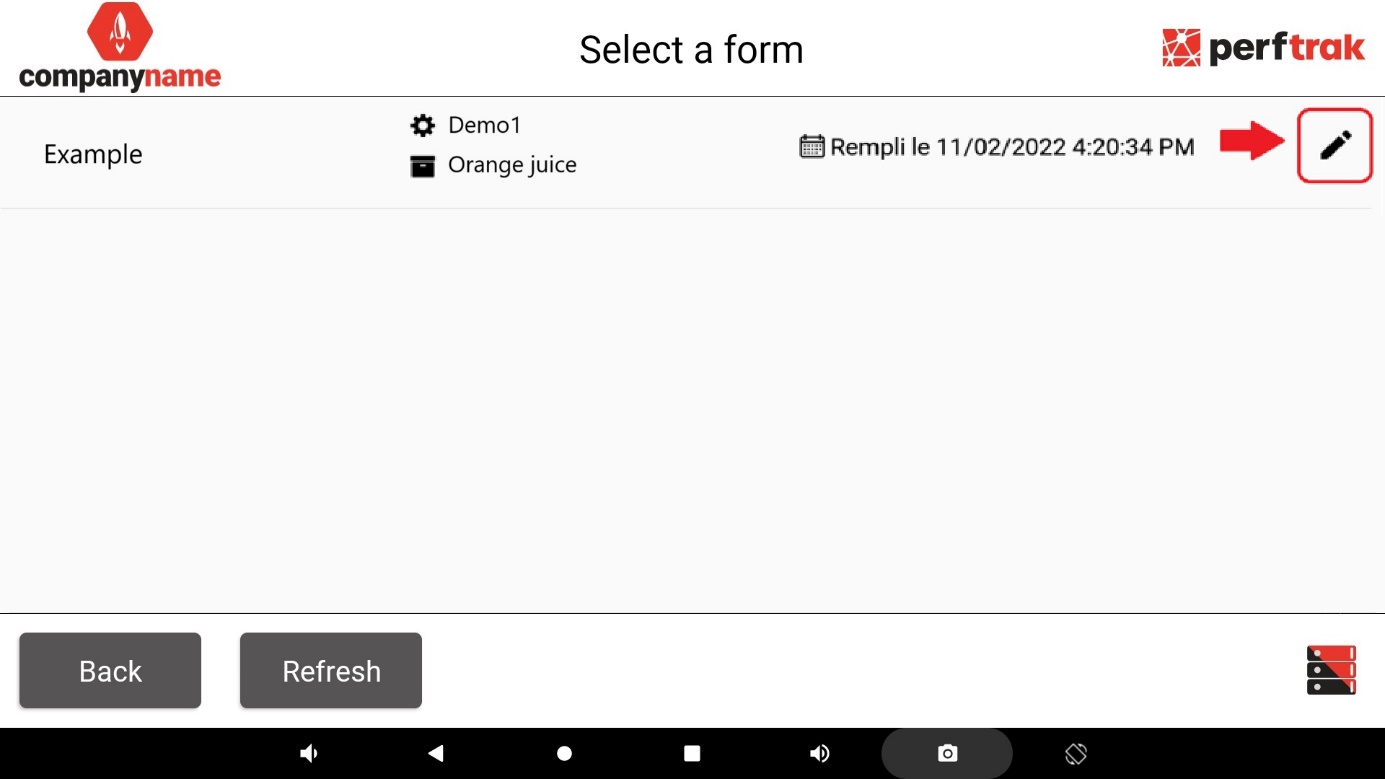
The title, date and time of the form are then displayed. By clicking the pencil icon on the right of the screen, you can edit the content of your form's answers. Remember to save your selection.