The Losses' edition option lets you modify losses that have previously been entered by the operators, in order to correct mistakes made when selecting the cause of a loss. The modification concerns both the duration and the cause of the losses detected by the application.
Accessing the feature
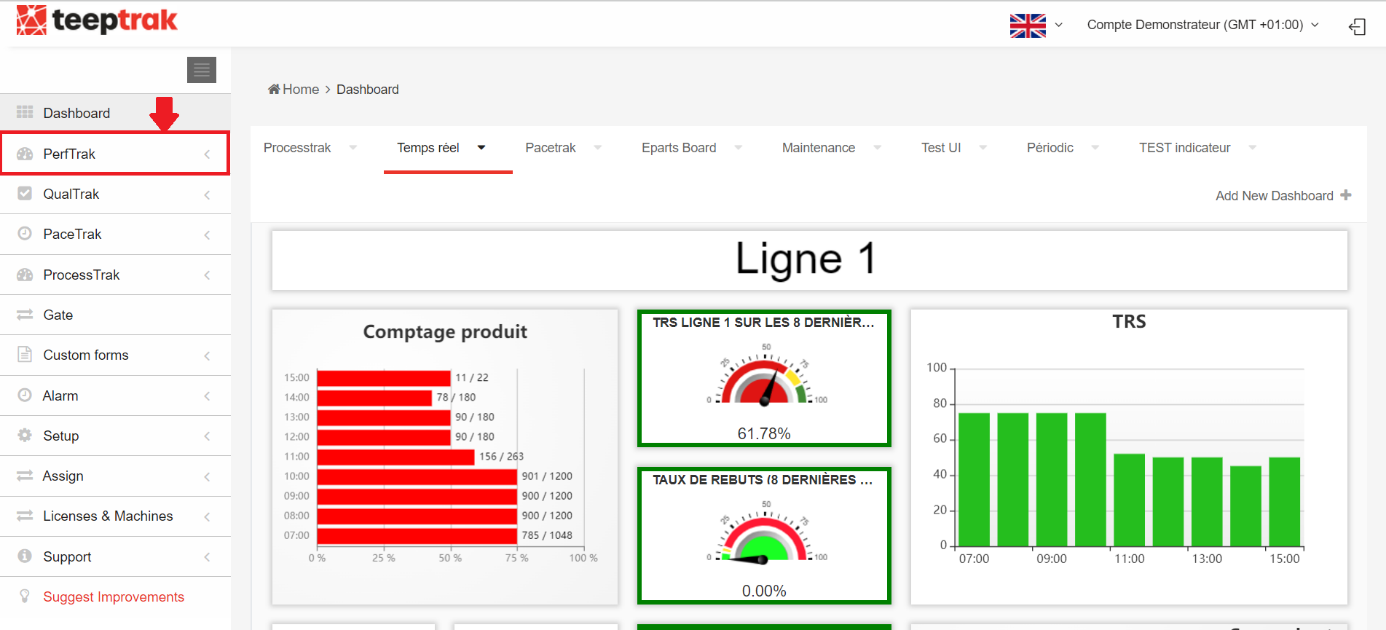
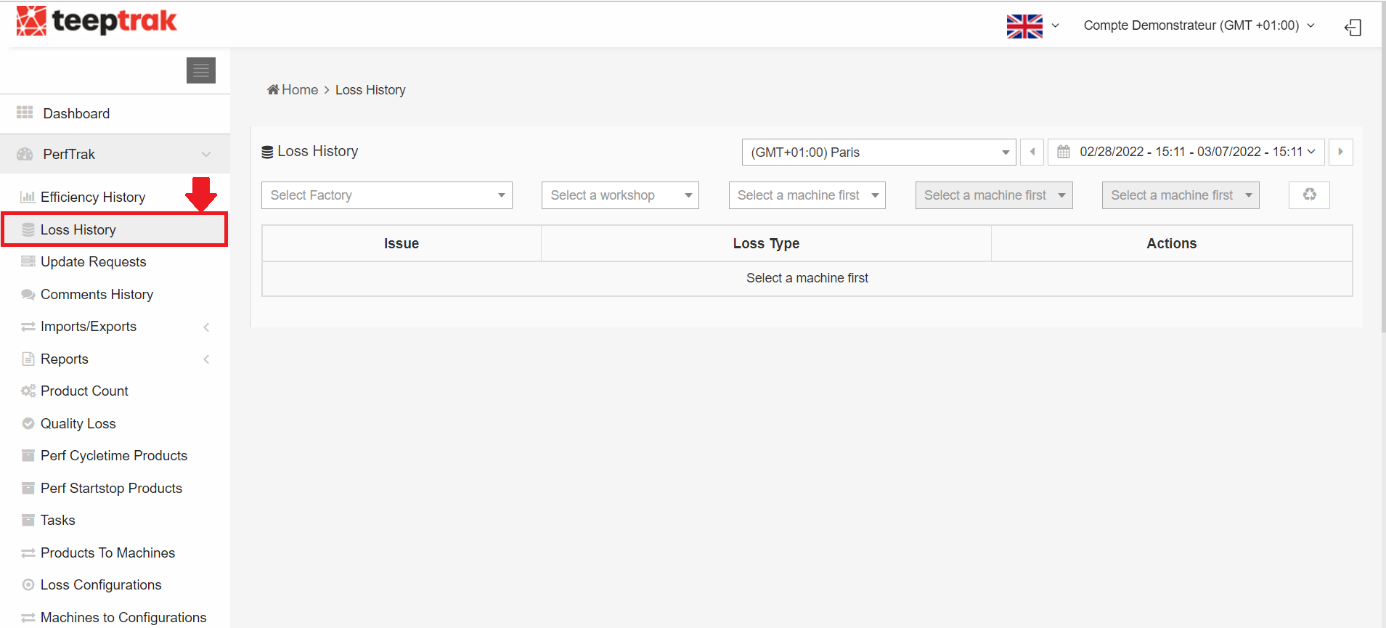
To use the option allowing losses to be modified retroactively, go to the PerfTrak tab and select the History of losses sub-tab.
Selecting the machine and the interval
Once in the loss history, you can filter the data to be modified with the Factory, Workshop and Machine sub-tabs.
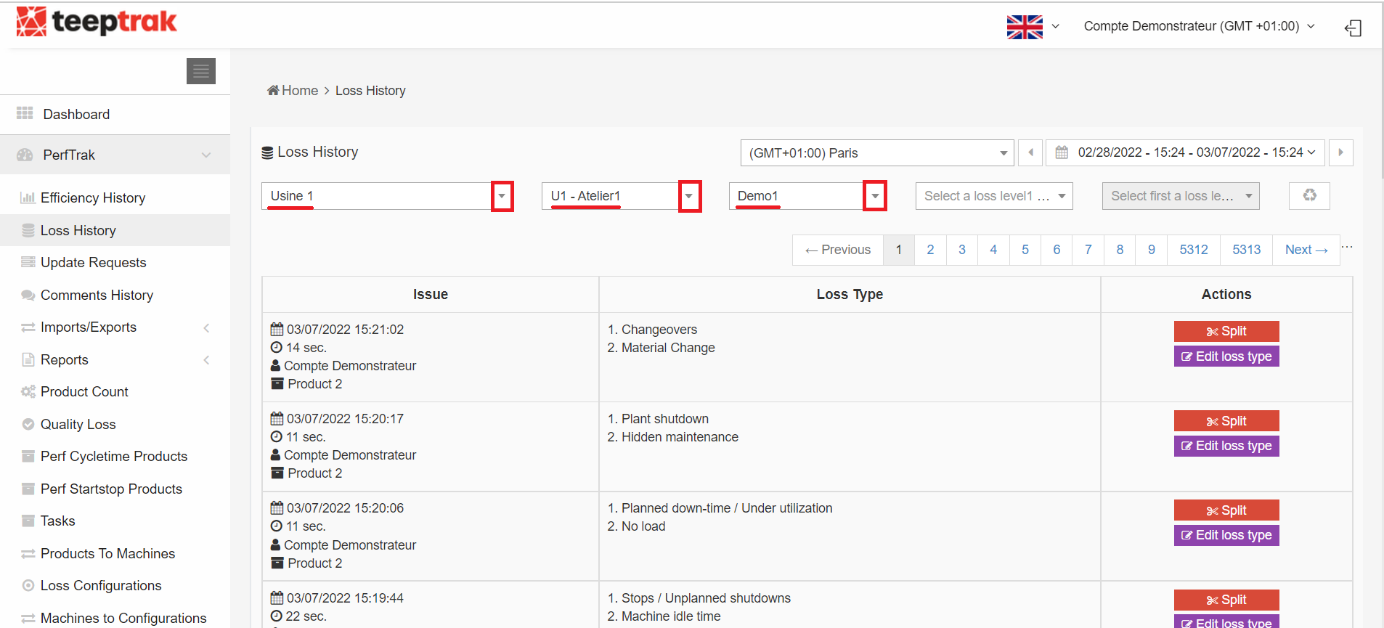
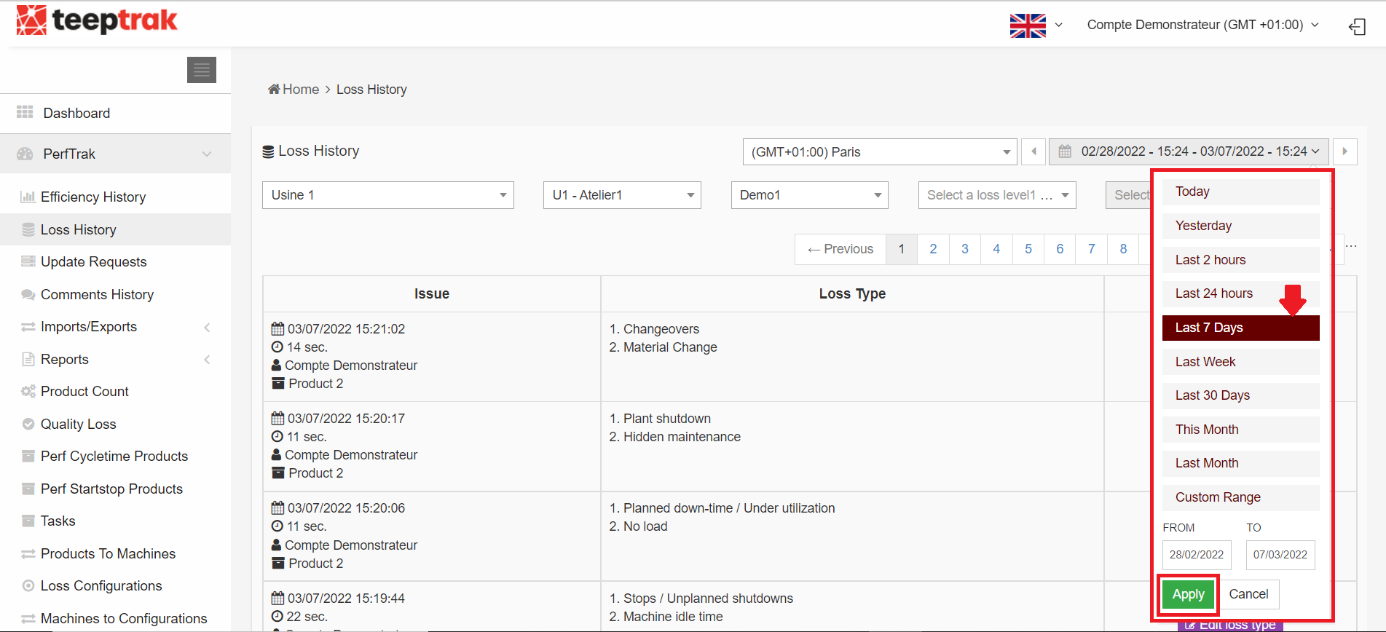
Once your reference machine is selected, you can choose the time interval over which the losses can be modified:
Today
Yesterday
Last 2 hours
Last 24 hours
Last 7 days
Last week
Last 30 days
This month
Last month
Custom range (according to your own selection)
Selecting and splitting the displayed losses
The losses displayed for the selected machine (Demo1) and period (the last 7 days) correspond to all the losses manually reported by the operators. Automatically reported losses, such as over-cadence and under-cadence, are not shown in the list.
However, losses filled in automatically by the Stop production button — which is activated manually, with its cause of loss pre-filled — are displayed in the list of modifiable and splittable losses.
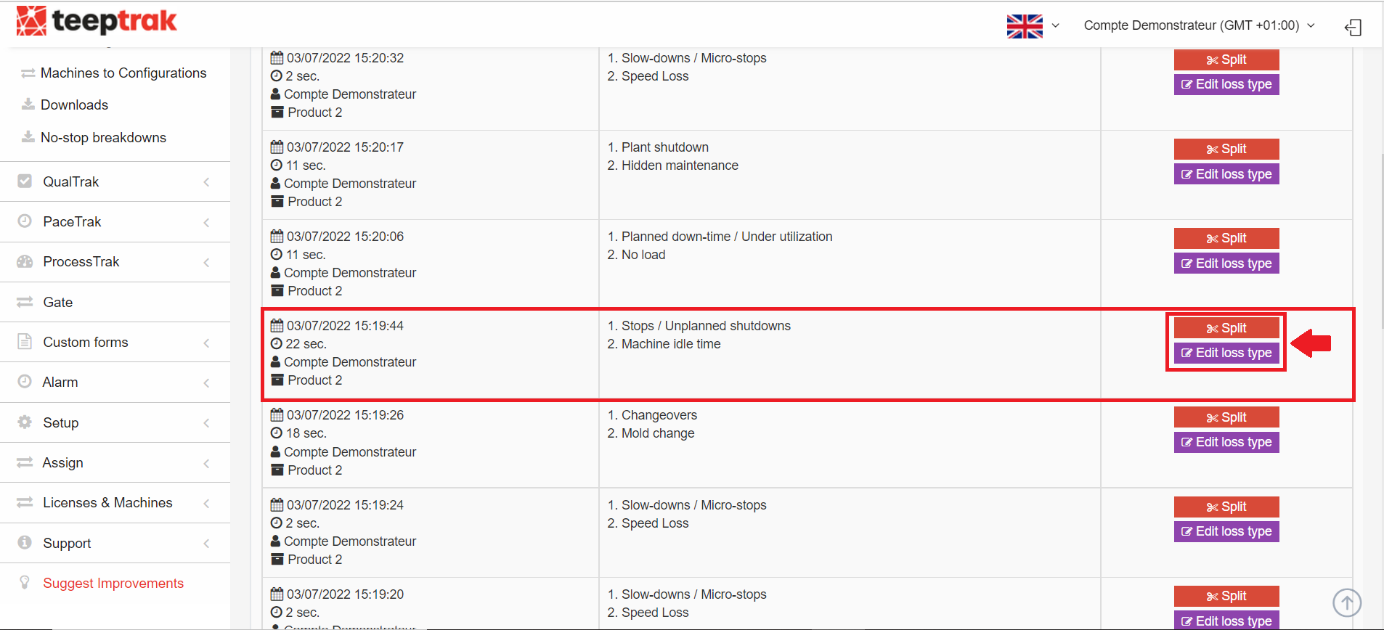
Select the loss to edit
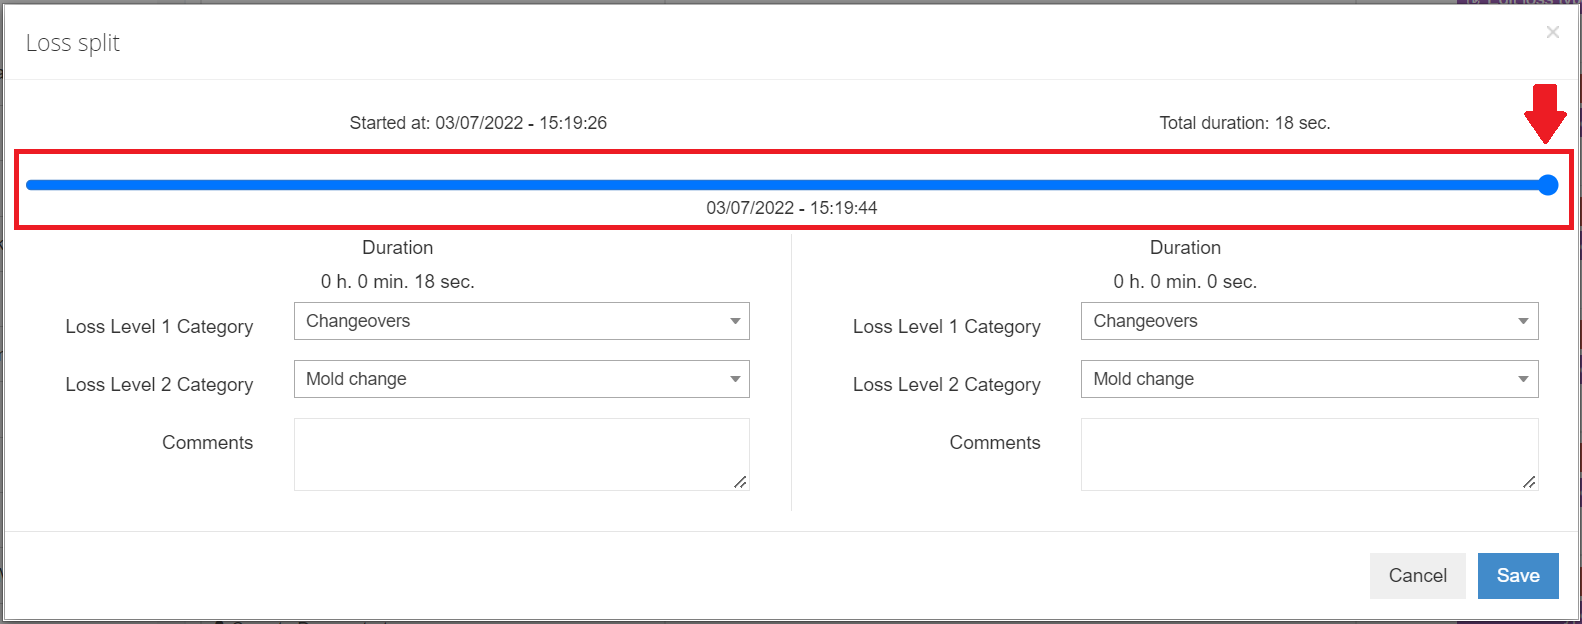
Set the duration of the loss time to modify
You can split the duration of the loss by clicking and dragging the blue dot slider to the right or to the left of the timeline, to adjust the durations as you wish.
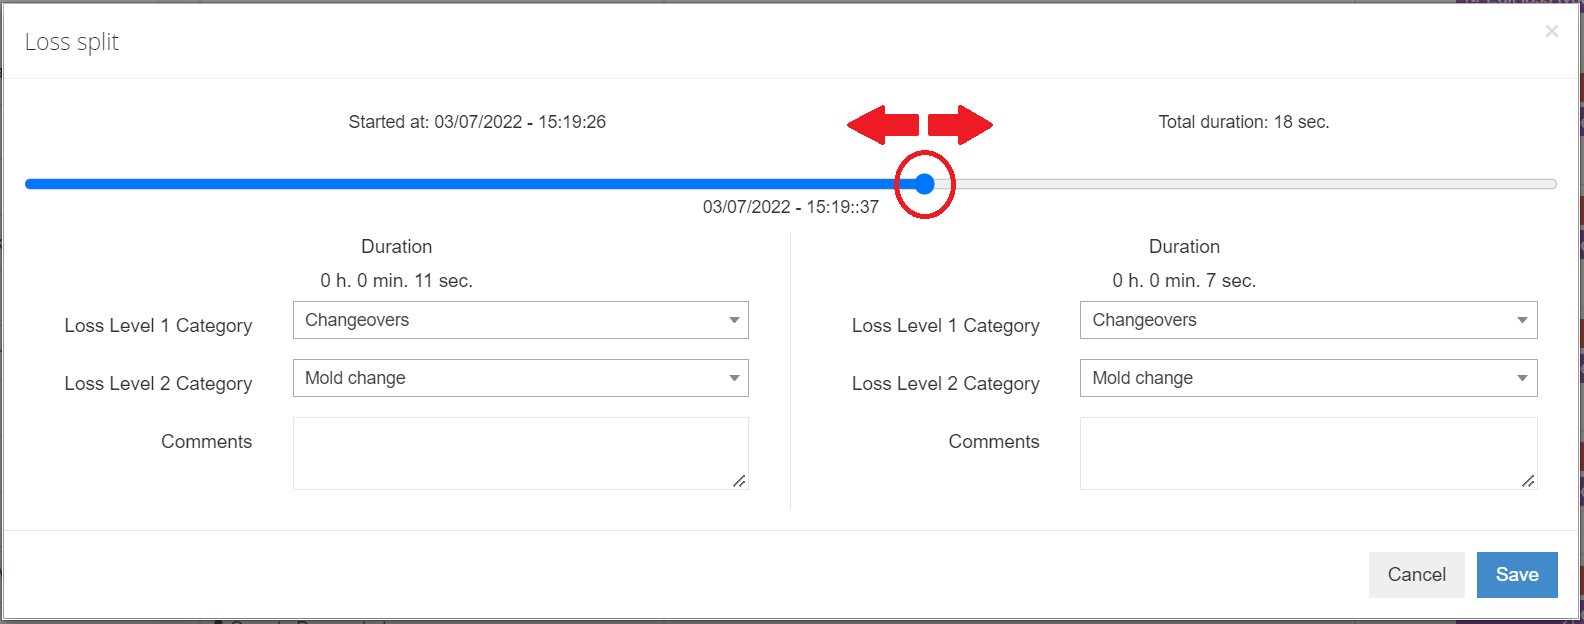
Once the duration of your loss has been split, you can choose the level 1 and level 2 loss categories to associate with the two time periods displayed on the screen. You can also add a comment.
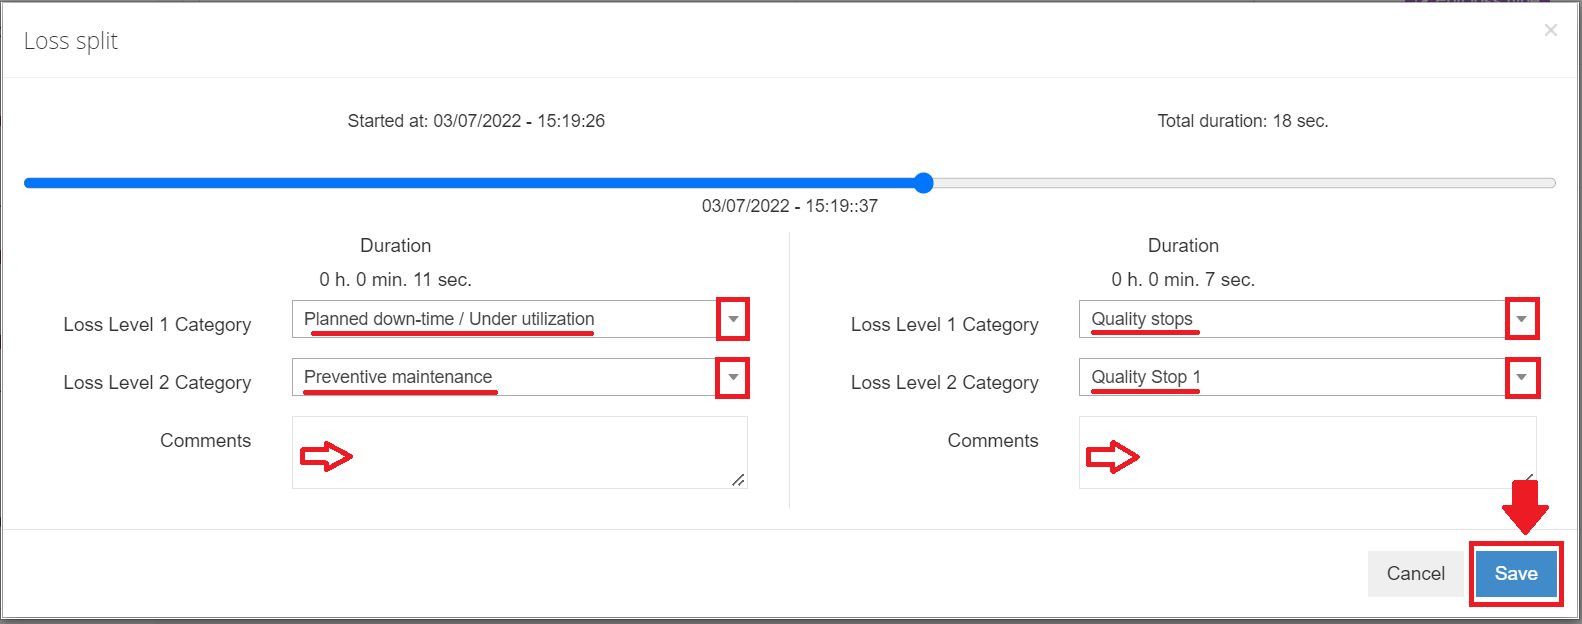
Once your modification has been made, validate your selection by clicking Save.
Reviewing the modifications
After saving your modification, you can view the summary of the modifications made on the tab.
The Actions column lets you see and delete the modifications — the deletion only concerns the display of the modification in the list.
Finally, you can click Go to update request to see the history of edited losses.
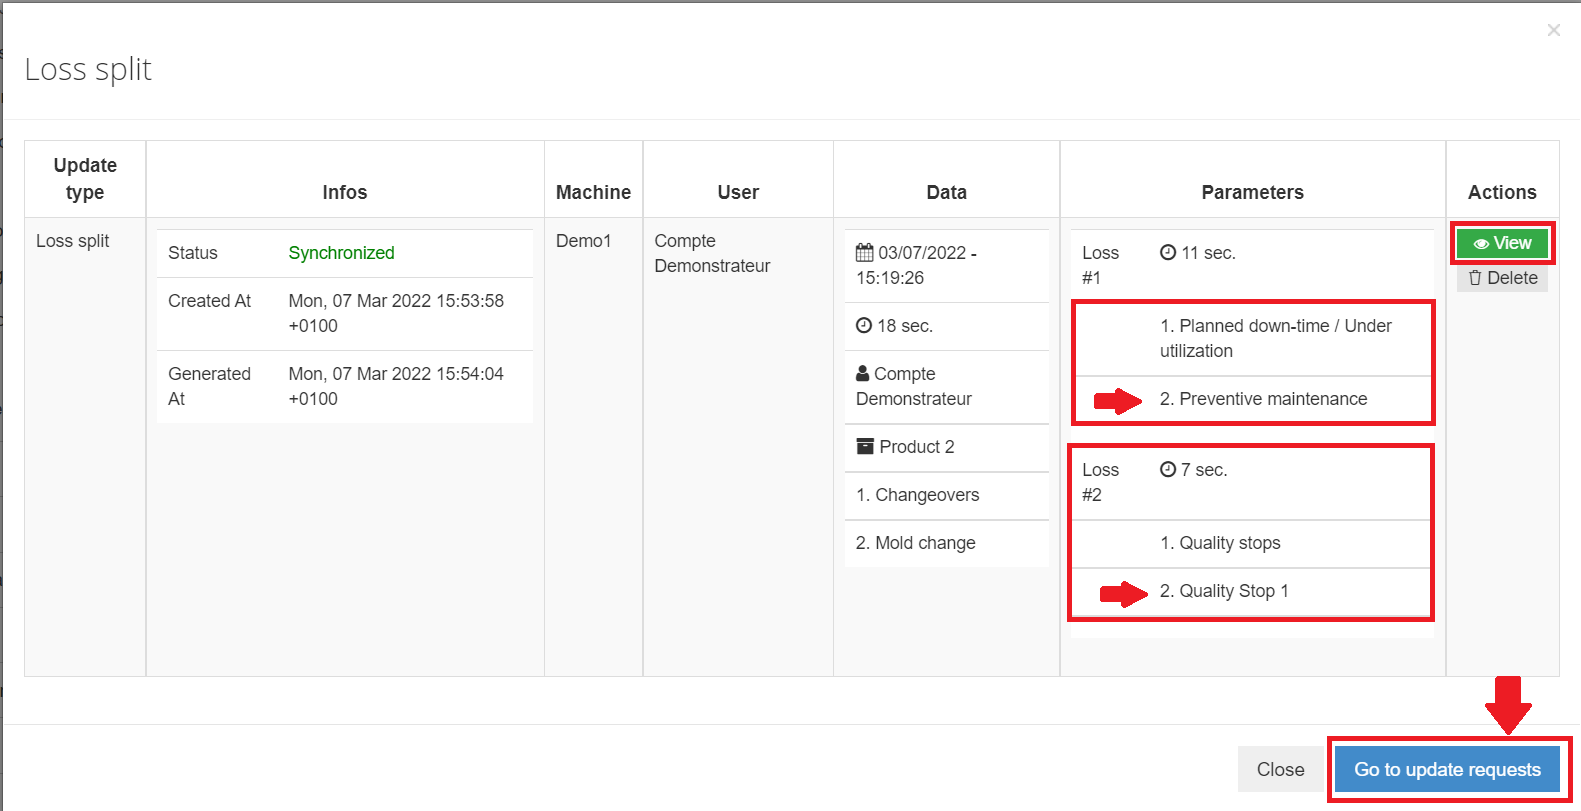
In this example, a first loss time (Plant closure) was successfully modified by splitting it into two times: the first one is associated with the "Preventive maintenance" loss (level 1 "Planned down-time / Under utilization"), and the second one with the "Quality stops" loss (level 1 "Quality stops").
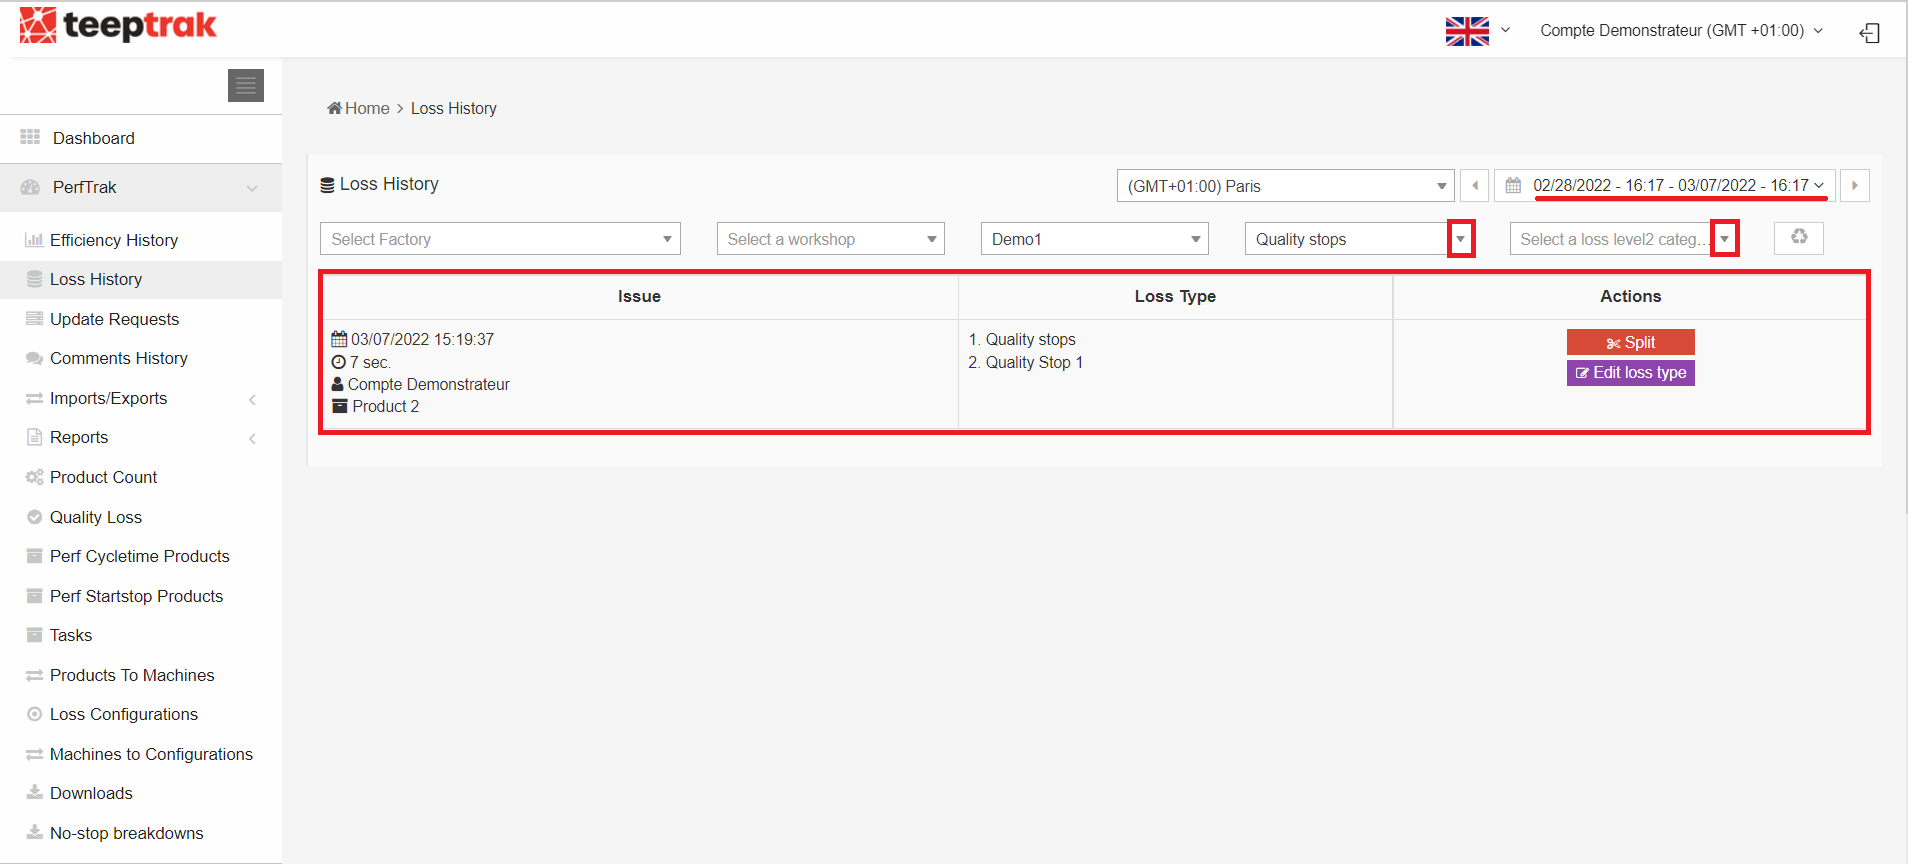
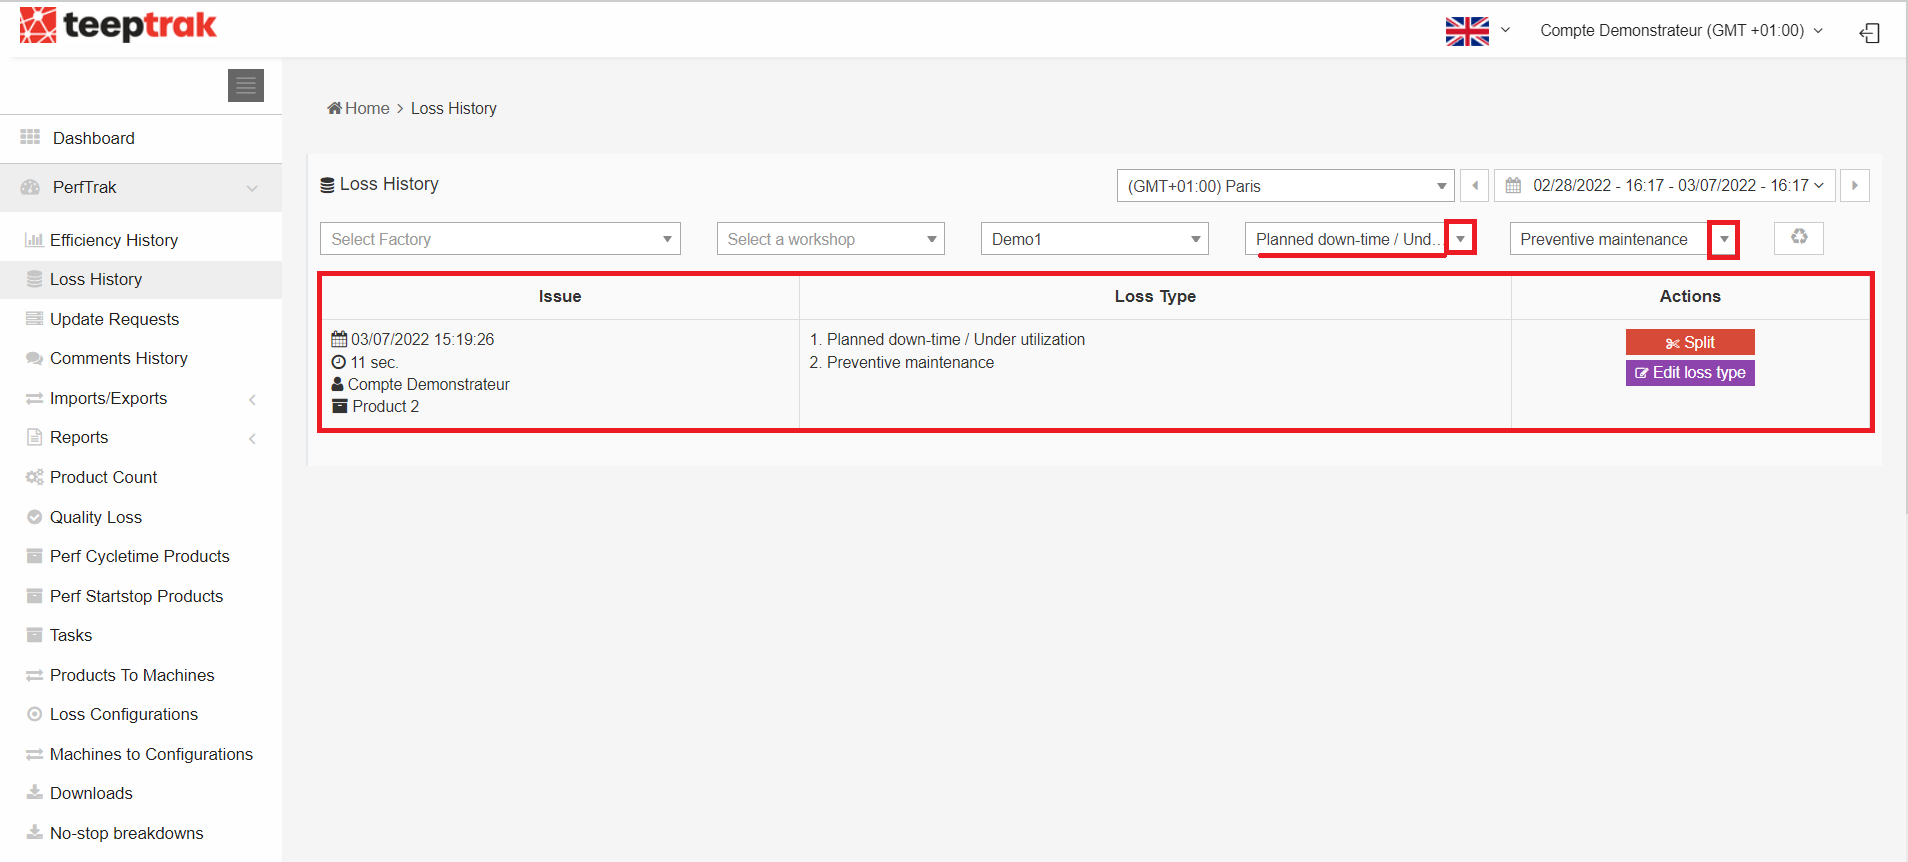
You can also filter the data directly according to the loss type.
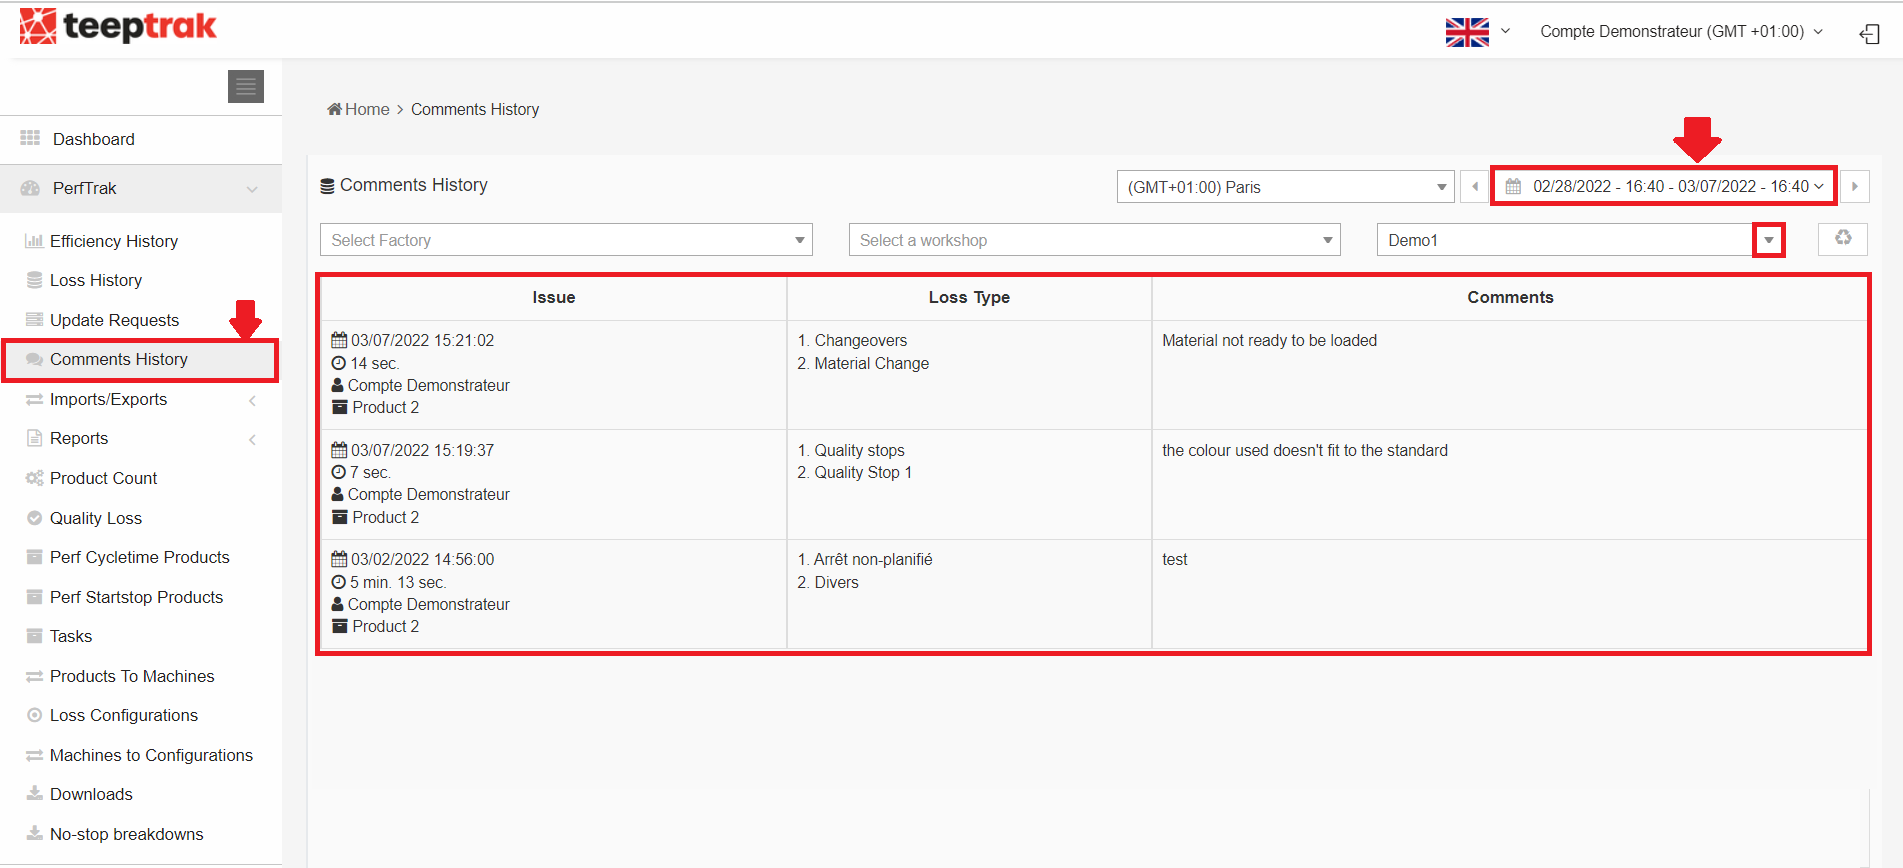
The Comments History tab
This tab lets you view all the comments made by the operators or the managers for each loss.
The list of all the comments, filtered by machine over the period of your choice, is displayed with all the associated additional information (duration, type of loss, date, etc.).