Path: PerfTrak > Analysis & Monitoring > Production Orders
The Production Orders tab lets you create production orders (POs), which are attached to the products configured beforehand and appear on their reference tablets.
I. Creating production orders
1. General configuration
Before creating your production orders, you must configure three general parameters governing the availability of the POs.
Go to your www.teeptrak.net account (or to the TeepTrak URL of your dedicated server) and:
enter your username and password to access your configuration and monitoring platform;
go to Administration > Configuration;
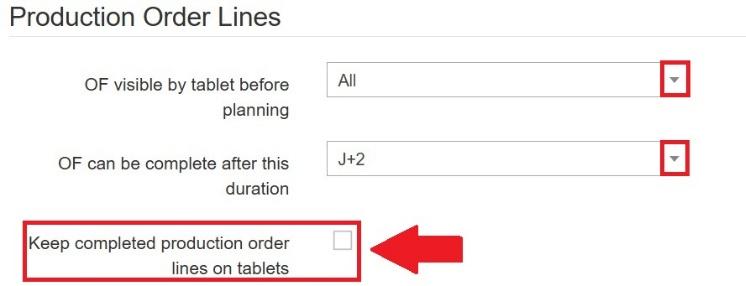
at the bottom of the page, find the Production Order Lines section.
This section offers three display and logging settings for your POs:
OF visible by tablet before planning — the number of days (D-x) before the planned production date during which the PO is visible and can be launched.
OF can be complete after this duration — the number of days (D+x) after the planned production date during which the PO is visible and can be launched.
Keep completed production order lines on tablets — whether completed POs are logged on the tablet.
Note: a production order that has not been completed can only disappear under two conditions:
it is completed during the production activity of the machine — automatically detected by the sensor — and the units produced are equal to or greater than the planned quantity;
it is completed manually on the platform, as a declarative action in the Production orders tab (see the last section of this article).
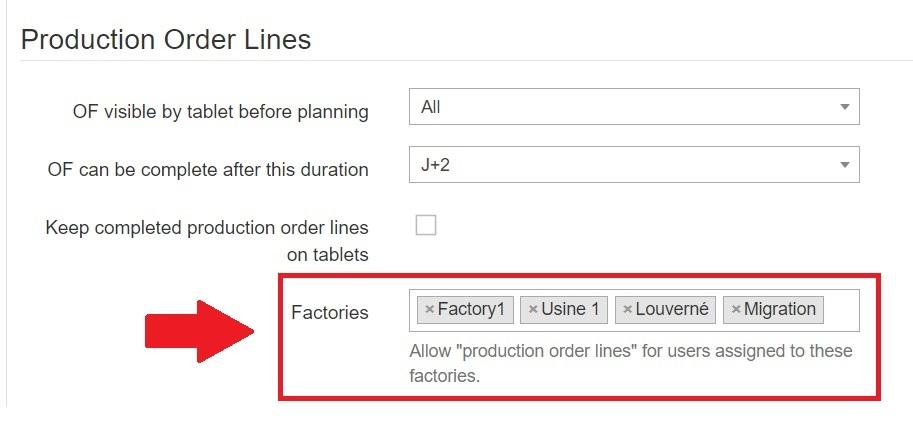
Finally, select the factories in which the use of POs is granted.
2. Creating the POs
a. The Production Orders tab
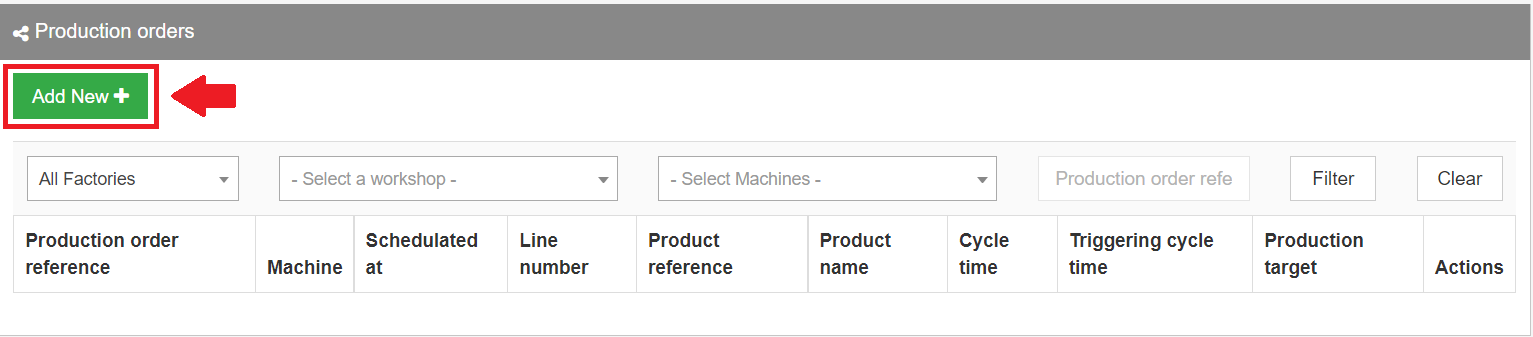
Go to the PerfTrak tab, select the Production Orders sub-tab and click Add New.
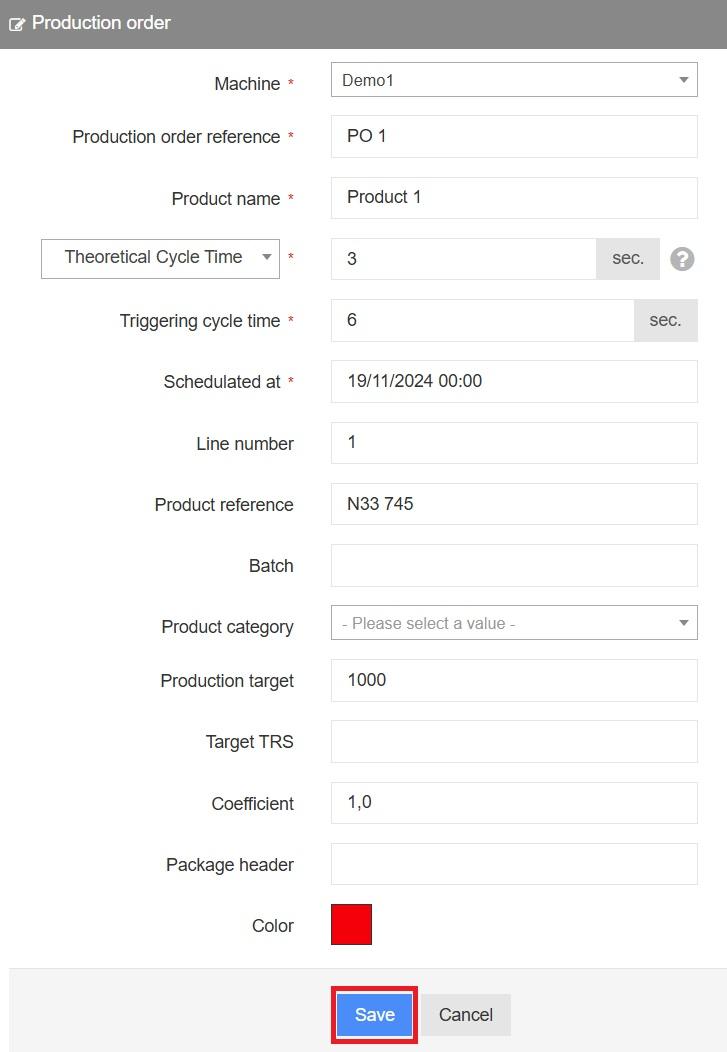
First select your reference machine, that is, the machine to which the production order and its underlying product will be assigned. Then fill in at least the fields marked with a red star, which are mandatory:
Machine — the name of the machine to which the PO is assigned.
Production order reference — the reference of the production order, or the code of the manufacturing order depending on your naming convention.
Product name — as entered on your configuration site.
Theoretical cycle time — of the product (or pace in pieces/hour, in which case the platform computes the theoretical cycle time from the pace value).
Triggering cycle time — the maximum time before a stop is reported, that is, the threshold beyond which the operator is asked to inform the losses displayed on the tablet.
Scheduled at — the planned production date associated with the PO.
Line number — the number of the line on which the PO is launched.
Product reference — the code associated with your product.
Batch — optional.
Product category — optional; available if you created one beforehand in the Perf Cycletime Products tab, under Manage Categories.
Production target — the number of parts to be produced; optional.
Target TRS — the targeted overall equipment effectiveness.
Coefficient — the grouping coefficient you wish to add to your PO; by default this coefficient is a multiplier.
Package header — optional.
Color — optional.
Example of a typical configuration, "PO 1" with its product reference "N33 745":
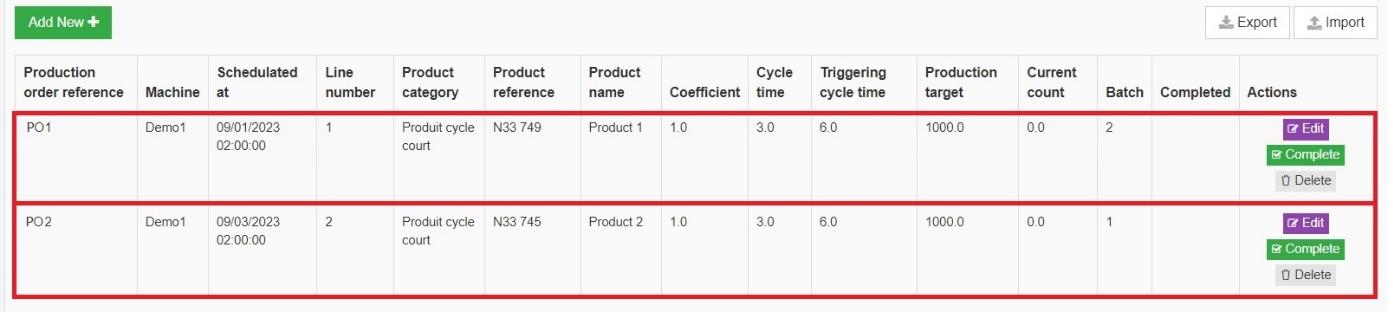
Once created, the production order appears at the top of the list — provided that the machine assigned to the PO is added and that the viewing range matches the date planned for the PO. In our example we configured two different production orders, PO 1 and PO 2.
b. The Import/Export profiles tab
Before creating your POs from this tab, make sure you have configured an import profile matching your own Excel repository. You can create your import tables from scratch or modify the default import template, available under the Default heading.
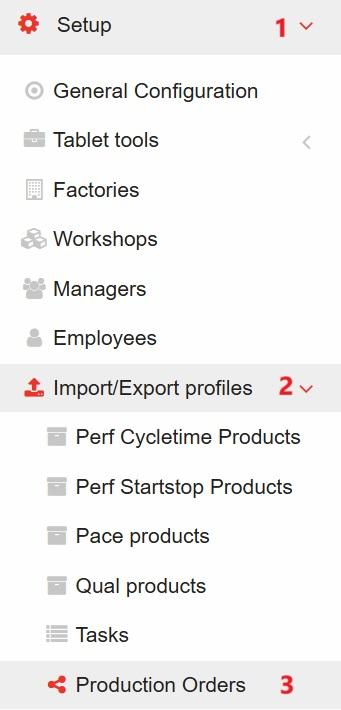
Go to Administration > Reference Data > Import/Export profiles and select the Production Orders sub-tab.
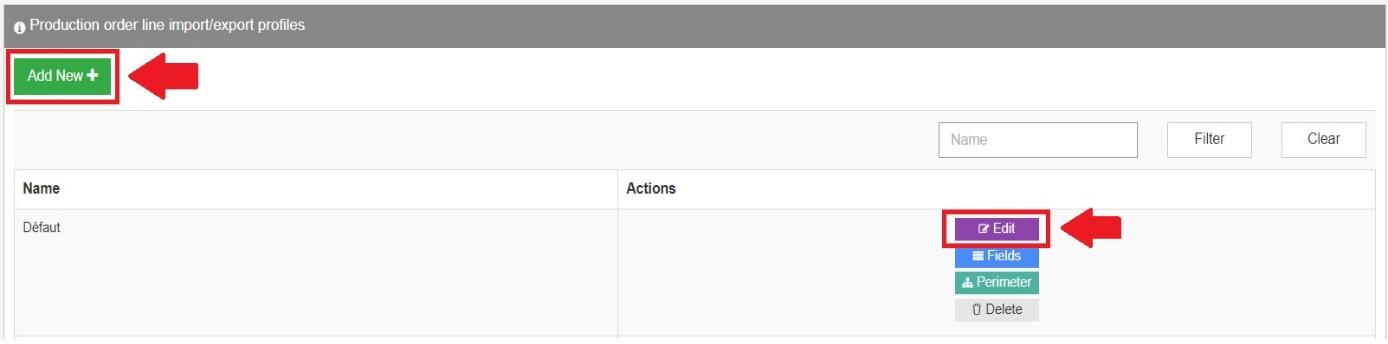
In the Import tab, add a new import template by clicking Add New, or modify the default template with the Edit button.
A list of information categories is available, whose position can be adjusted by drag and drop, from top to bottom or bottom to top. This is how you build import/export files matching your own repository — the order of the columns of your Excel file must be respected.
Mandatory fields. By default, the document presents the following mandatory fields, whose column names are interchangeable:
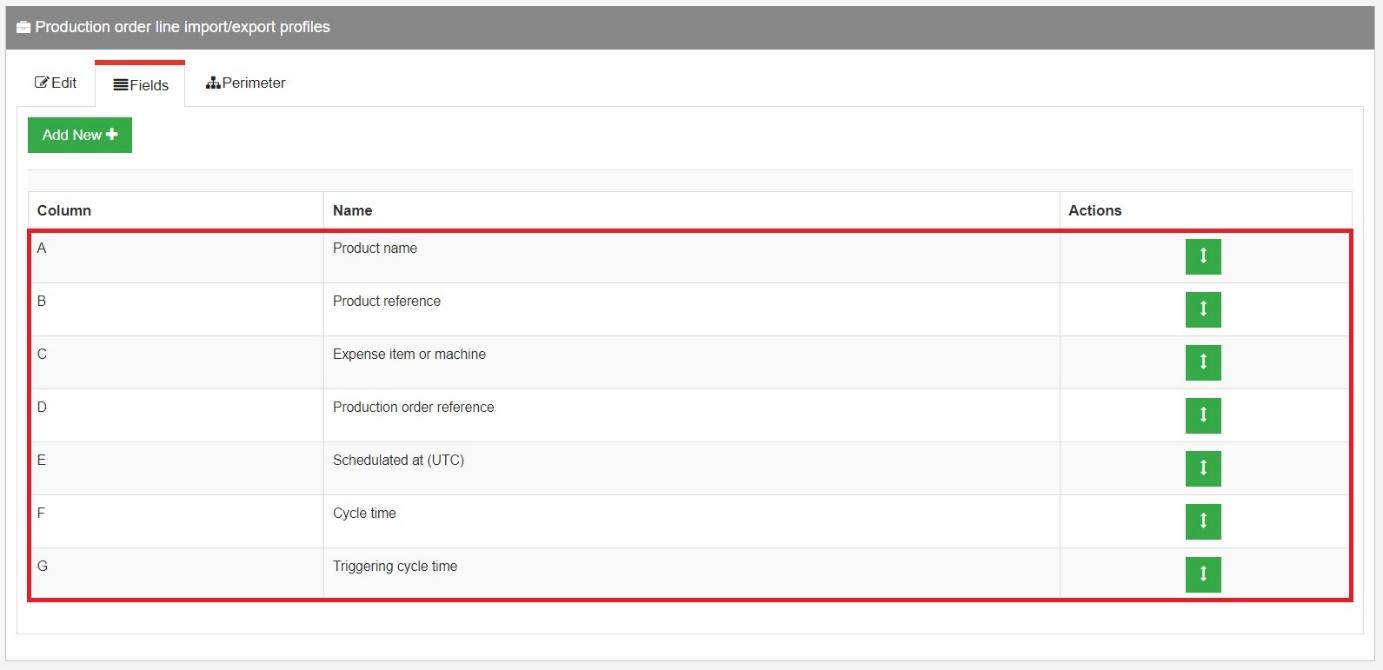
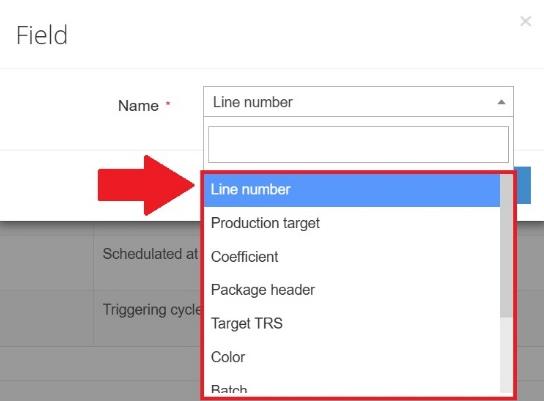
Optional fields. In addition to those, you can add ten optional fields, which display extra information for your POs:
Line number,
Production target,
Coefficient,
Package header,
Target TRS,
Color,
Batch,
Product category,
Alt cycle time input type,
Alt cycle time value.
Editing, arranging and deleting the fields. The name and position of an optional field can be changed at any time, and the field can be deleted. Mandatory fields, on the other hand, cannot be deleted, since they are essential to the configuration.
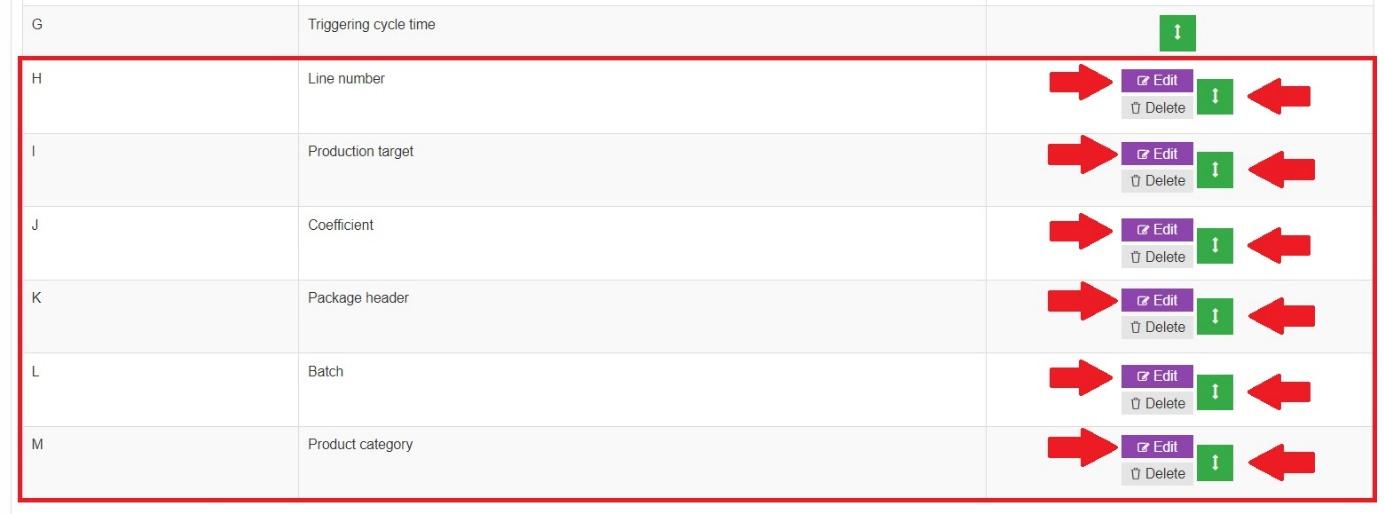
The double-arrow buttons move each element into its corresponding column.

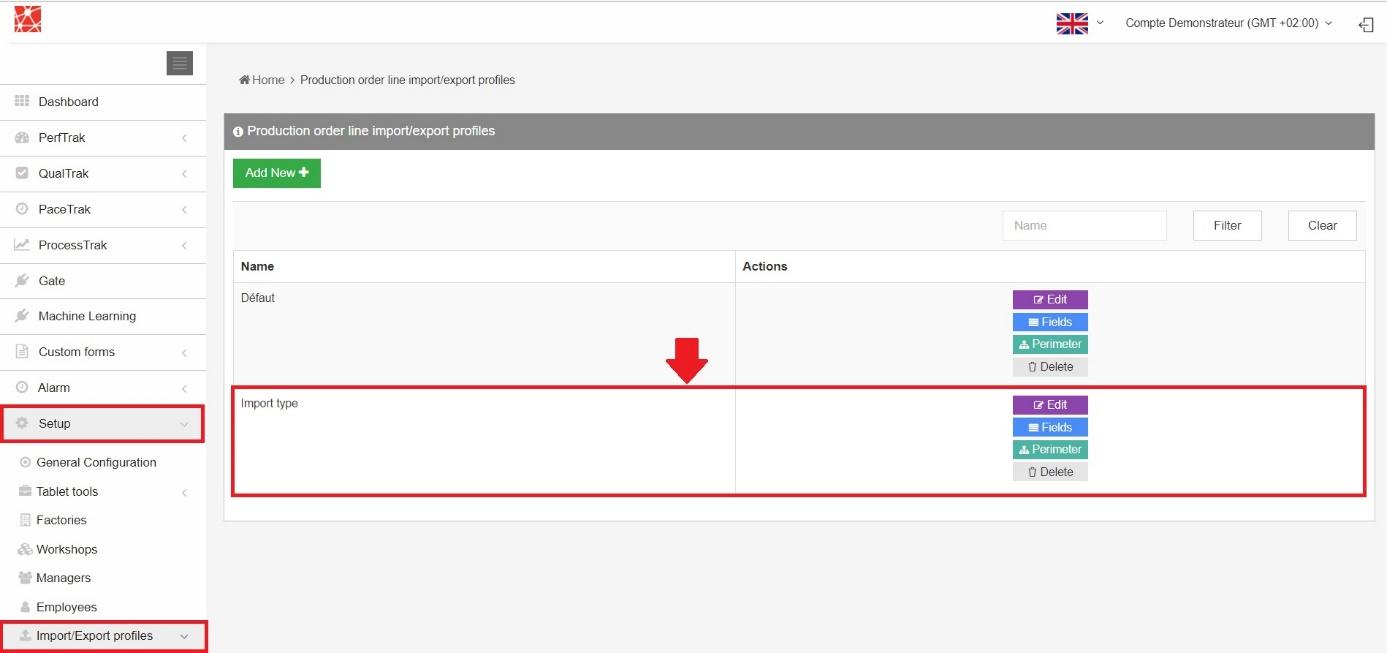
For the example, we created the "Import type" profile below. It corresponds to an import format that can be used to import POs directly from the Production orders tab, then Import.
First, set up the profile in Administration > Reference Data > Import/Export profiles:
Then use it in PerfTrak > Analysis & Monitoring > Production Orders:
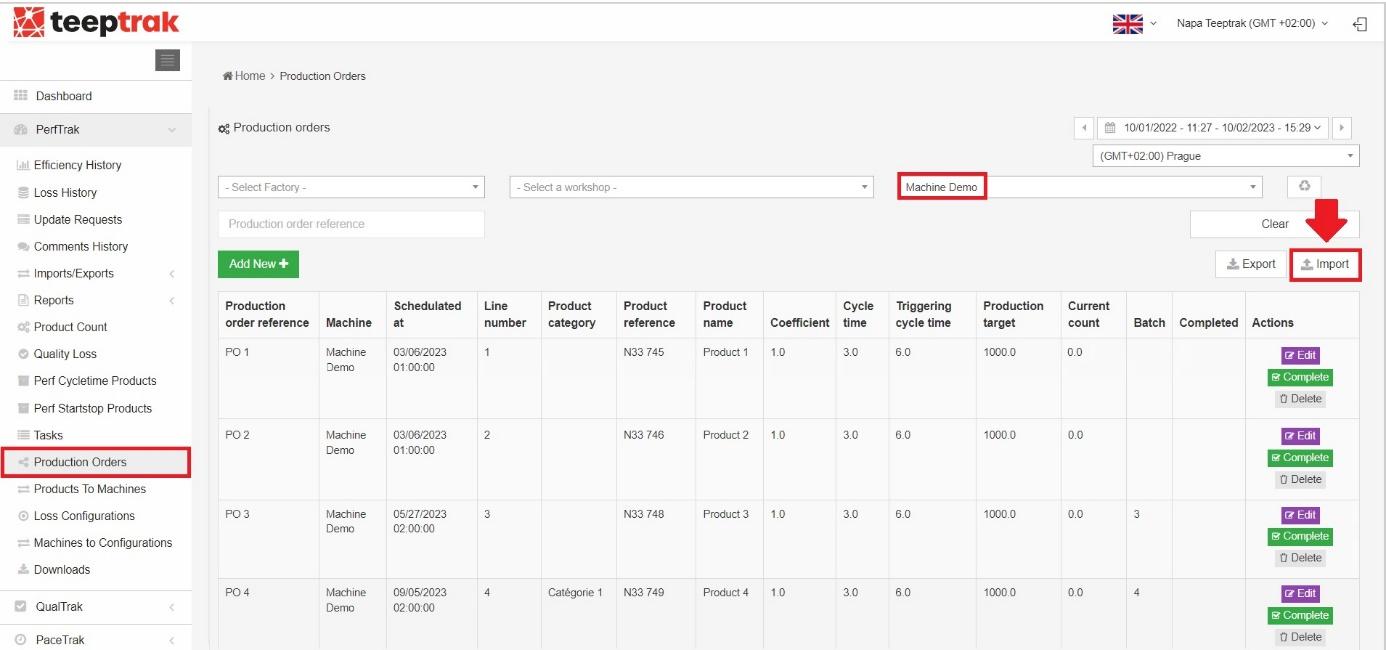
c. Example of an Excel import file
For the information to be readable and interpretable by the system, this format must be respected:

Important: for each date and time to be entered — start and end — add a double space between the date and the time, in the
dd/mm/yyyy hh:mm:ssformat.
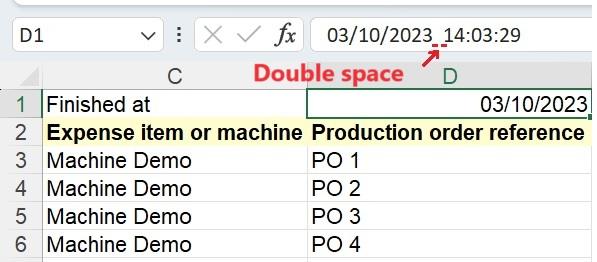
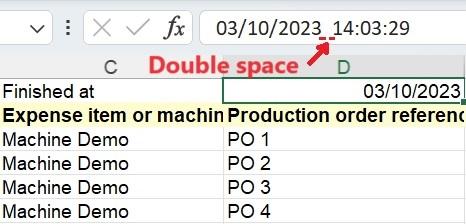
Once the file is imported, your POs appear in the tab, exactly as they would after a manual creation.
d. Assigning the production order to its reference machine
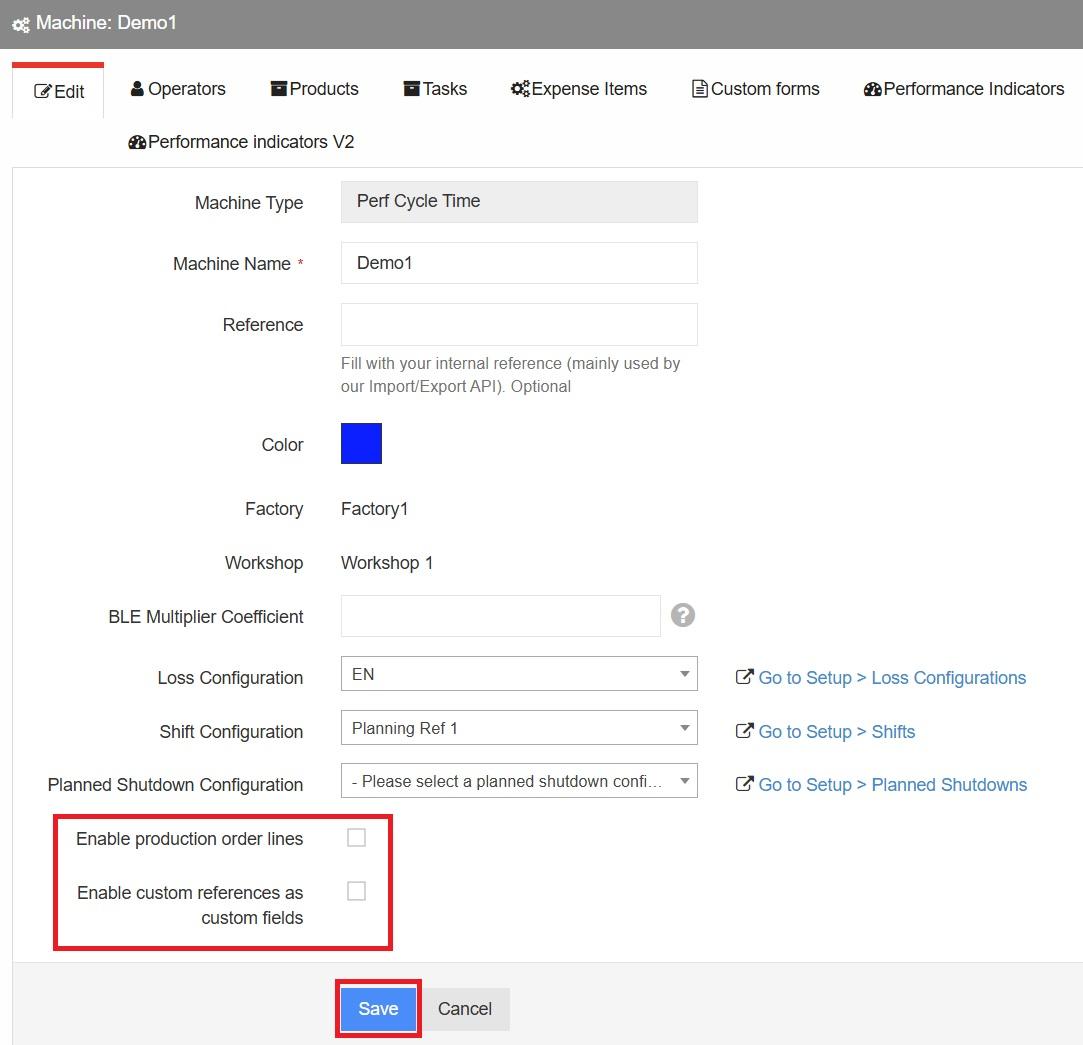
In Administration > Licenses & Machines > Machines, find your reference machine and click Edit, then tick the boxes Enable production order lines and Enable custom references as custom fields. This activates the display of the production orders on your tablet. Save with Save.
II. On the tablet
Step 1 — Synchronising the production orders
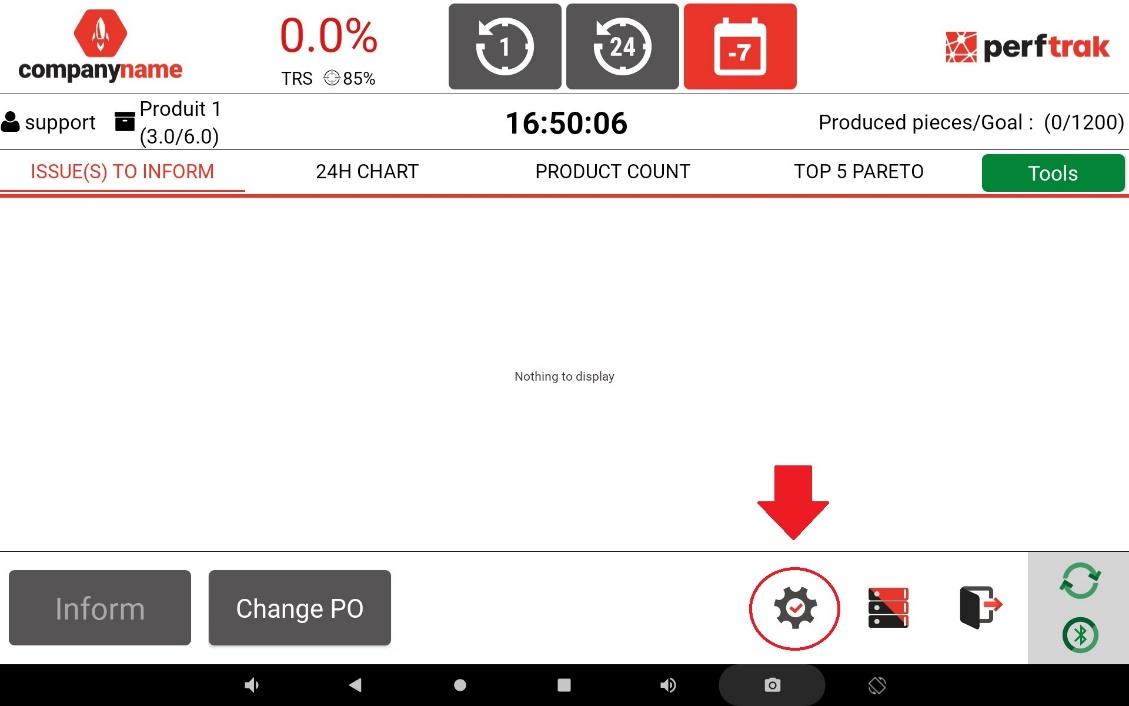
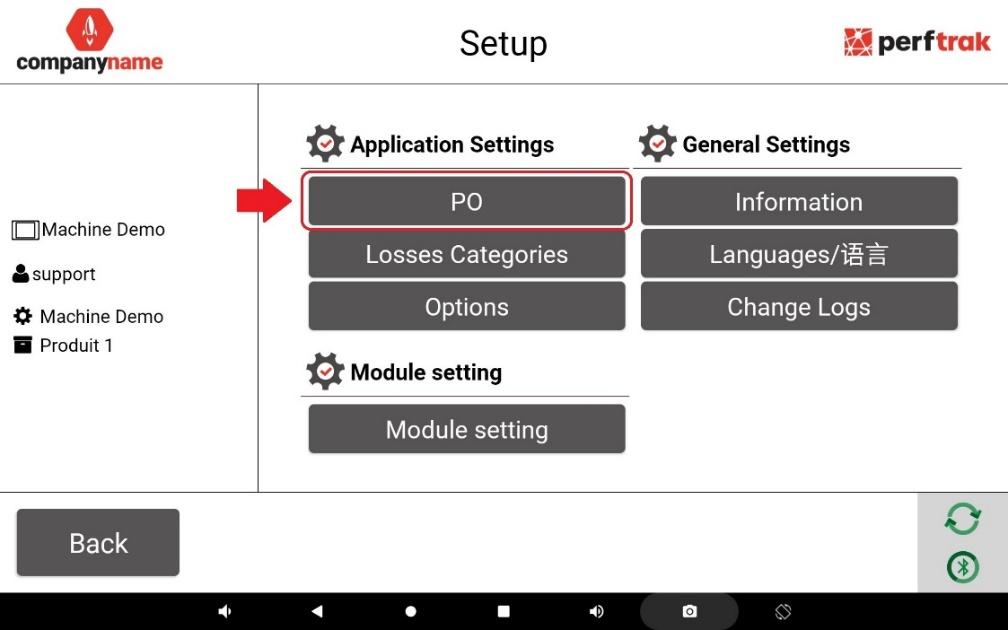
Launch PerfTrak and press the cogwheel at the bottom right of the main screen to open the settings. Click PO to synchronise the production orders created beforehand.
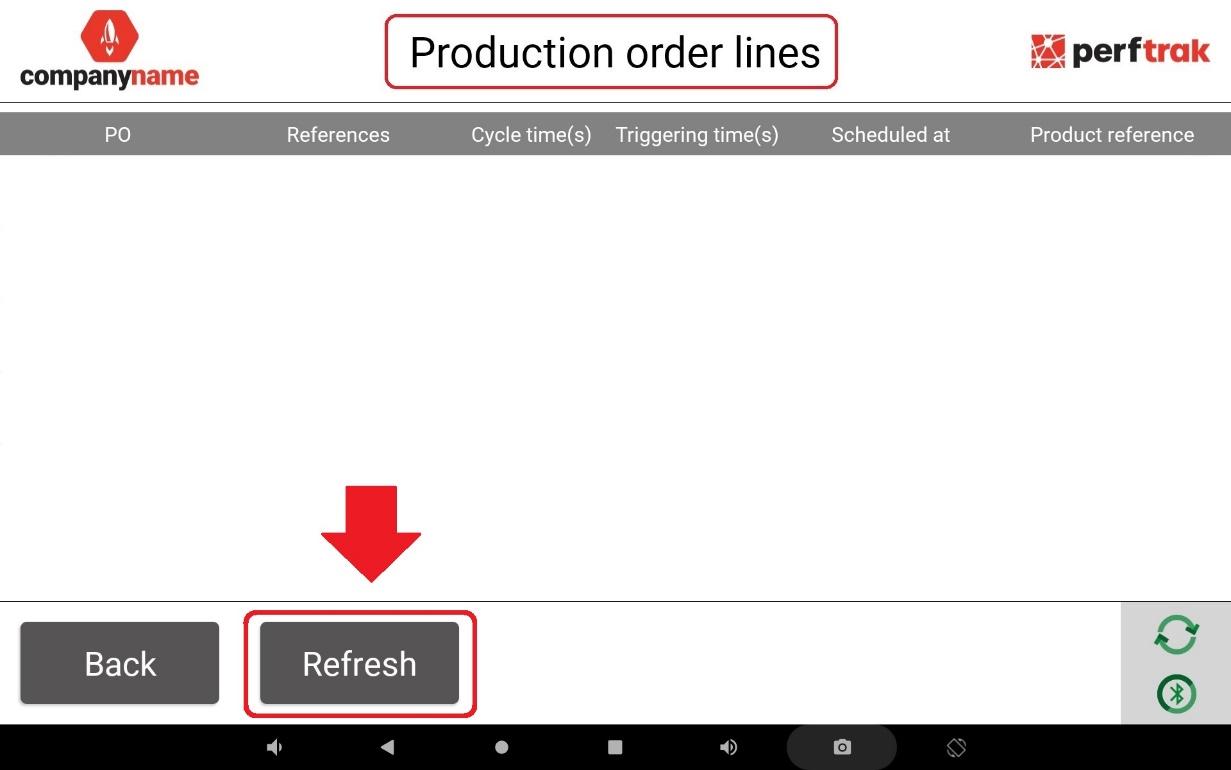
Once on the production order lines screen, press Refresh to synchronise the data from the platform to the tablet.
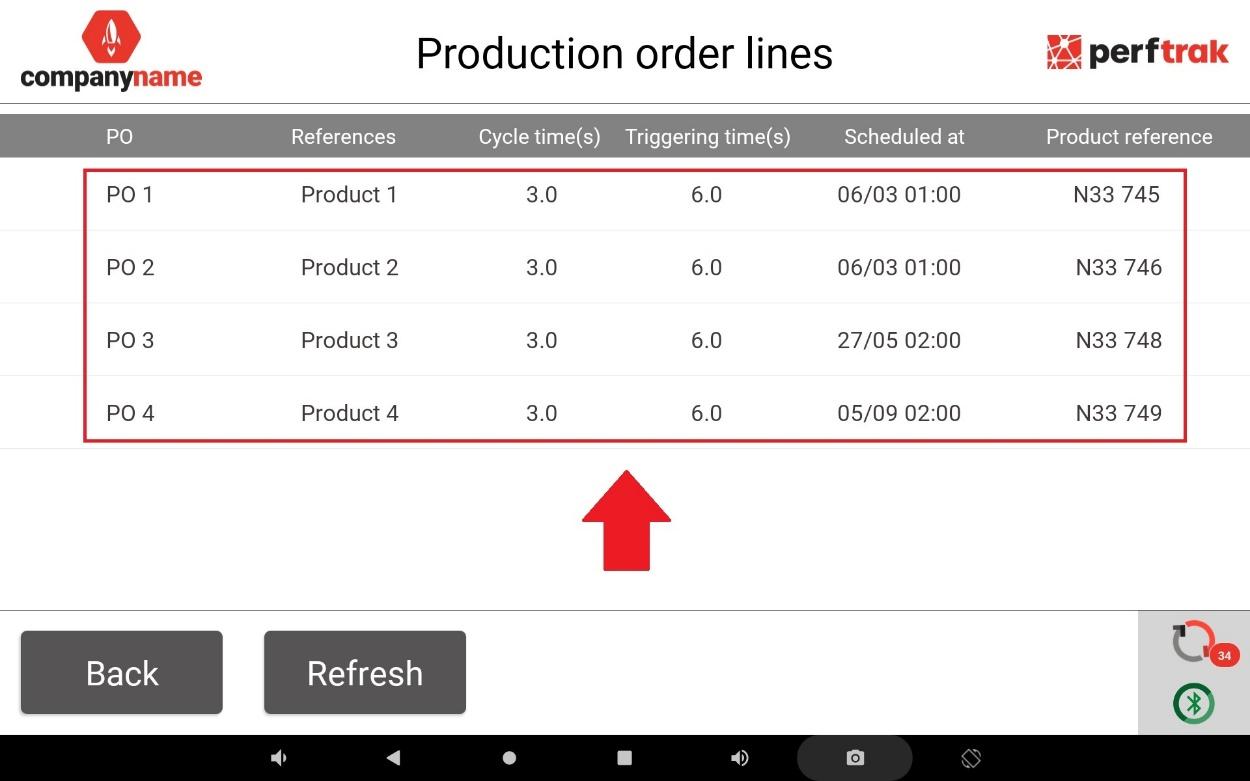
The POs appear on the screen with their scheduled date and time, along with their product reference.
Step 2 — Configuring the display options
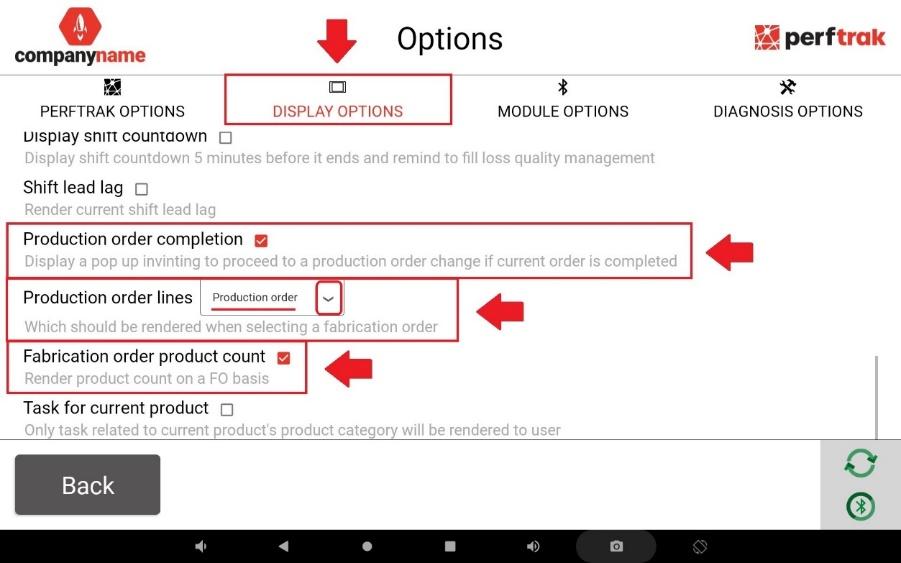
Back in the settings, select the Options tab, then the Display options sub-tab. Three features dedicated to POs can be enabled there:
Production order completion — displays a pop-up inviting the operator to proceed to a production order change once the current order is completed.
Production order lines — displays the name of the production order instead of the product reference.
Fabrication order product count — displays the product count on a production order basis.
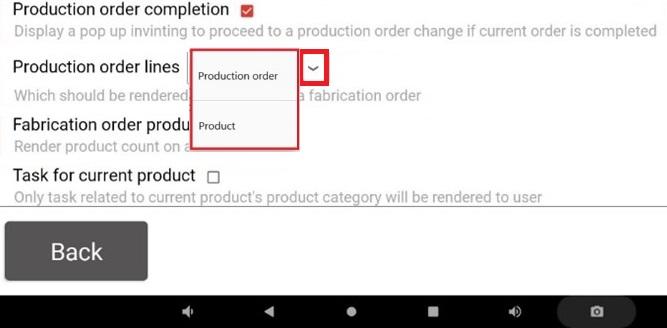
The Production order lines option itself offers two values: display by production order or by product.
Step 3 — Selecting a PO and controlling production
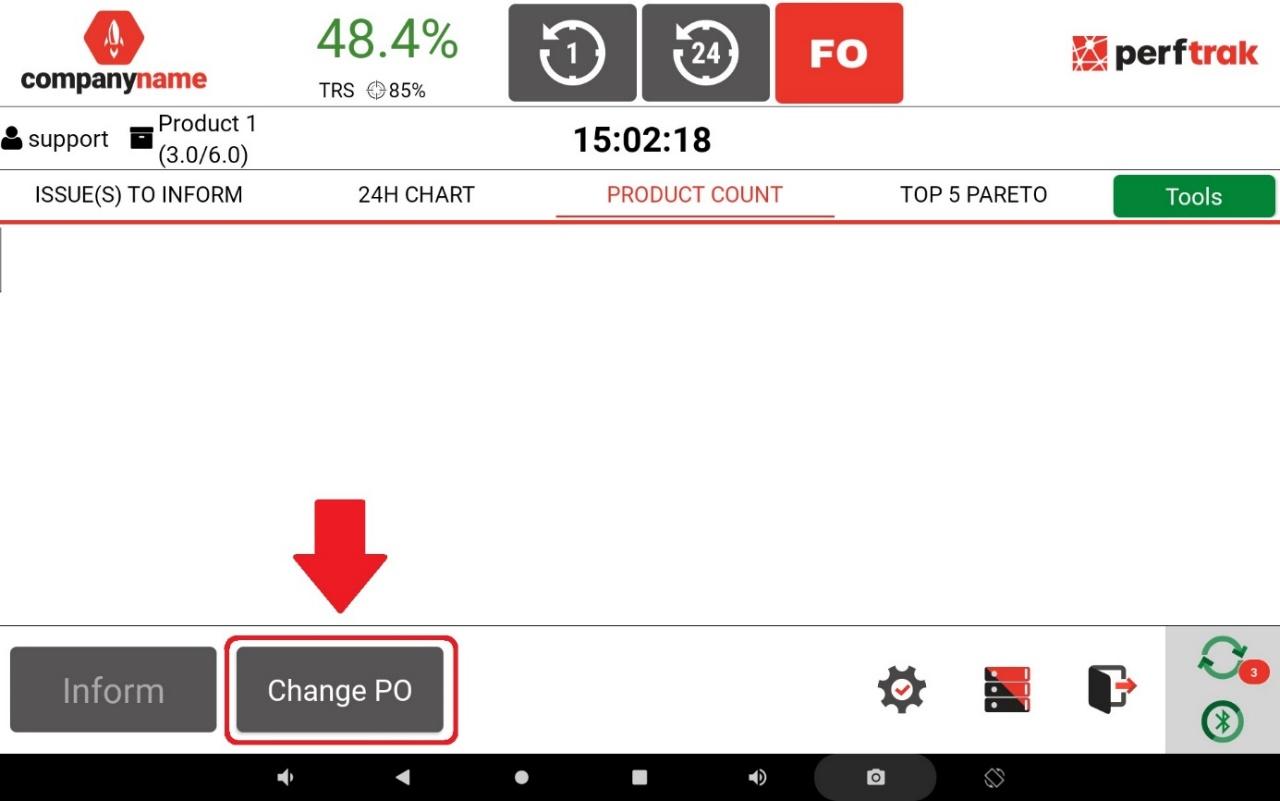
Once the options are activated, go back to the main screen and press the Change PO button.
The list of your POs appears. It consists of the pairing of the production orders and the products configured and assigned from the platform. With the Production order lines display set to Production order, the name of the PO is shown first, together with its associated product.
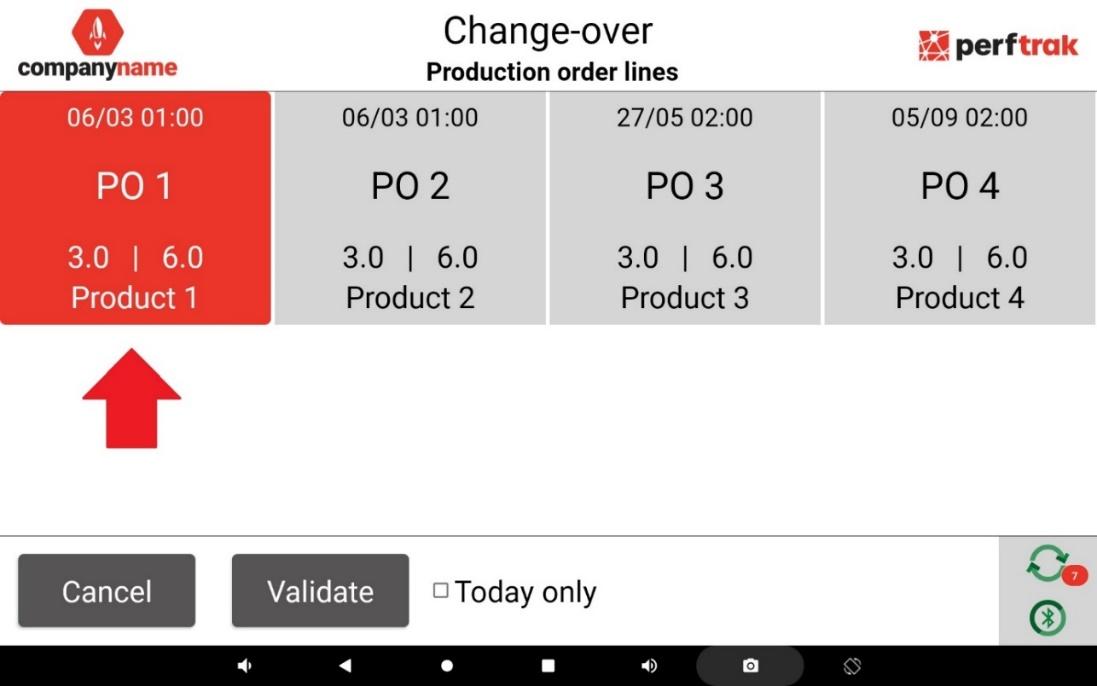
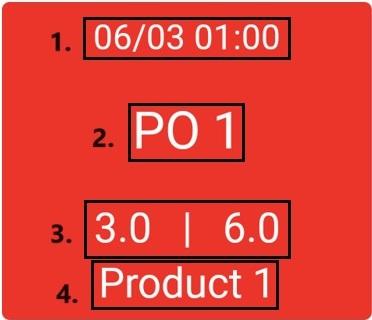
Each tile displays:
the scheduled production date of the PO,
the name of the PO,
its cycle time and its triggering cycle time,
the name of its underlying product.
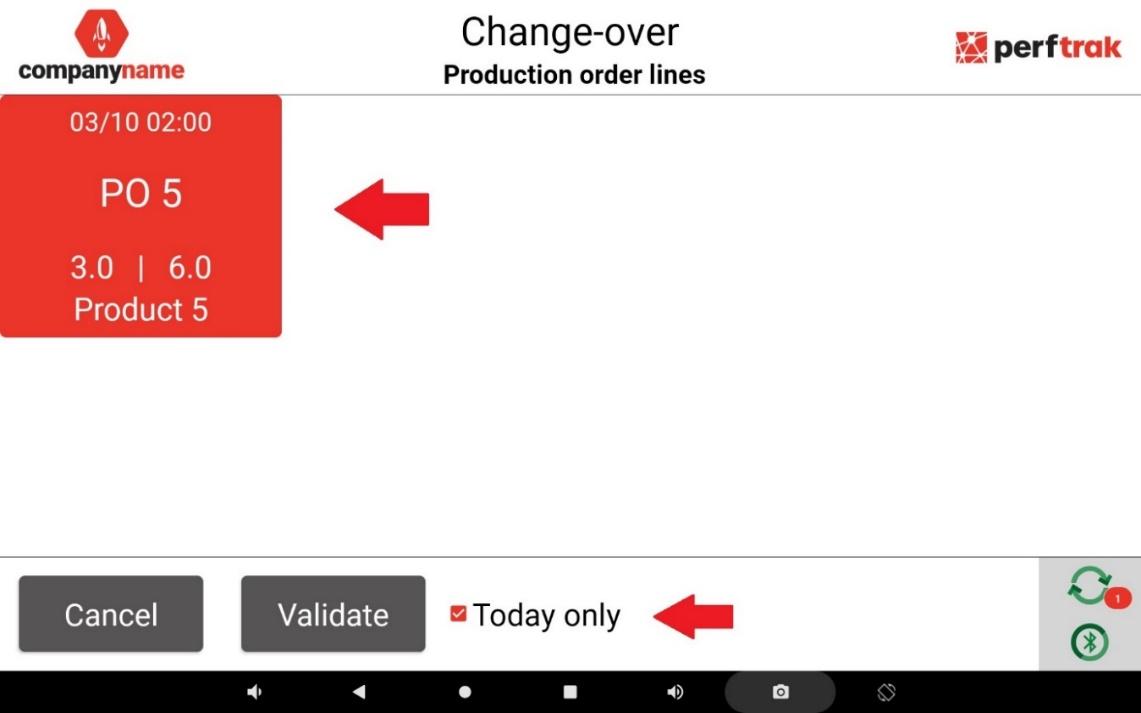
You can also tick Today only to clean up the display and keep only the productions scheduled for the day. In the example below, PO 5 is the only production order scheduled for the day, the previous ones having all been completed.
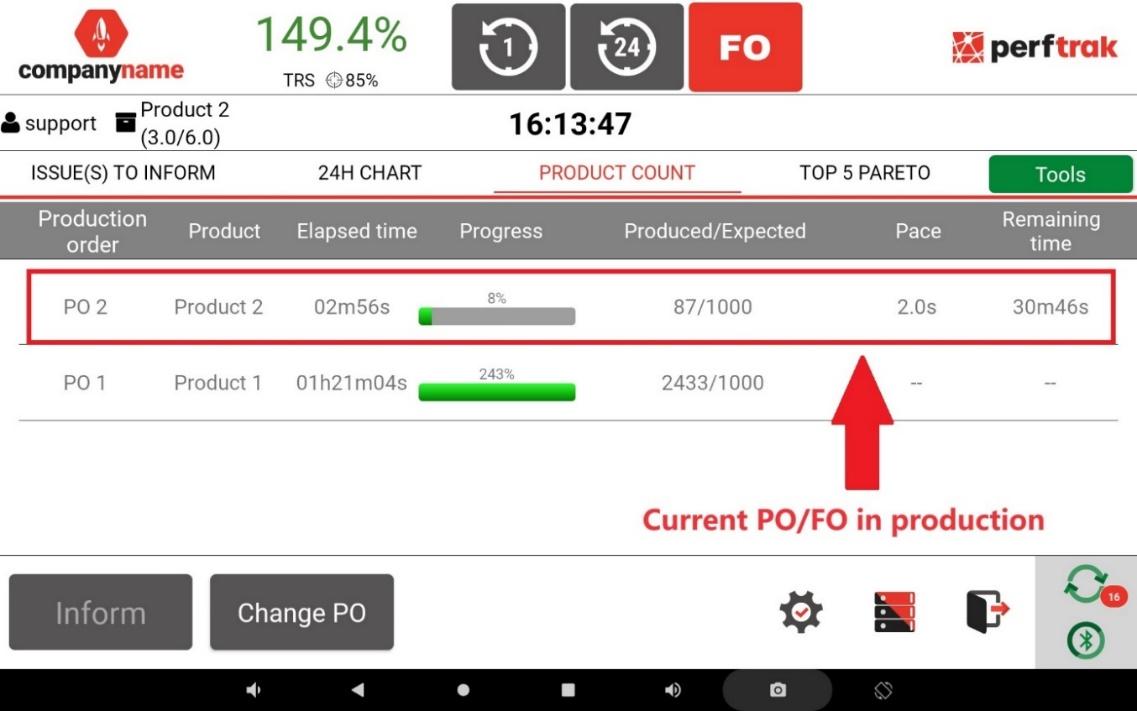
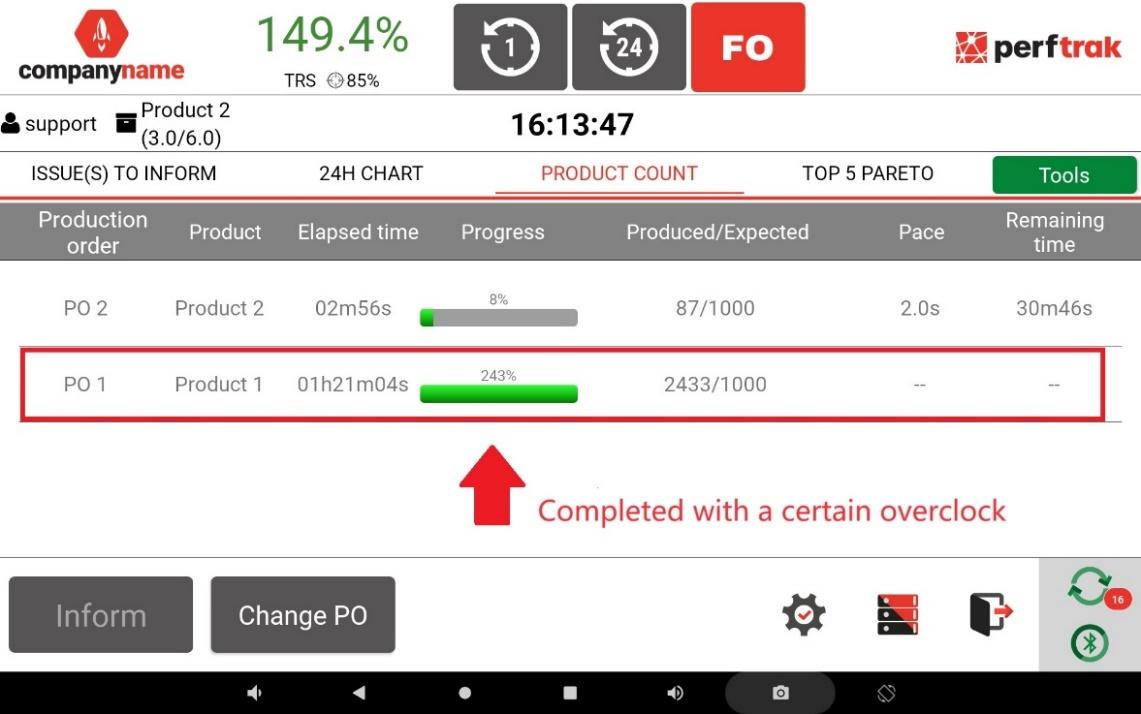
The scheduled POs are then launched in production. After a while, the completion of each PO is displayed on the main screen, from the most recent to the oldest, top to bottom.
III. Visualising the performance history
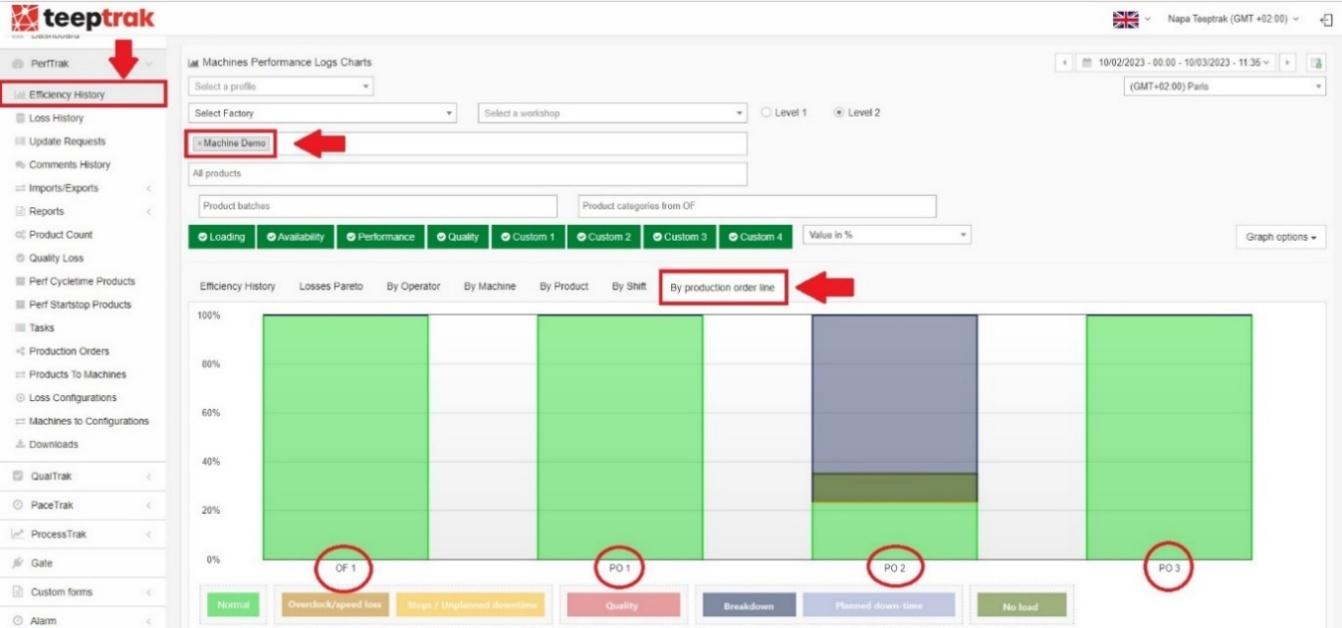
Once the platform and the tablet are configured — and after an effective production time — you can monitor the performance of your equipment through the tab dedicated to production orders, By production order line.
Completing a production order
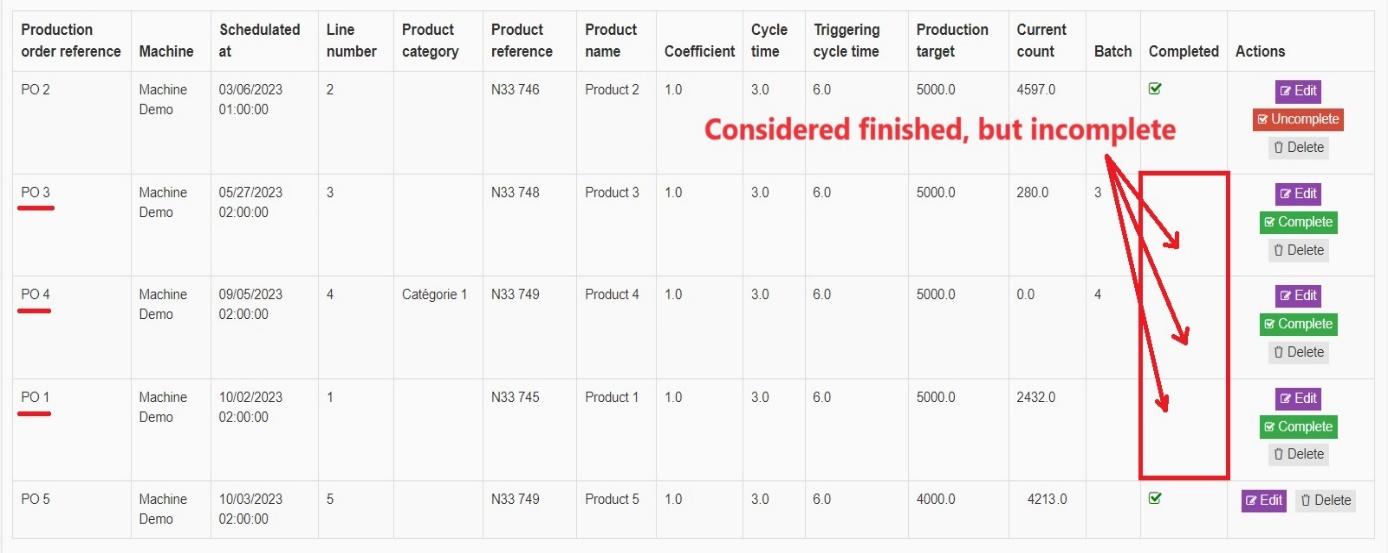
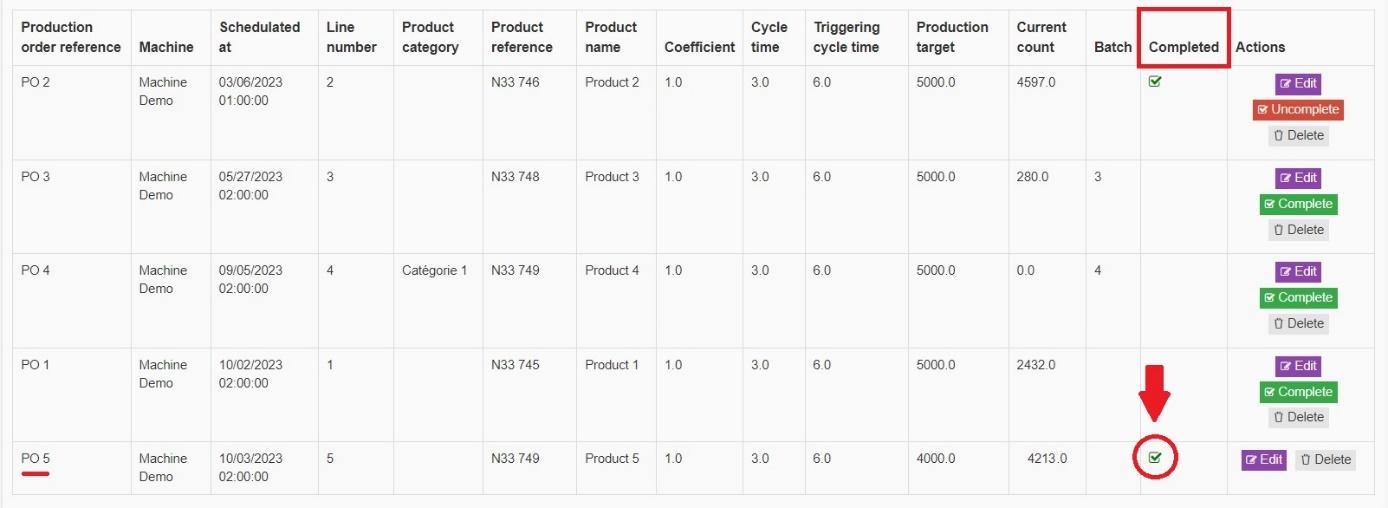
Go back to the Production orders tab to see which POs have been completed, thanks to the tick box in the Completed column.
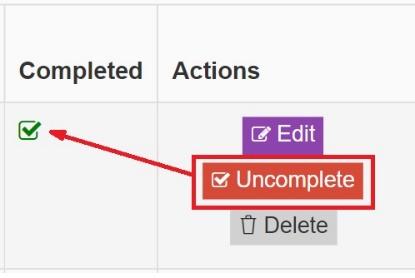
If you wish to validate the completion of a PO manually — because the quantities produced are lower than expected, for instance — click the Complete button. A green tick then appears in the Completed column, and the Complete button becomes Uncomplete. Click that button to return to the previous situation.
In the example below, PO 2 did not reach its target of 5,000 parts — 4,597 were produced — yet it was completed manually. PO 5, on the other hand, exceeded its target of 4,000 parts with 4,213 pieces produced: the green tick therefore appeared automatically in the Completed column.
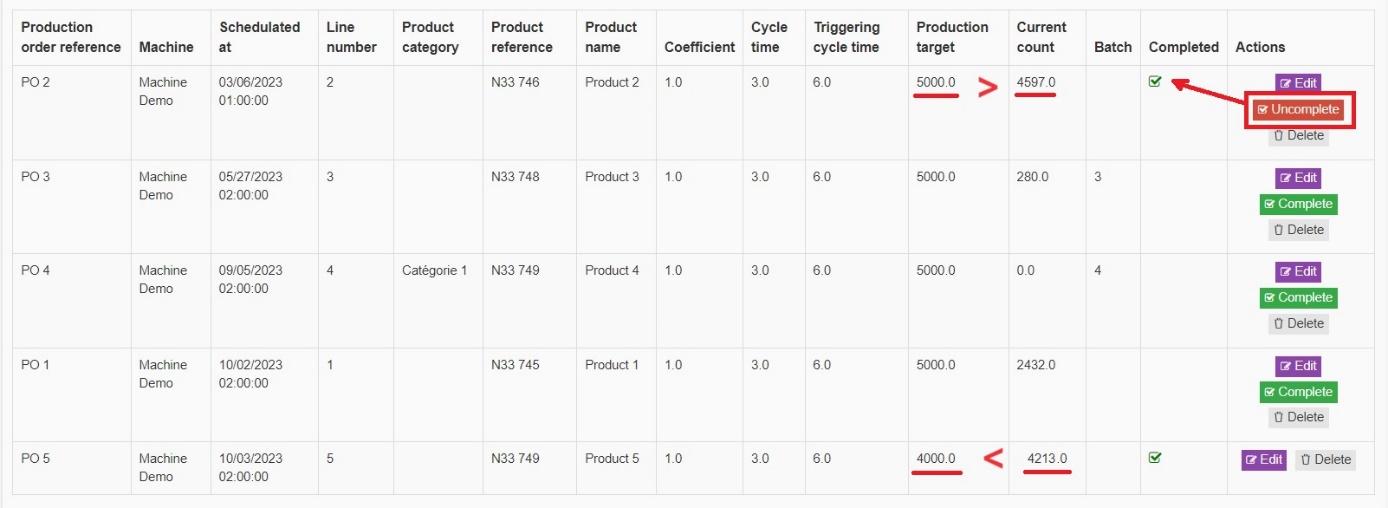
The remaining production orders are considered finished, but are not marked as complete.