Path: PerfTrak > Loss Configuration > Tasks
Overview
The Tasks feature is designed to prevent the recording of non-production-related impulses for activities such as cleaning, line startup, and so on. This helps quantify the actual duration of these activities more accurately.
This feature is currently only available in the PerfTrak cycle time system. It is not enabled by default: if it does not appear on your interface, contact our team to have it activated.
Configuration on the platform
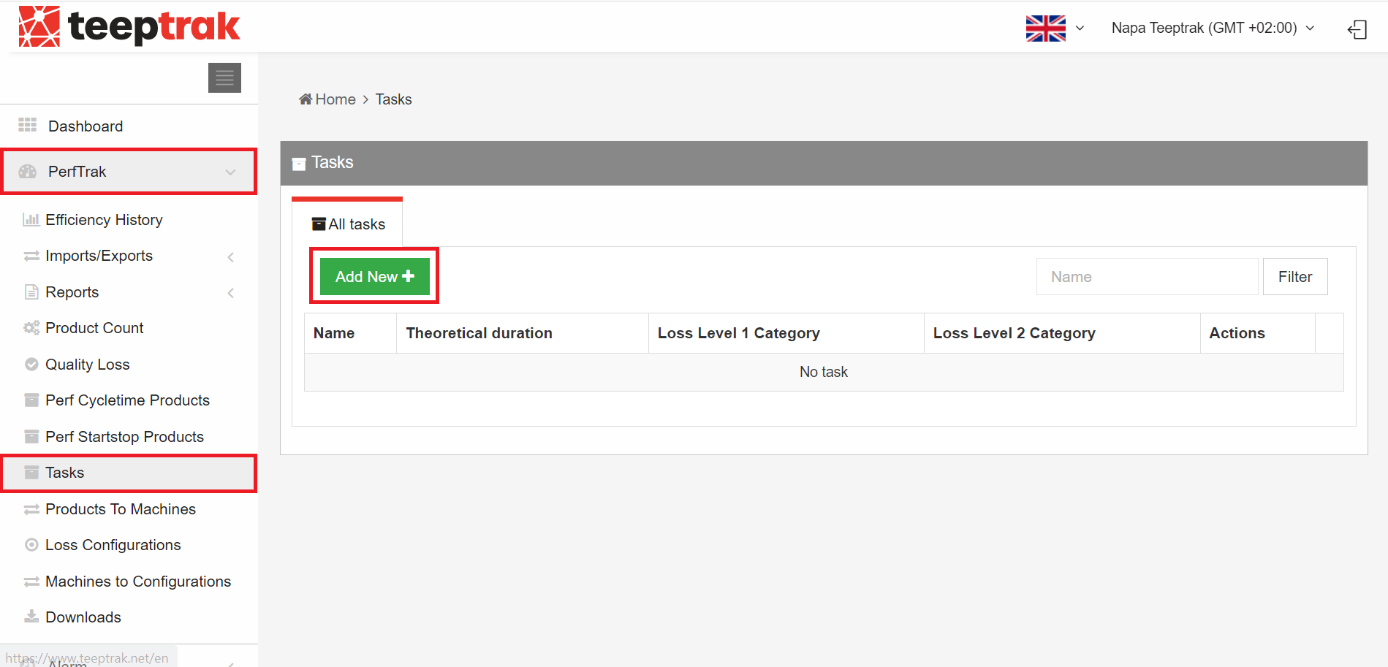
Go to PerfTrak > Loss Configuration > Tasks, then click Add new.
Then enter the name of the task, the theoretical duration for completing it (in seconds), the corresponding loss tree, and the level 1 and level 2 categories under which the task will be automatically informed. Click Save.
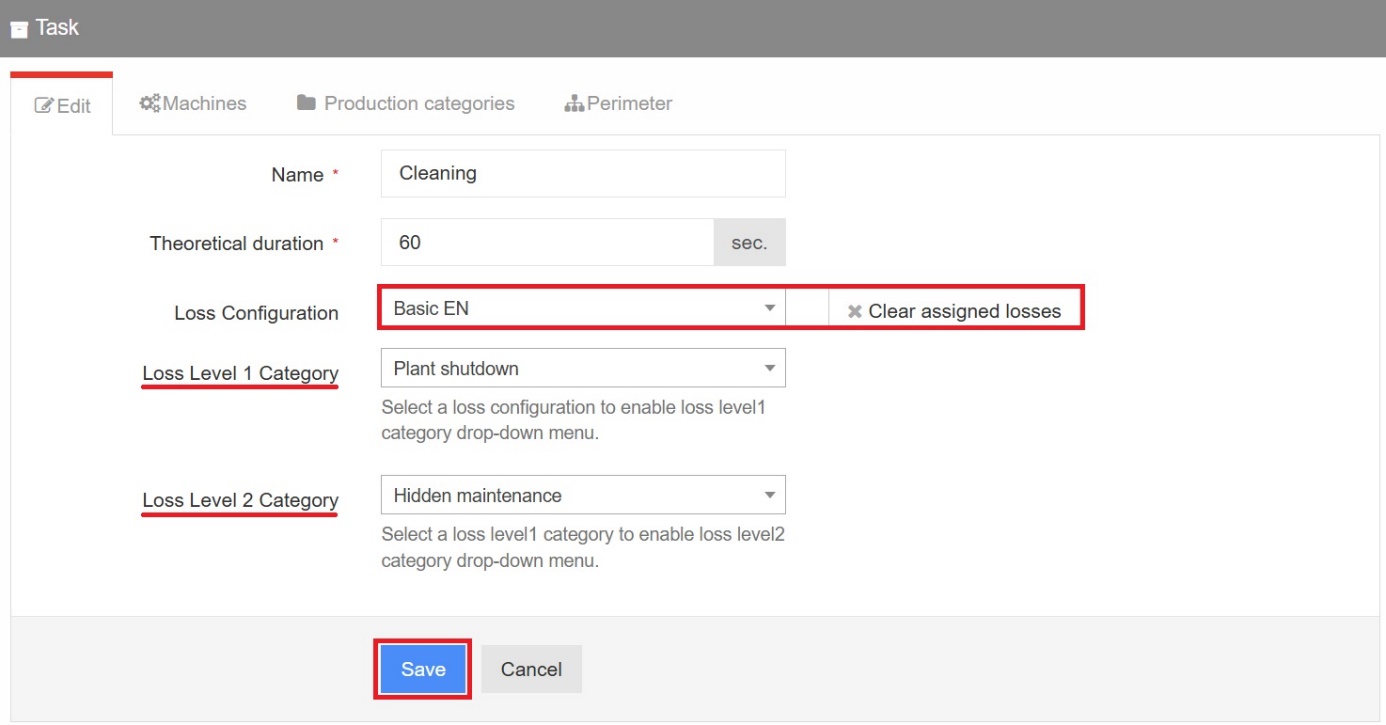
⚠️ Warning: a task can only be assigned to one loss tree and to one pair of level 1 and level 2 losses. It is therefore recommended to create specific tasks for each machine that uses a different loss tree.
Note: if you want to give a task unlimited time, simply set the theoretical duration to 0 seconds. The operator will then be able to complete it without any time constraint.
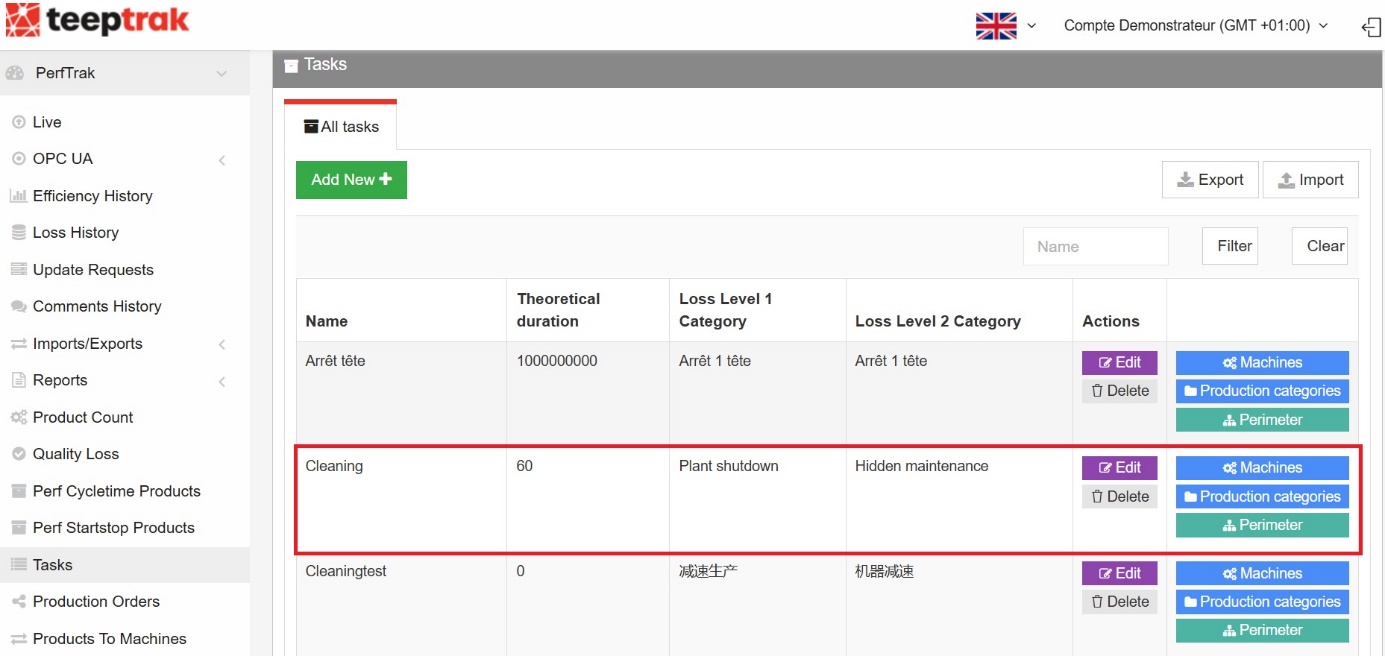
The task you have just created now appears in the list. As a reminder, the theoretical duration of the configured tasks is displayed in seconds.
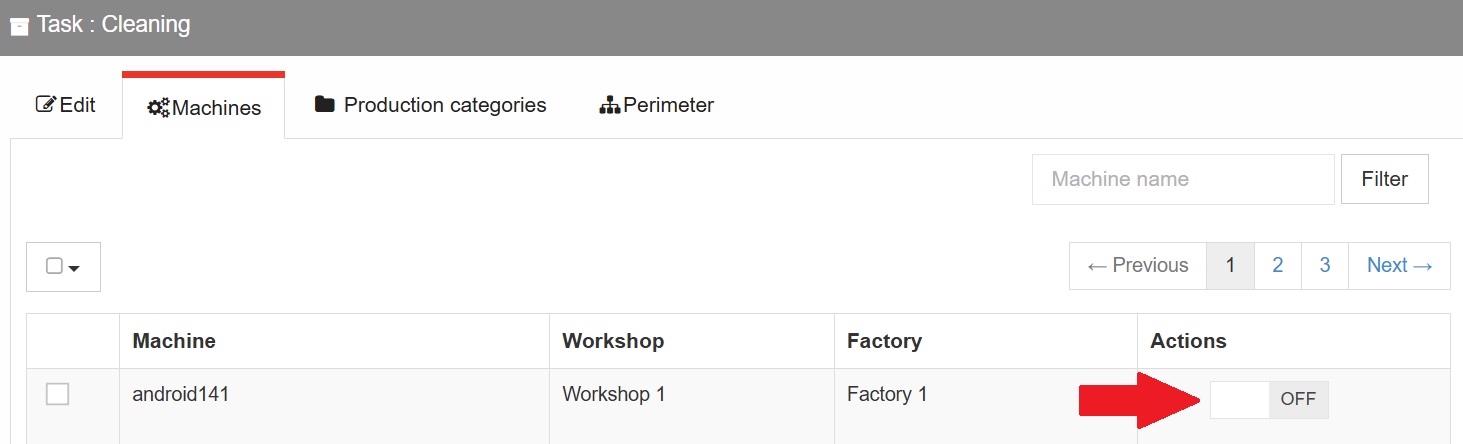
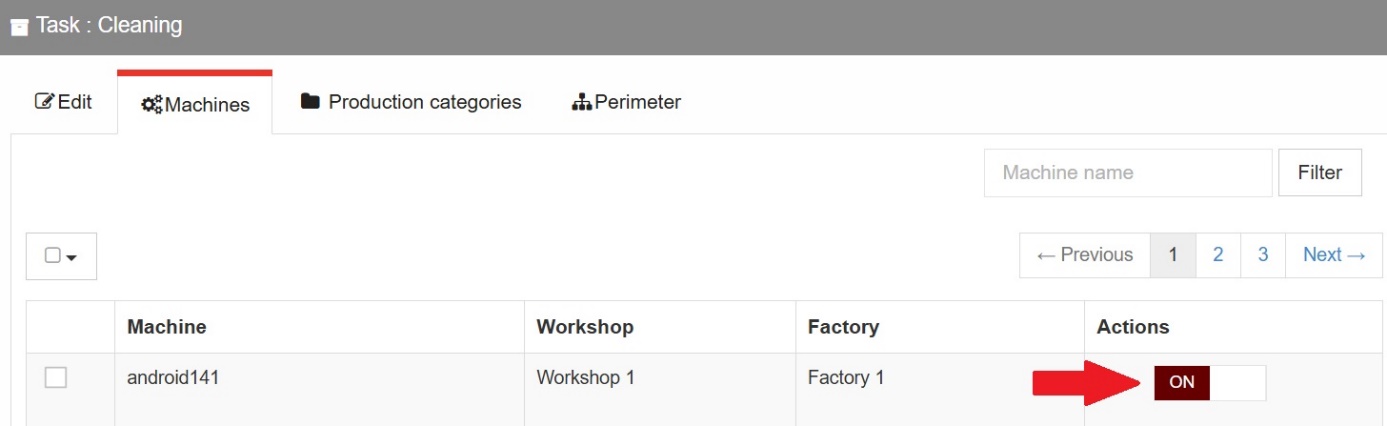
Next, select the machine, the production categories and the relevant perimeters by pressing the ON button in the Machines, Production categories and Perimeter tabs. Do not forget to save your selection.

Configuration on the tablet
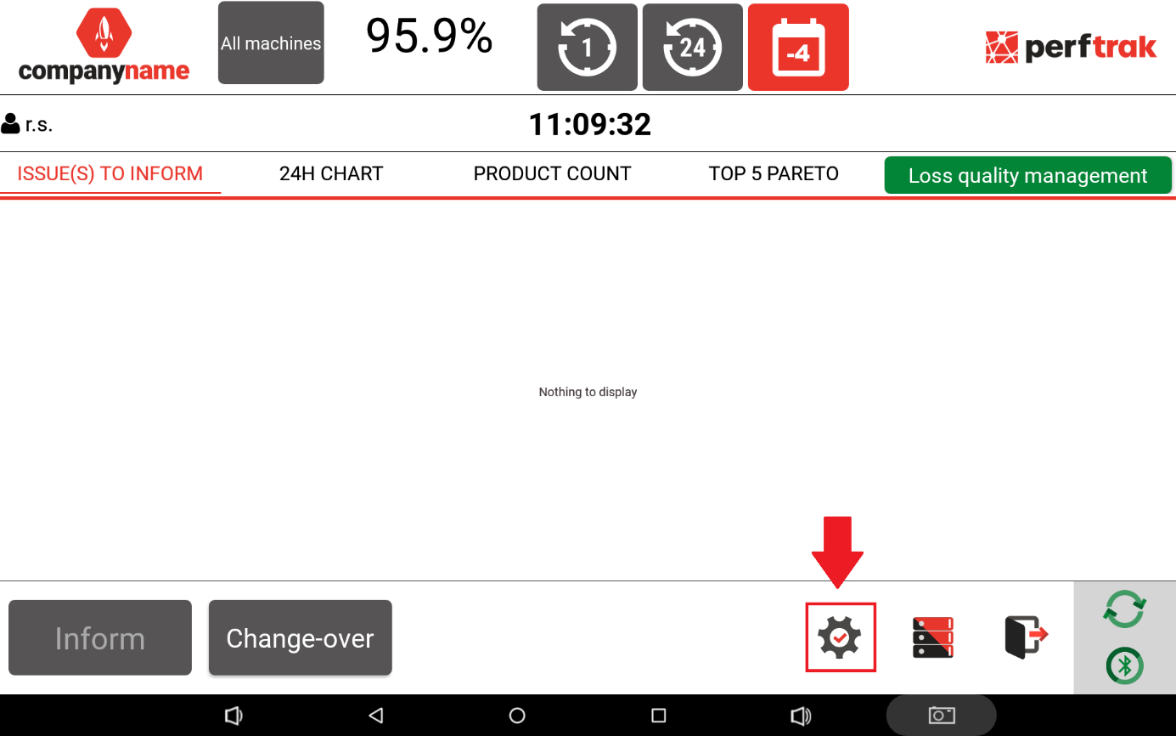
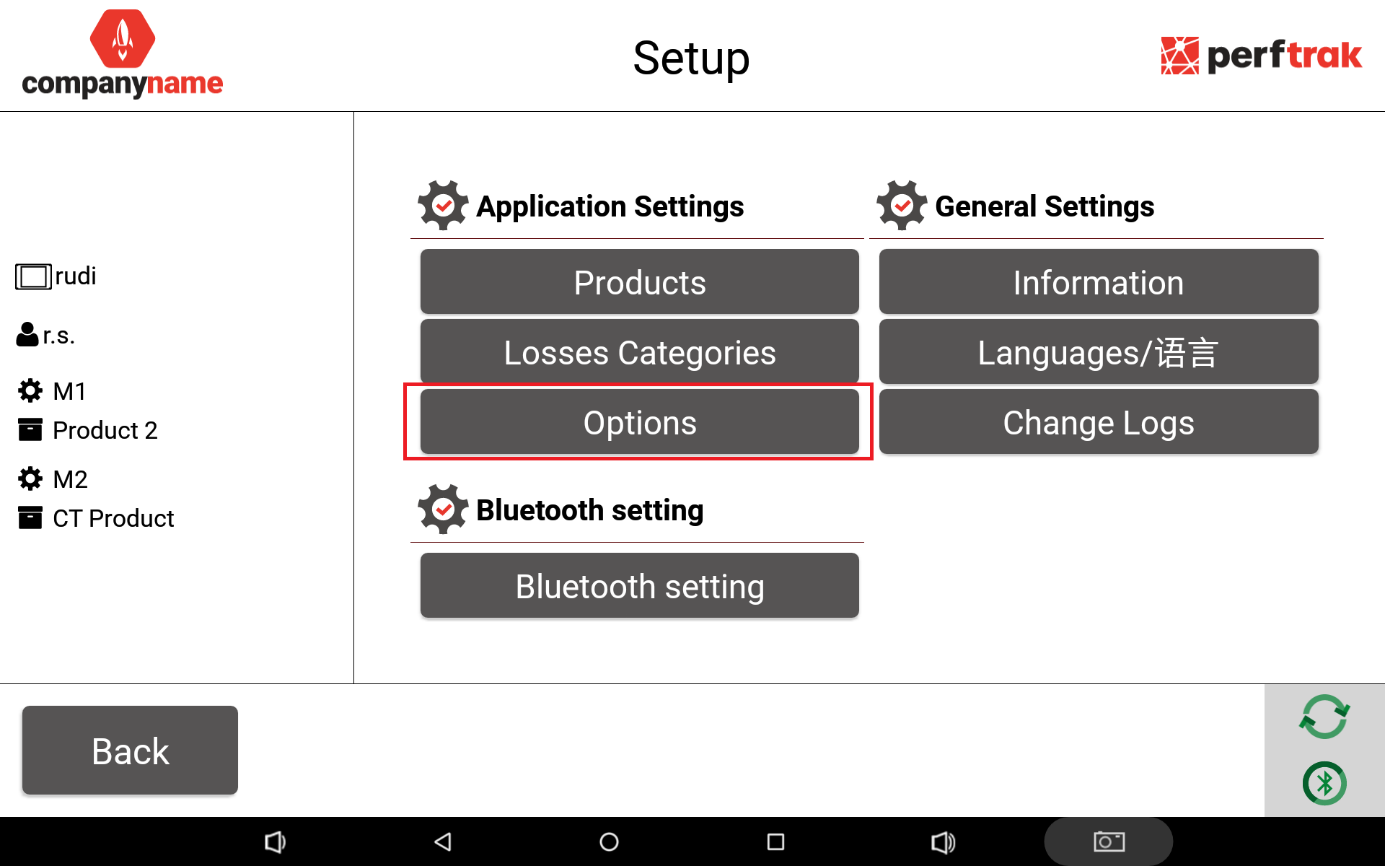
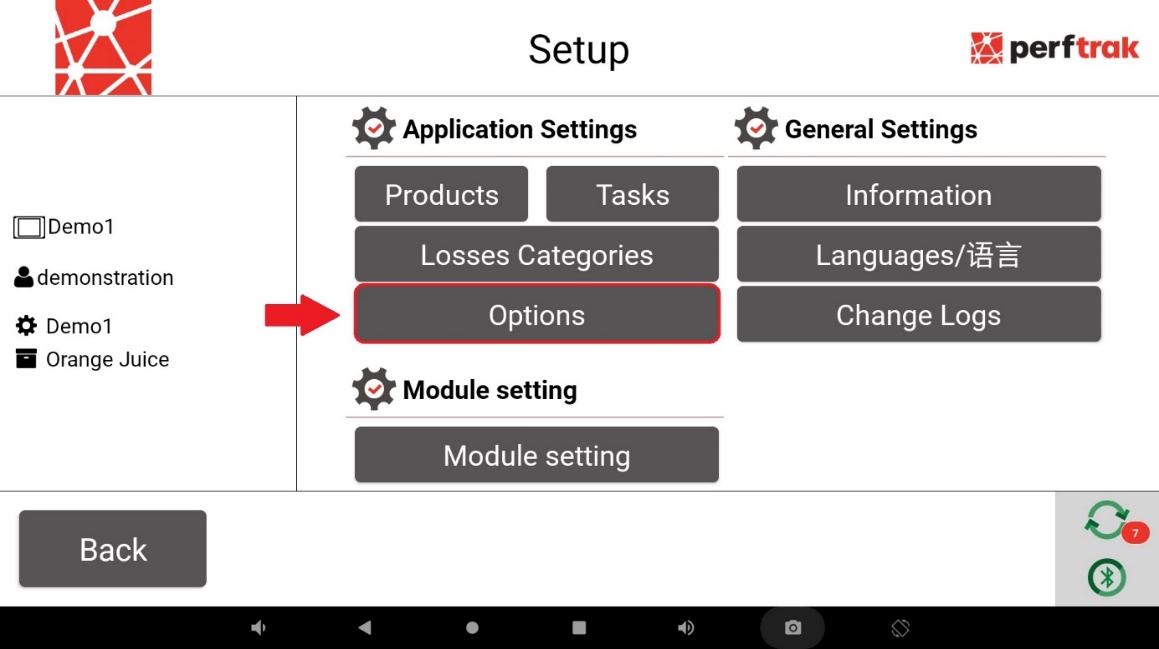
Once the tasks are configured on the platform, go to Settings using the cogwheel icon and click Options.
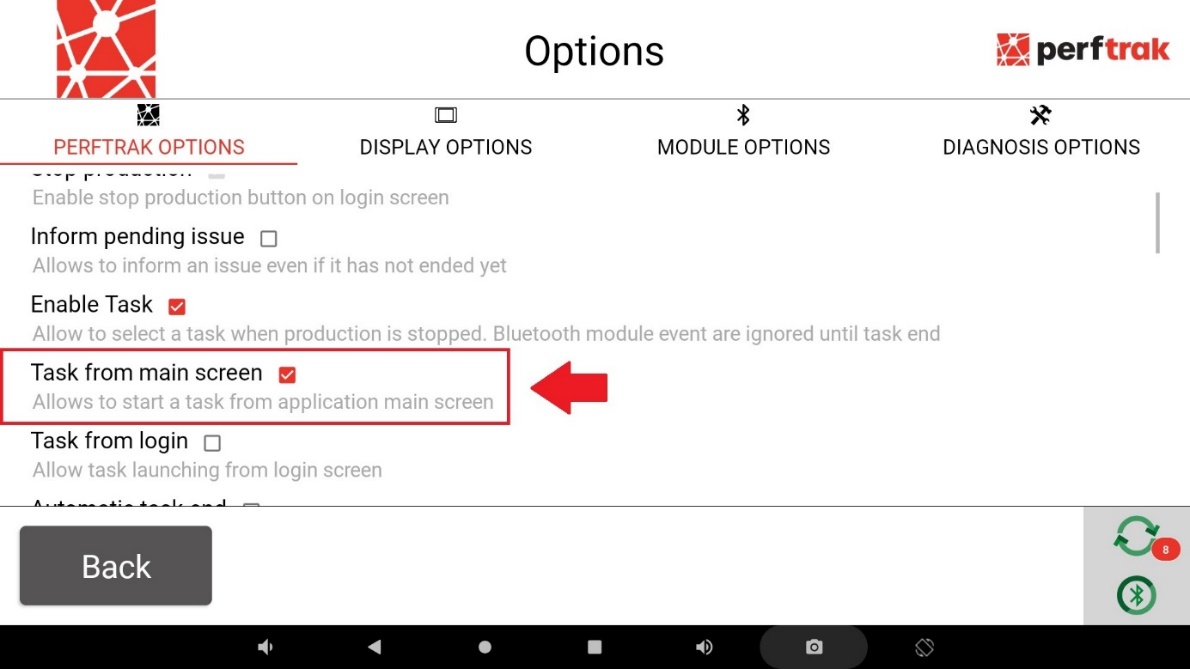
In the PerfTrak options tab, tick the Enable Task box.
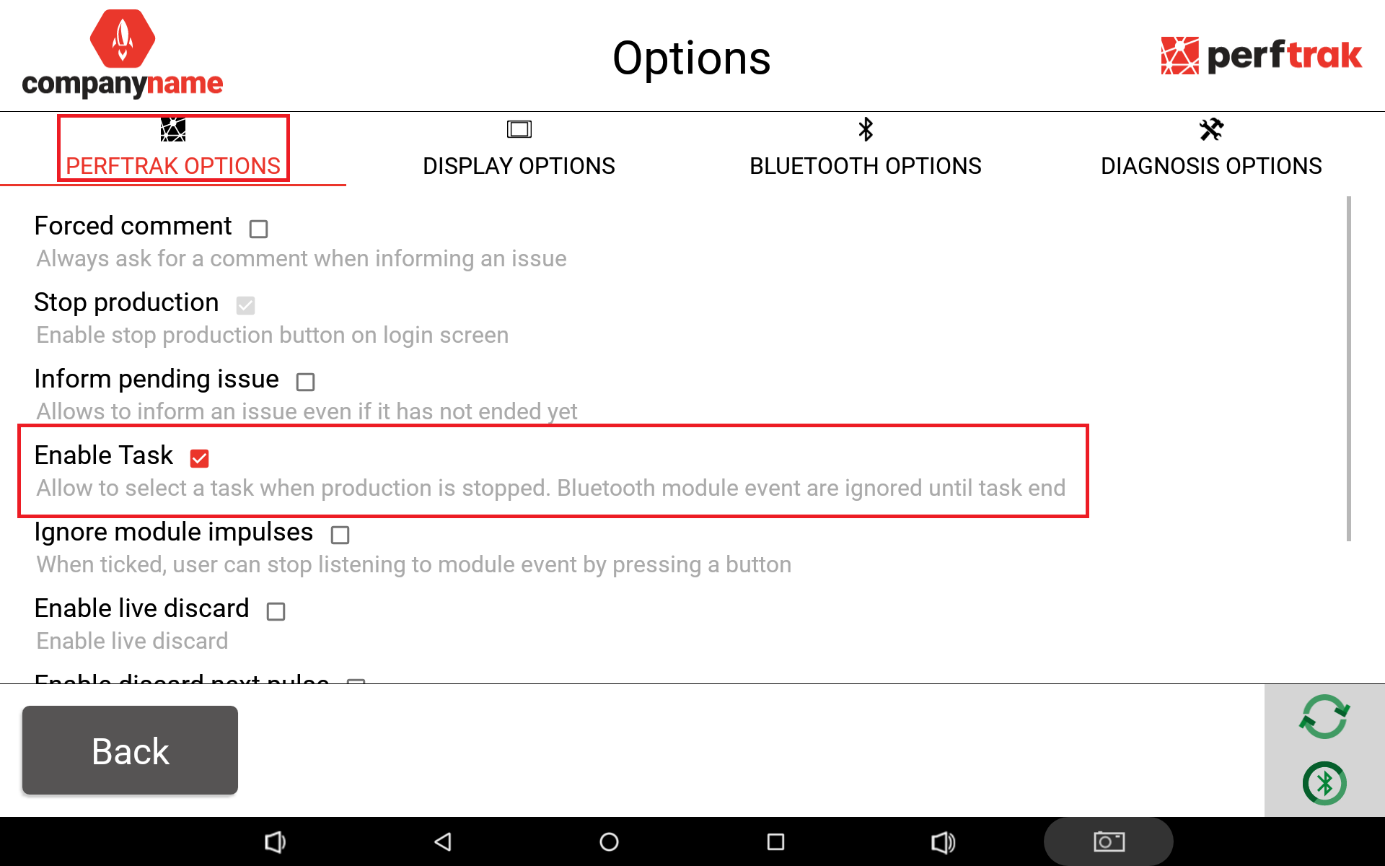
Note: as indicated on this screen, the module events are ignored for as long as a task is running.
Starting a task
To start a task, log out using the button at the bottom right of the main page, then press Stop production.
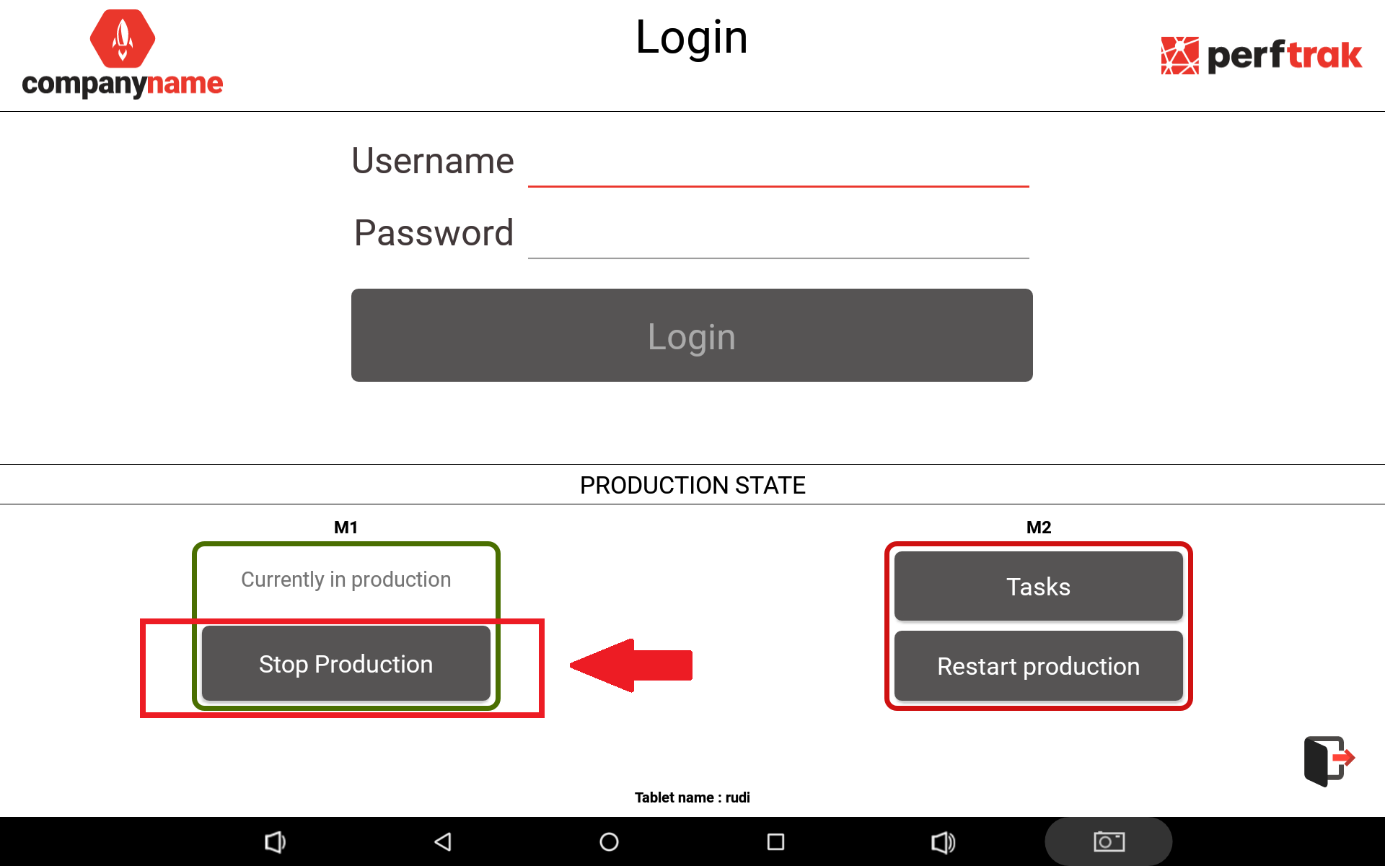
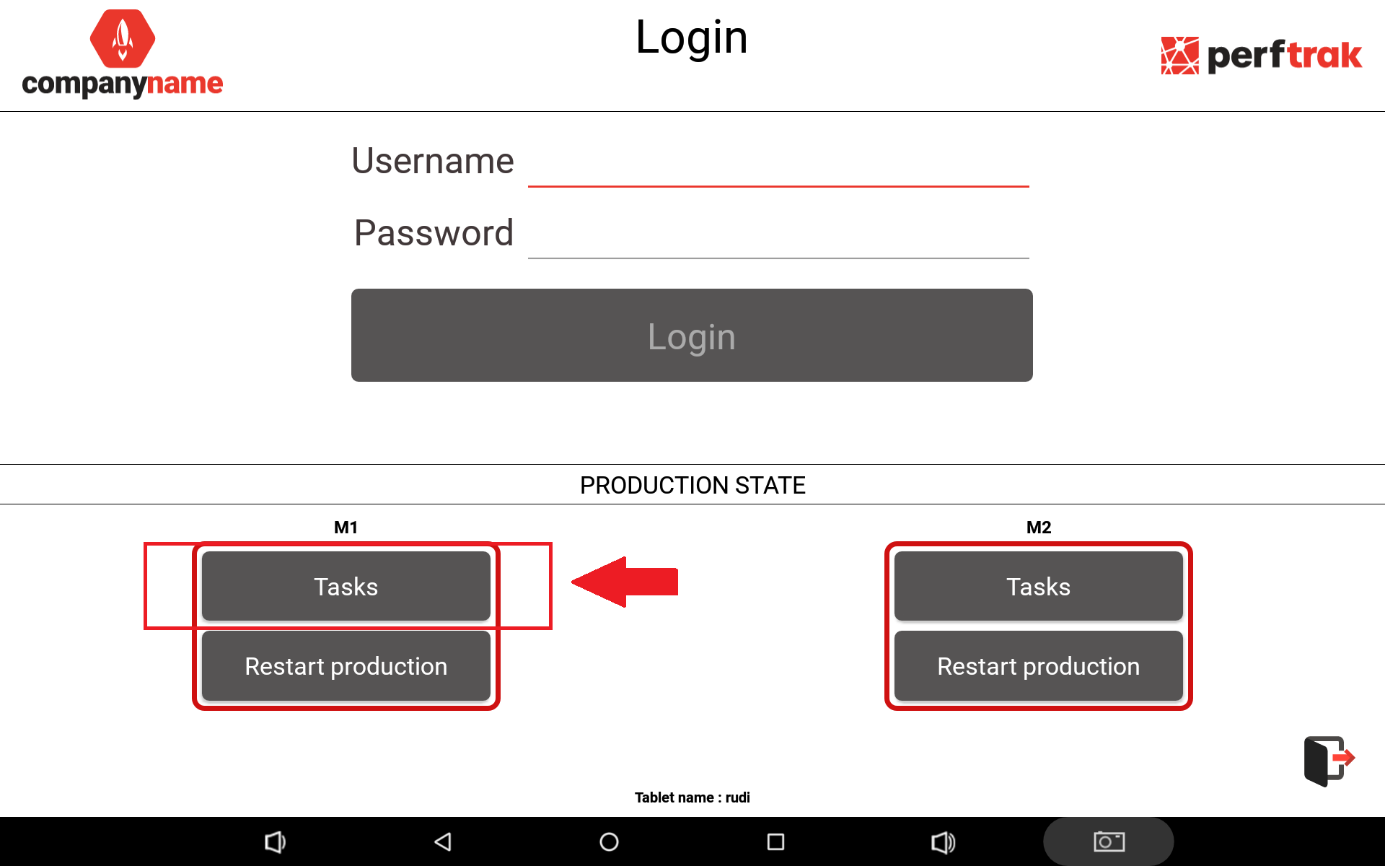
Select the Tasks tab, then the corresponding task. A countdown starts, based on the theoretical time defined beforehand.
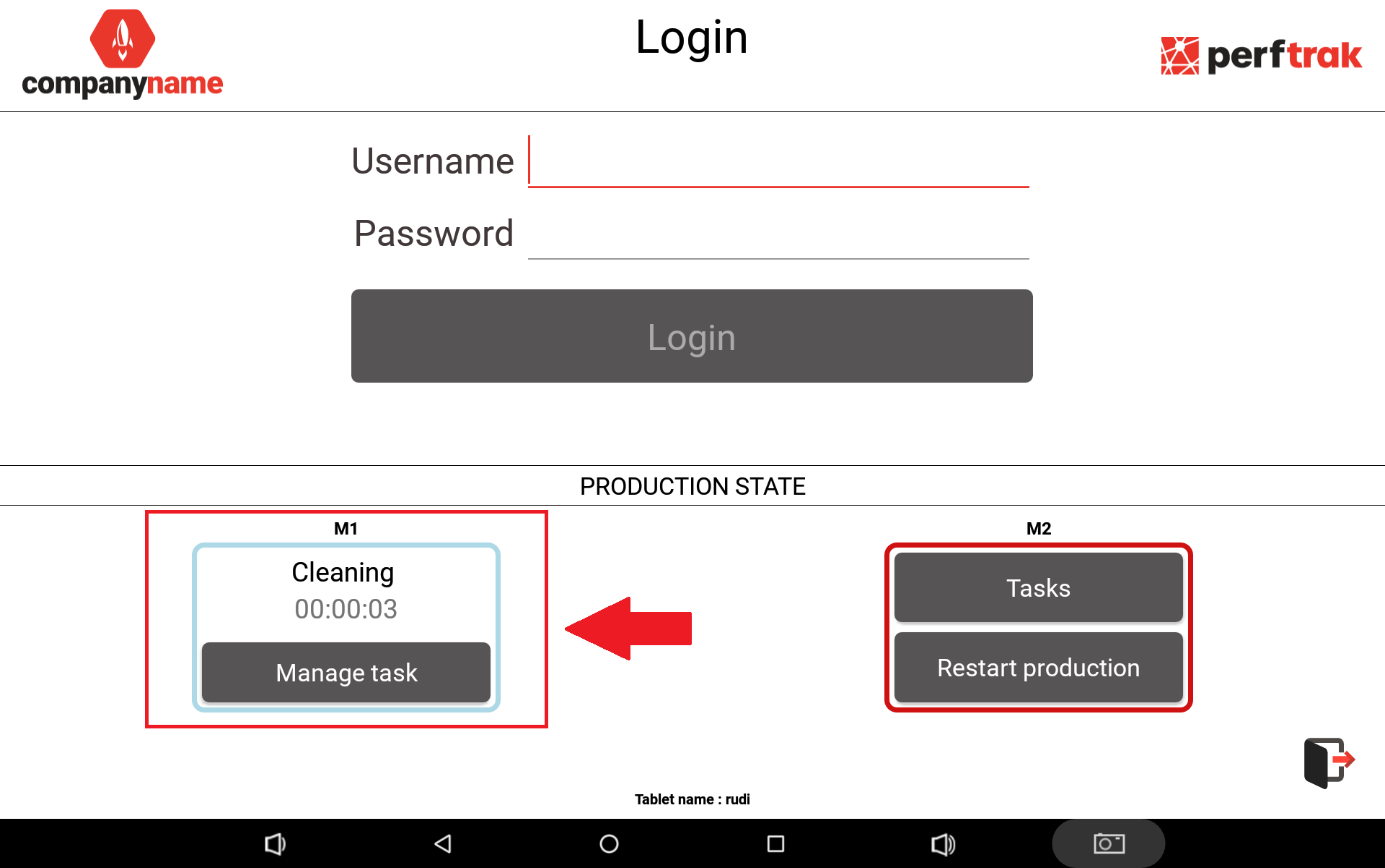
Once the task is complete, press End Task.
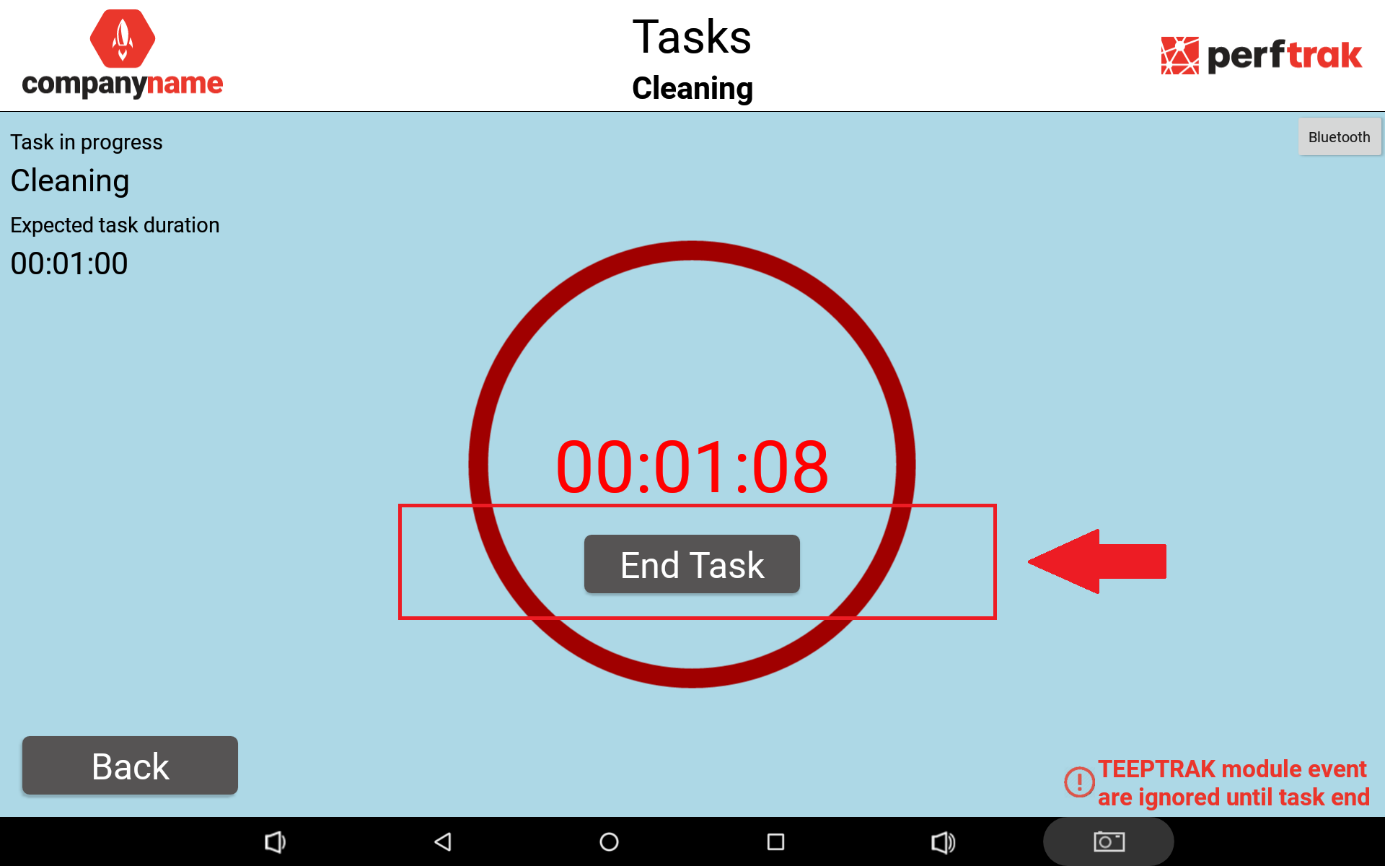
If the time needed to complete the task is equal to or shorter than the theoretical time, then, when you reconnect to the main interface, the completed task is automatically informed under the level 1 and level 2 loss categories defined during the task configuration.
If the time needed exceeds the theoretical time, the countdown turns red and displays the time exceeded. When you reconnect to the main interface, the completed task is likewise automatically informed under the level 1 and level 2 loss categories defined during the configuration.
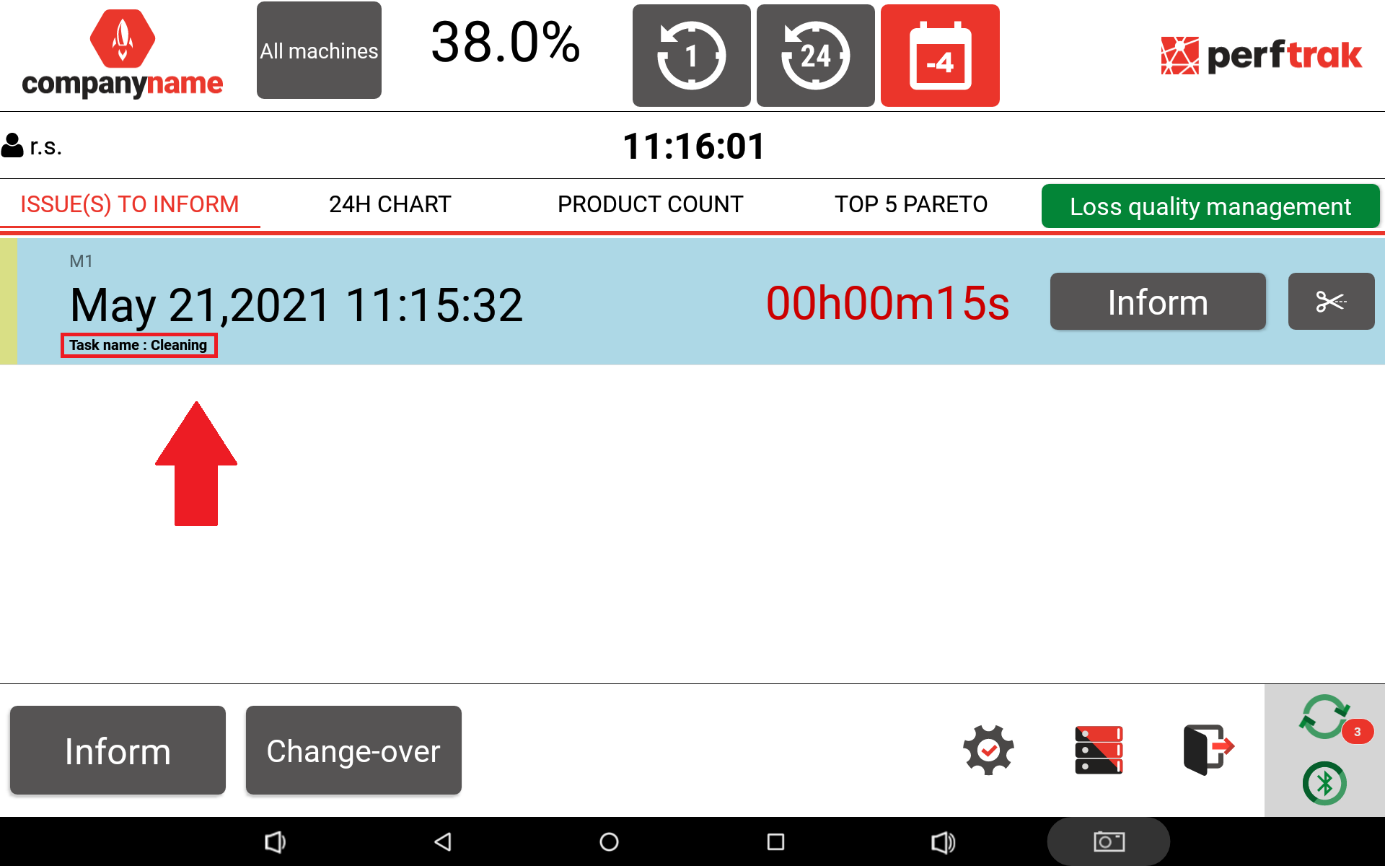
The exceeded time — 15 s here, highlighted in red — has to be informed according to your loss tree.
Displaying the Tasks button on the main page
From the tablet settings, under Options then PerfTrak options, you can enable the display of the Tasks button directly on the main page of the application.
To display the task selection button on the lower bar of the main screen, tick the Task from main screen option.
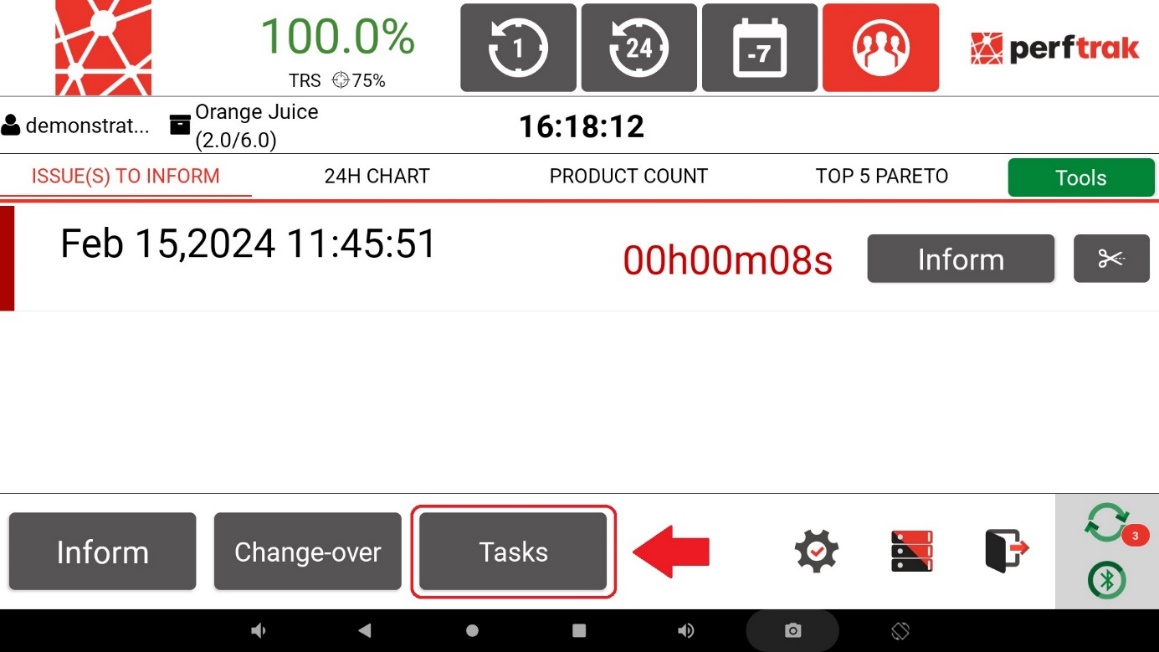
The task selection and launch button is then displayed as shown below:
Application behaviour when starting a task
A downtime before and after starting the task
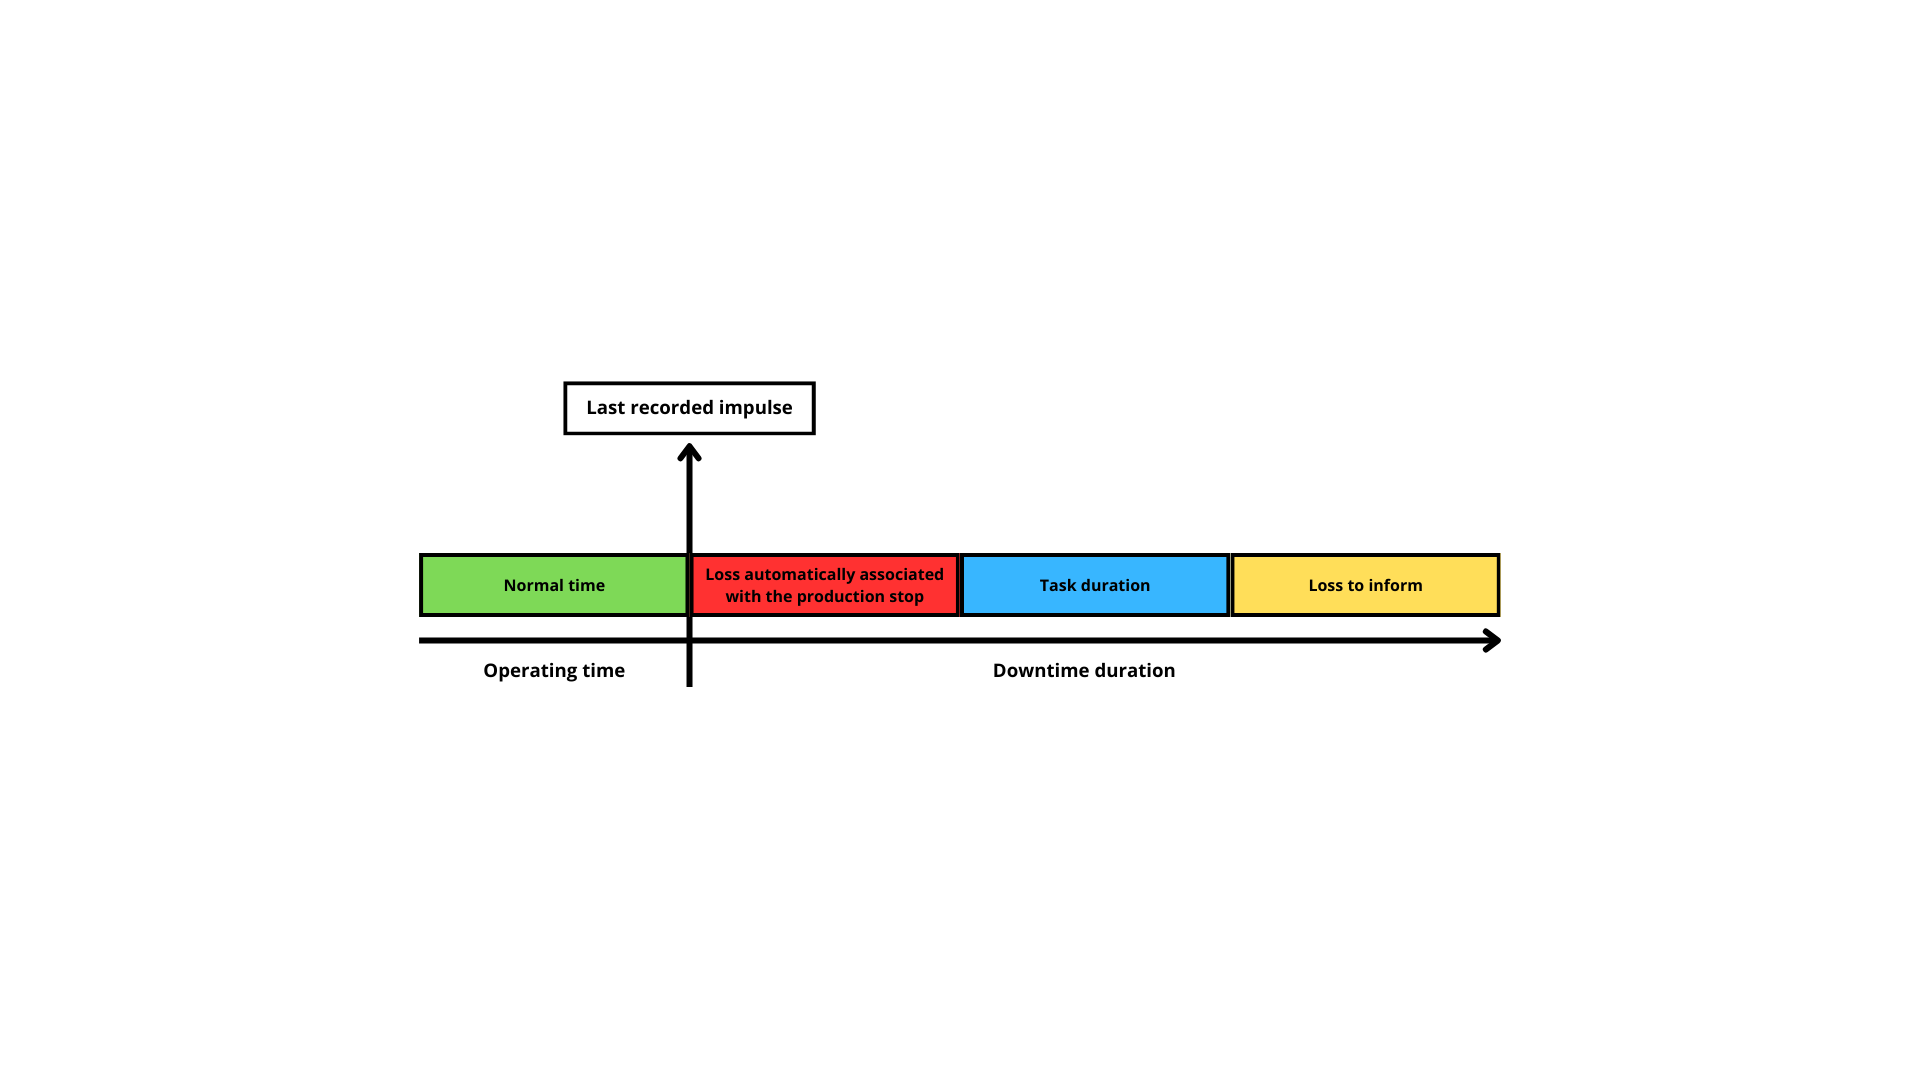
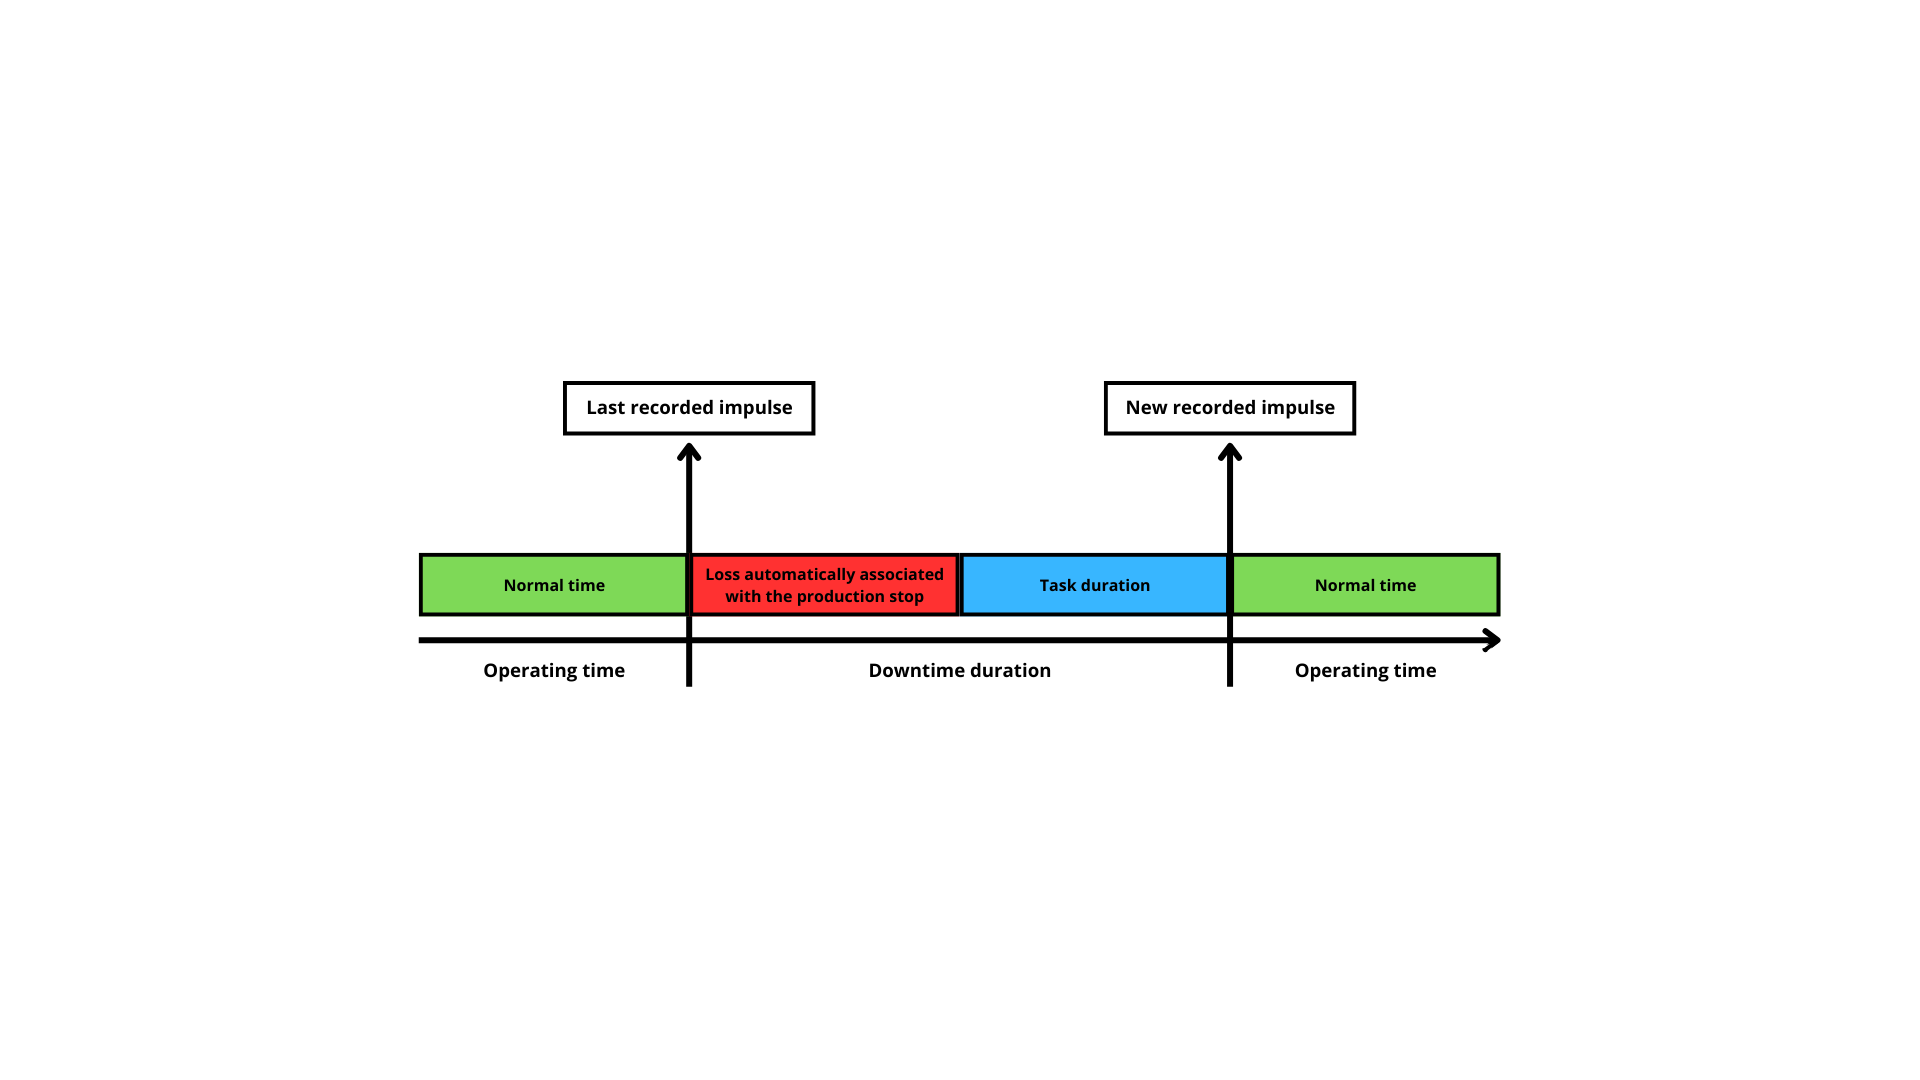
The time between the last recorded impulse and the start of the task is automatically informed with the title chosen for the production stop — that is, the loss selected when using the Stop production button.
If the stop continues beyond the time allocated for completing the task, a loss to inform appears as soon as the task is finished. It lasts until an impulse is recorded, which separates the "ongoing" time from the "loss to inform" time.
A stop before and after starting the task
Provided that an impulse is recorded as soon as the task is completed, the time following the resumption of production is automatically detected as normal operating time.
Using the "inform of current loss" option
The behaviour described above remains valid.
Even though the loss preceding the start of the task has been informed manually under a title different from the one used for production stops, it is the production stop title that is applied to the loss manually selected for entry. Normal operating time follows the task, thanks to the resumption of production.
Under normal circumstances, the only way to split the duration of a loss automatically into different labels is to wait for a pulse marking the end of the displayed loss and to inform it under the corresponding label. The other way is to split an ongoing loss manually.
Manual splitting, however, does not work when a task is starting: the system automatically requalifies the duration preceding the task as a production stop as soon as the task is launched.