Path: Administration > Reference Data > Import/Export profiles
Overview
The Import/Export profiles tab lets you configure the import and export of Excel files. Its goal is to simplify the creation — through an import — of a list of new products, including all the necessary configuration information.
The key information to be provided includes:
loss qualification thresholds, to be entered manually or automatically,
product-related scopes,
coefficients,
etc.
The export buttons let you choose the type of export based on previously created profiles. This feature enables the TeepTrak platform to adapt to the formats and references of your own Excel files when importing and exporting products.
Several import/export profiles can be configured, so you can select the one that best suits the document you want to use.
An import/export profile is built on two choices:
adding or removing the fields that make up the import or export document,
selecting the position of the chosen categories (columns).
Configuration procedure
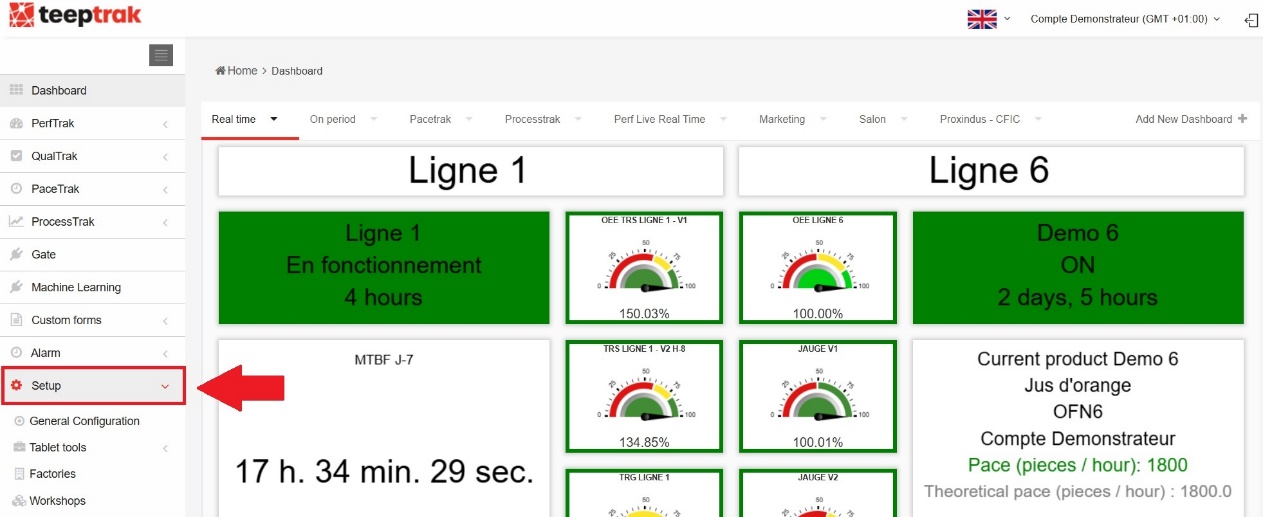
Log in to your account on the platform www.teeptrak.net (or the URL giving access to your server) and go to Administration > Reference Data > Import/Export profiles.
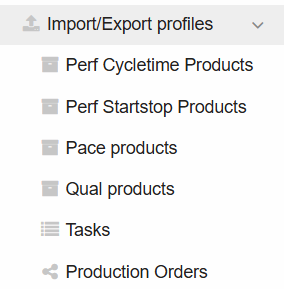
Several types of import/export appear on the screen, depending on the TeepTrak solutions you are using:
Perf Cycletime Products,
Perf Startstop Products,
Pace products,
Qual products,
Tasks,
Production Orders.
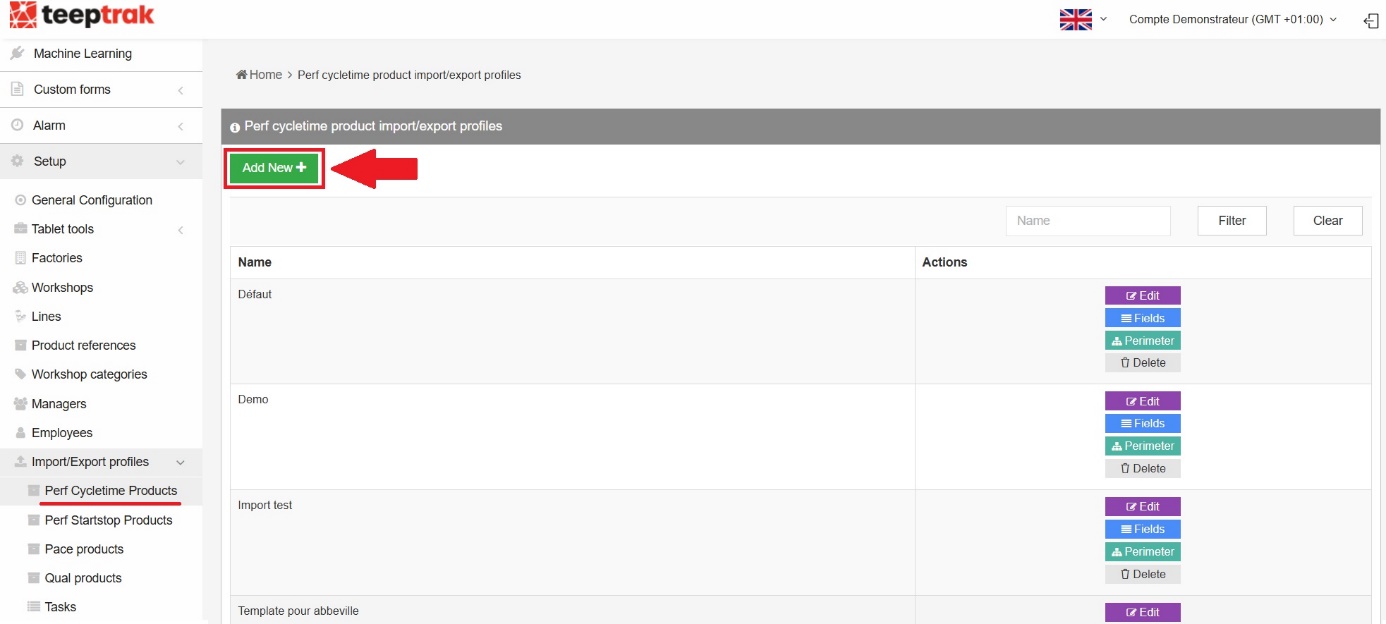
Select the import/export type associated with your TeepTrak solution and click the Add button. In our example, we select the profile associated with Cycle Time Products.
Start by giving your profile a name, click Save, then select the elements — the fields — you want to include in this profile.
Configuring the fields
Some elements are mandatory. They are marked with a double arrow:

By clicking and holding this icon, you can move a line to organise the fields as you wish.
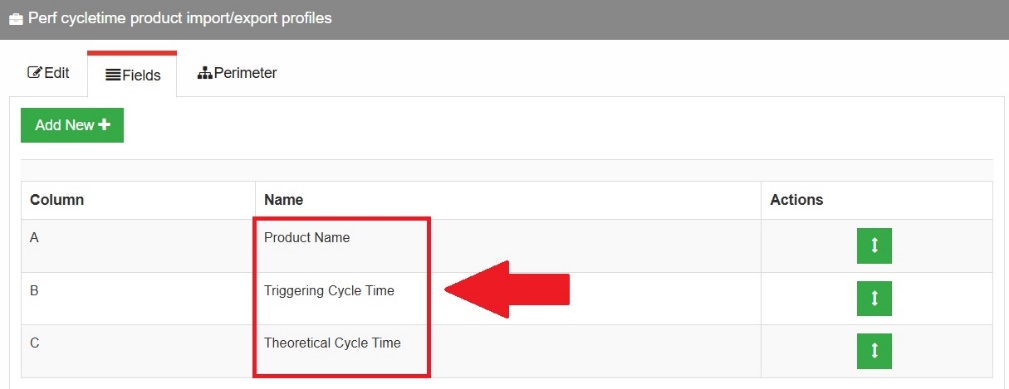
By clicking Add, you can add optional elements — up to 20 in total — which can also be moved afterwards. They come with two buttons: Edit and Delete.
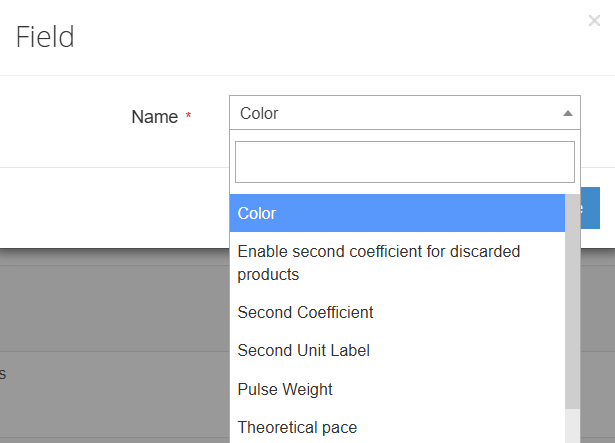
Configuring the optional fields
You can select one or several elements among:
Reference
All factories
Perimeter factories
Perimeter workshops
Perimeter machines
Assigned machines
Color
Coefficient value
Package header
Coefficient
Unit label
Enable coefficient for discarded products
Enable second coefficient for discarded products
Second Coefficient
Second Unit Label
Pulse weight
Category
Alt cycle time input type
Theoretical pace
Target TRS
Important: it is perfectly normal not to see every element listed above. Most of them only appear once specific features are enabled on your TeepTrak account. The list above simply gives a complete overview of everything that can be added when all the options are activated.
Configuration example:
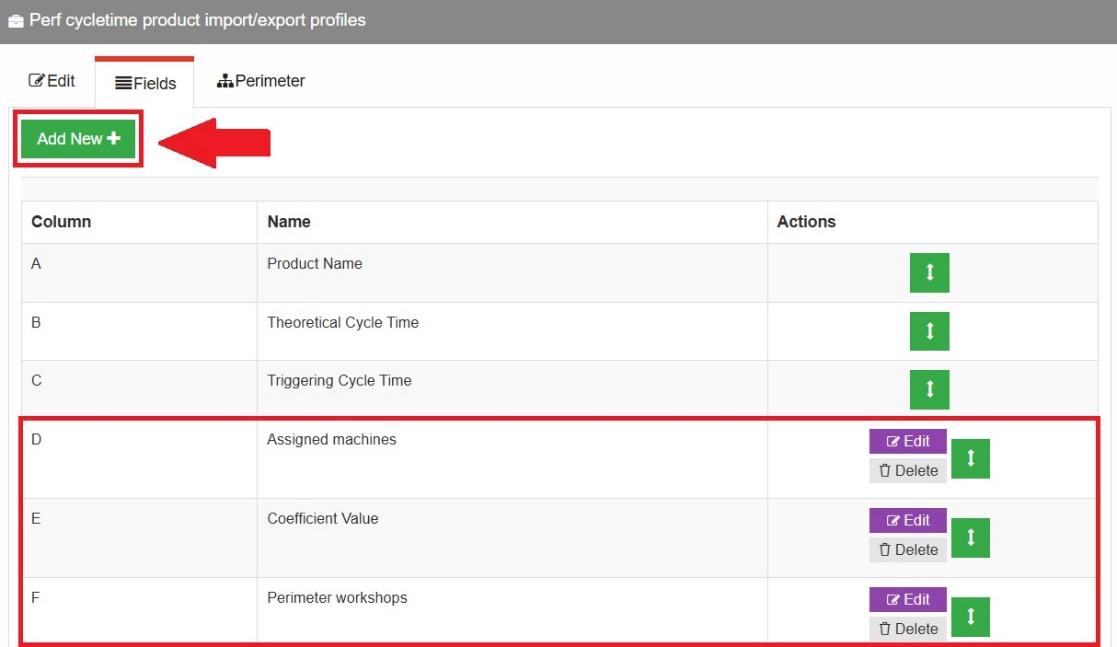
Elements A, B and C are essential and foundational, whereas D, E and F have been added as optional fields and can be ignored.
Once your fields are configured, define the scope of the profile and save your settings.
Import/export procedure
Once your import/export profile has been created, you can use it directly on the platform. The tab to use depends on the solution:
Profile type | Tab |
|---|---|
Perf Cycletime Products | PerfTrak > Perf Cycletime Products |
Perf Startstop Products | PerfTrak > Perf Startstop Products |
Pace products | PaceTrak > Worksequences |
Qual products | QualTrak > List Products |
Tasks | PerfTrak > Tasks |
Production Orders | PerfTrak > Production Orders |
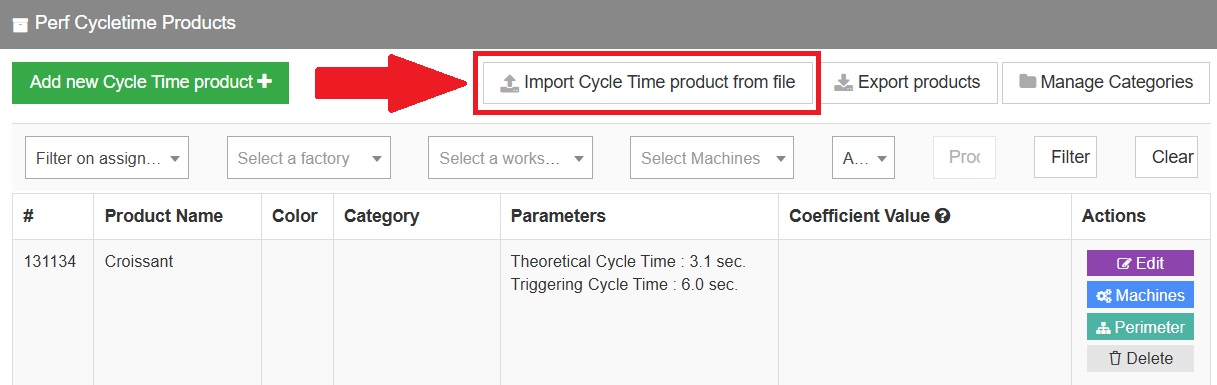
The buttons are displayed in one of two ways, depending on the page:
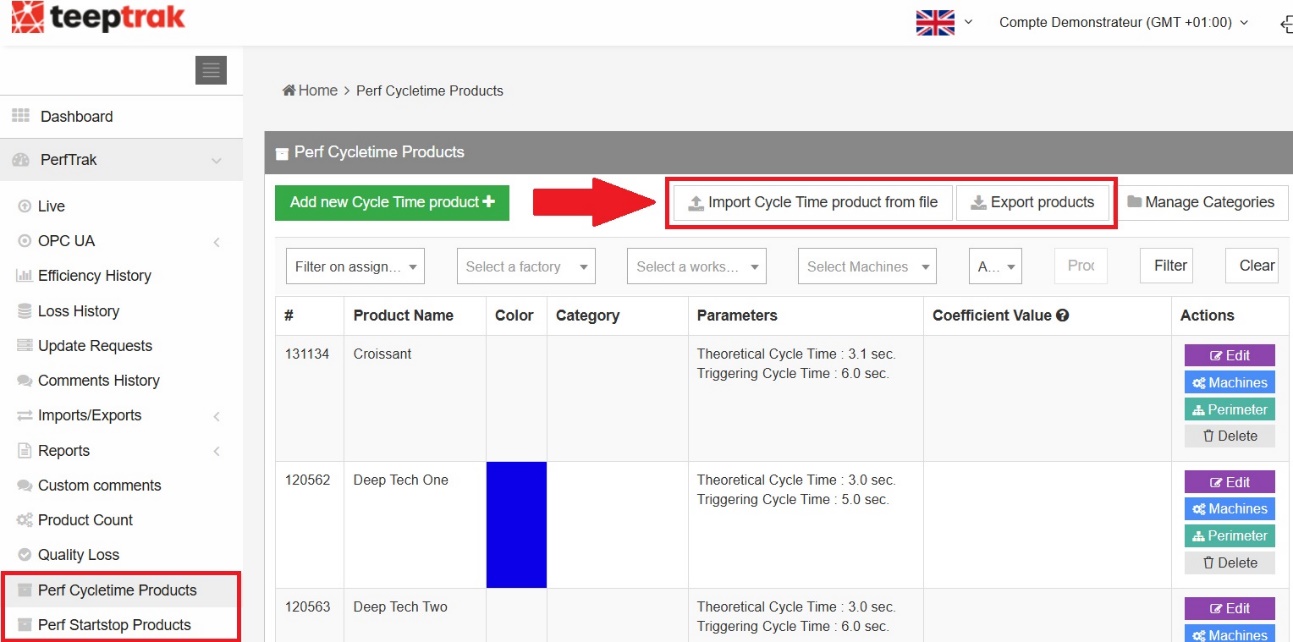
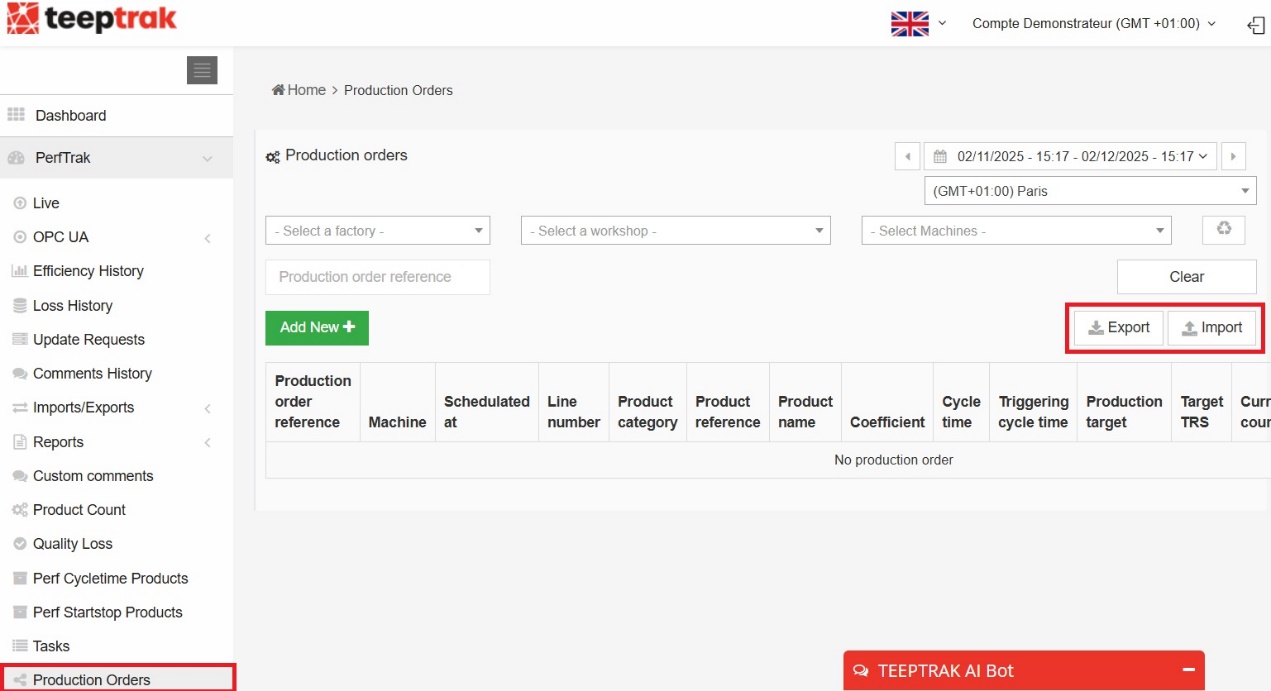
Import
Click Import and select your import profile. In our example, we select the profile "Import type" to import PerfTrak cycle time products.
Then select the file — in CSV, XLS or XLSX format — in which you configured your products, production orders or tasks.
In some cases, you also have to indicate whether you want to:
keep only imported items,
keep only imported machines,
keep only imported product references.
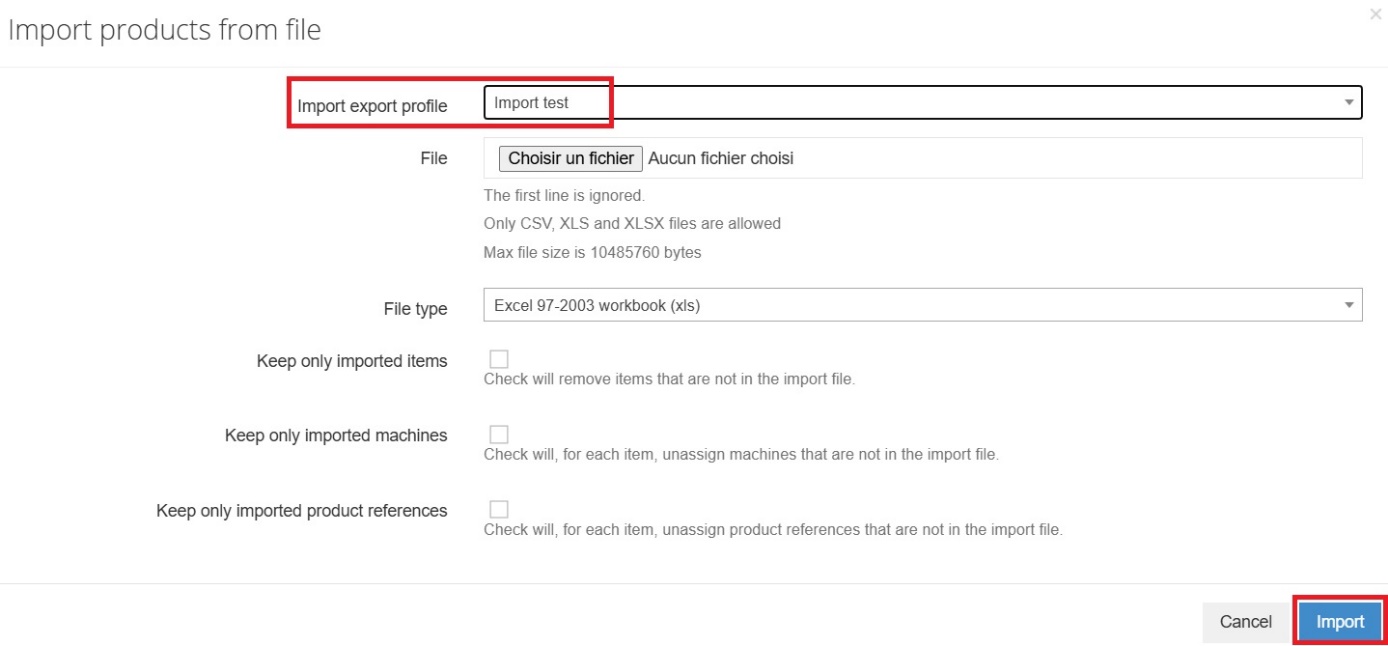
Finally, click Import.
Export
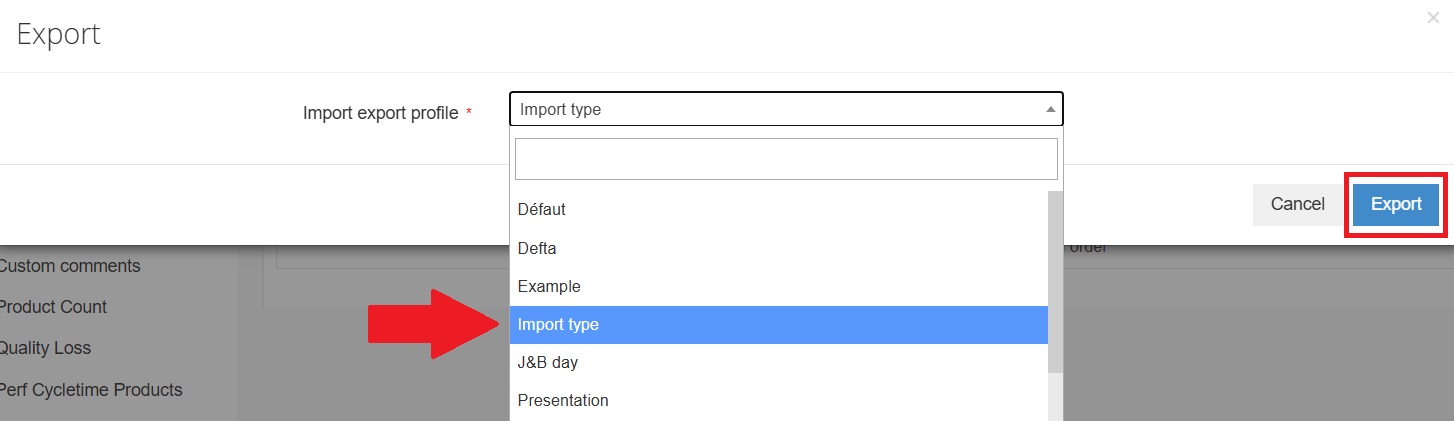
Exporting products, tasks or production orders is even simpler: click Export, choose the export profile and validate by clicking Export.
Example of an Excel file configured in "Production Orders" mode:

In this example, the fields Product name, Product reference, Machine name or loading station, Production order number, Production target, Scheduled at and Maximum time before input were selected in the field configuration of the profile, and arranged in columns A to I.
The data display logic is the same for cycle time products and for "Start & Stop" products.