Once the module and the tablet are installed, the next step is to configure the monitoring website in order to create the elements that will appear on the tablet and that will make up the "virtual factory" of your setup.
Go to www.teeptrak.net and enter the username and password provided to you by the TEEPTRAK team.
Video tutorials
1. Creating the virtual factory (the "Setup" tab)
Go to the "Setup" tab. There you will find: Factories, Workshops, Managers, Employees. Start with the factories and finish with the employees.
1.1 Create the factories and the workshops
Click "Factories", then Add. Create one or several factories matching your setup.
Click "Workshops", then Add. For each workshop, define which factory it belongs to.
1.2 Create the managers
Click "Managers" and define, for each one:
Their permissions:
The right to create sub-managers, which is useful for a multi-site account
The right to create factories, making them the local administrator of the factory
Access to the configuration: creating and viewing factories, workshops, managers and employees
Access to licenses & machines: extending a license, configuring machines
Access to cycle time or Start/Stop products: modifying, creating, deleting them
Access to loss configurations: modifying, creating, deleting a loss tree
Access to tasks: modifying, creating, deleting them
Their perimeter: define which factories, workshops or machines the manager will have configuration rights for.
1.3 Create the employees
Click "Employees" and fill out the form. For each employee, remember to:
Set a dedicated username and password.
Assign them to one or several workshops.
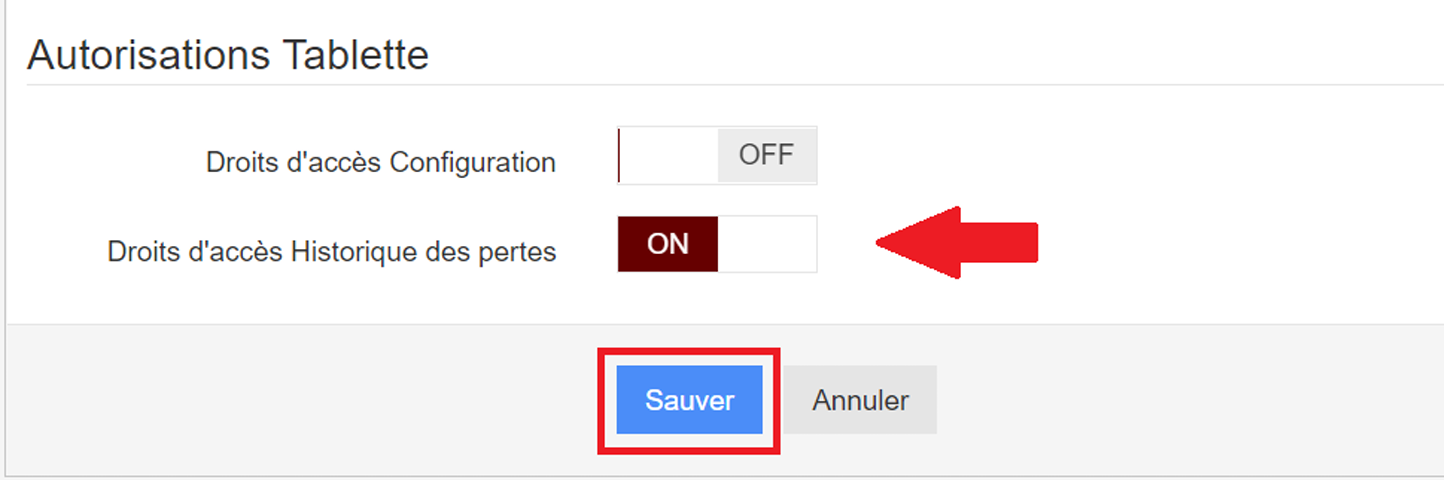
Set the Setup access rights, which allow the tablet's settings and options to be modified.
Set the History access rights, which allow downtime causes to be modified retroactively.
Reminder (France): tracking performance per operator is prohibited. We recommend creating "operator station" accounts, named after the workstation concerned.
1.4 Configure the shifts (optional)
If you want to track performance by team:
In Setup > Shifts, click Add.
Enter a starting date for the schedule, for example the start time of the next morning shift.
Enter the total number of days of the standard schedule. The schedule then repeats automatically in a loop.
In the "Work Shifts & Schedules" tab, create the shifts in the right-hand column, then add them in chronological order in the left-hand column. Assign a duration to each shift and save.
To link the schedule to a machine: go to Licenses & Machines > Machines, click Edit, then select the schedule under "Shift Configuration".
Note: analysis by shift is only available in the automatic reports.
2. Creating the products
In the PerfTrak tab, click "Products" to declare all the products of the machine to be monitored.
2.1 Cycle time products
Configure:
The theoretical cycle time, which must be higher than 1 second. Below that, contact the TEEPTRAK team.
The triggering cycle time, above which the operator must inform a stoppage.
Optionally, a coefficient and a product header name, for counting by batch, package, pallet, and so on.
2.2 Start/Stop products
Configure:
The time below which stoppages are not recorded — non impactful stoppages. The default is 1 second.
The triggering stoppage time for alarms.
Tip: you can import a list of products from a CSV file. A CSV example is available at the top of the Products tab.
Important: for each product, go to the "Perimeter" tab to select the factories, workshops and machines where the product will be used.
3. Creating the loss trees
In the PerfTrak tab, click "Loss Configurations", then Add.
3.1 Name the tree
Give it a name related to the type of equipment, for example "Machining Tree 1".
3.2 Create the cause categories
In the "Tree of loss types" sub-tab, create the level 1 and level 2 cause categories. The categories in the left-hand column are non-editable and serve as the reference for calculating the indicators:
Loading: planned downtime
Availability: unplanned downtime such as breakdowns, waiting, defects, change-overs
Performance: micro-stoppages and slowdowns
Quality: losses related to product quality
The tree follows the main principles of the AFNOR standard, but you are free to adapt it to your own standards.
3.3 Configure the automated causes
In the "Configuration" sub-tab of the tree, define the level 2 losses that will correspond to:
Speed Loss (SL)
Overclock (OC)
Plant Shutdown (PS)
These causes are automated and will not have to be informed by the operator. A dot — SL, OC or PS — appears to the right of the selected loss in the tree.
3.4 Define the tablet indicators
Click the "Performance indicators tablets" tab. Define a name for each indicator, as well as its perimeter, that is, the categories to take into account.
3.5 Define the perimeter
In the "Perimeter" tab, define the areas concerned by this loss tree.
4. Configuring the assignments
Once all the elements have been created, they need to be linked together so that the analysis tools can consolidate the information across several levels.
4.1 The "Assign" tab
Click "Tablets to Workshops": assign each machine to a workshop by dragging it under the corresponding workshop name.
Click "Employees to Tablets": specify which machine or machines each operator account works on.
4.2 The "PerfTrak" tab
Click "Products to Machines": assign the products to their machines.
Click "Machines & Loss Trees": assign each machine to its loss tree.
The website configuration is now complete. You can move on to finalising the configuration on the tablet.