Path: PerfTrak > Analysis & Monitoring > Quality Loss
This procedure guides you through reporting your scraps, both on the supervision platform and on the tablet, and presents the various reporting methods.
1. Declaring scraps on the platform
Go to PerfTrak > Analysis & Monitoring > Quality Loss. Then select the factory, the workshop and the machine from which you want to declare scraps.
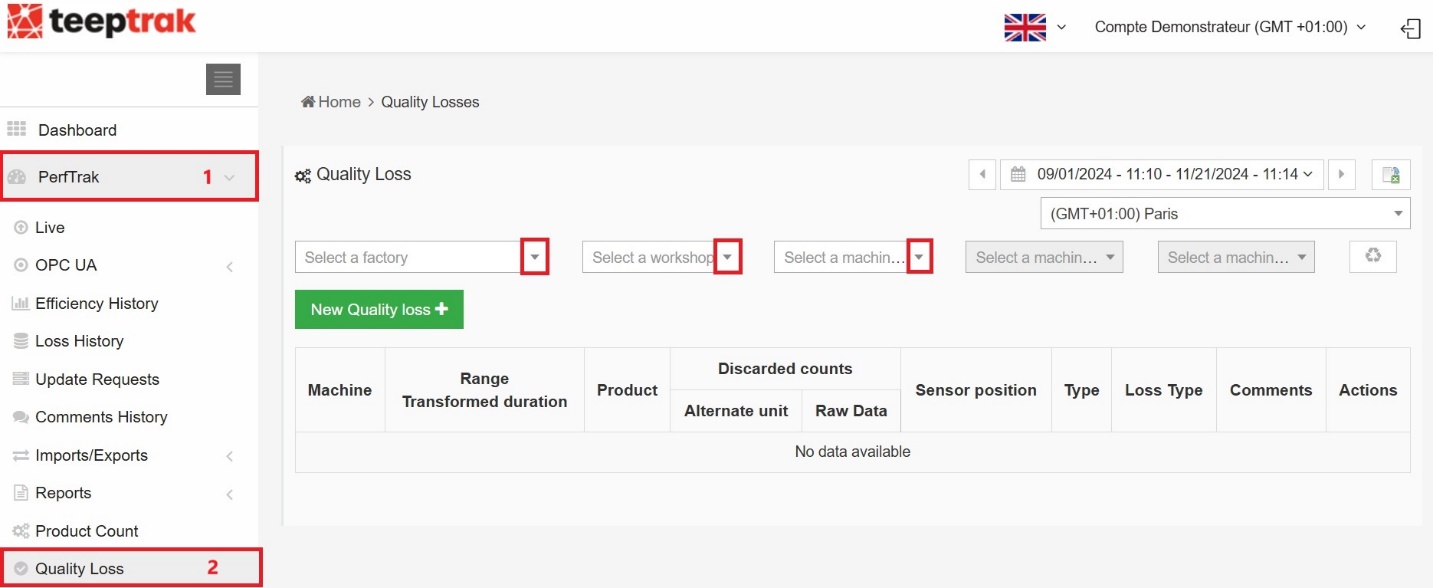
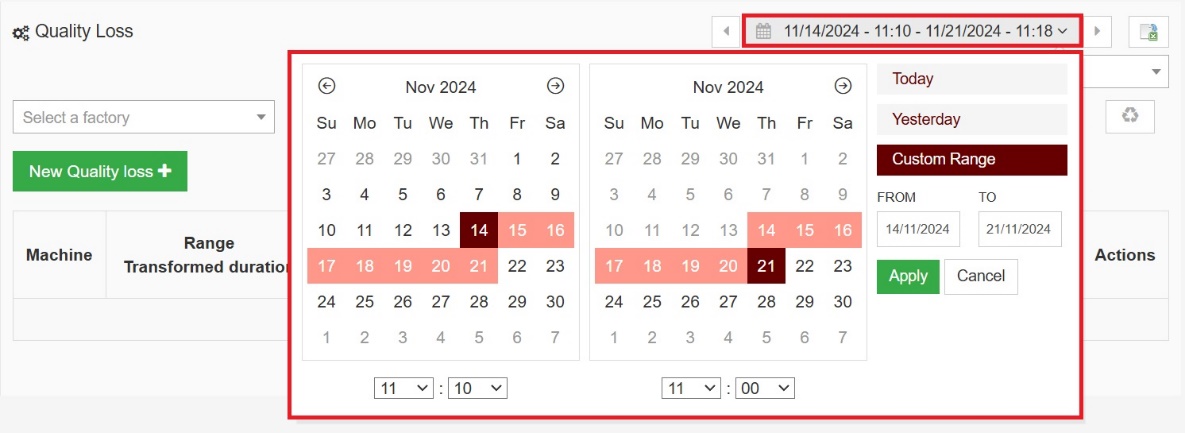
Choose the time range you want to work on.
Once all these elements are configured, click New Quality loss, then select the machine and the product for which you want to conduct your scrap session.
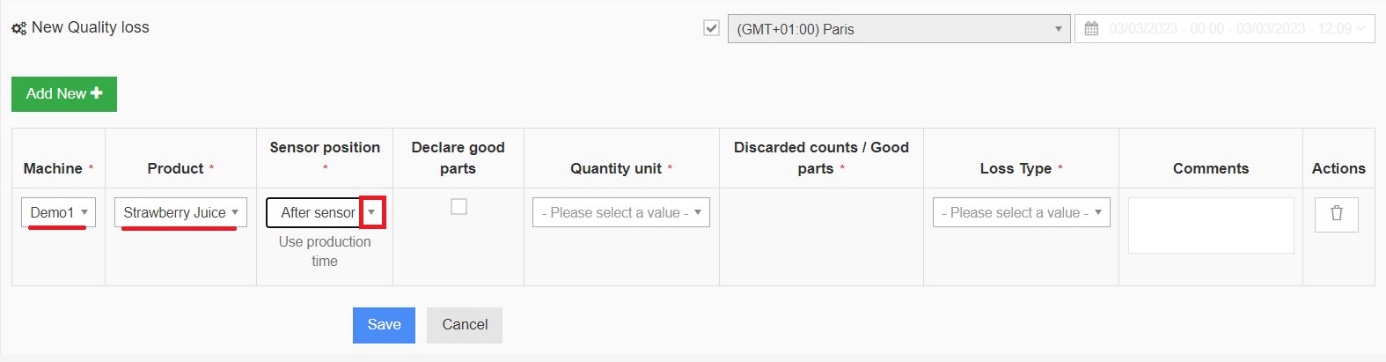
Sensor position
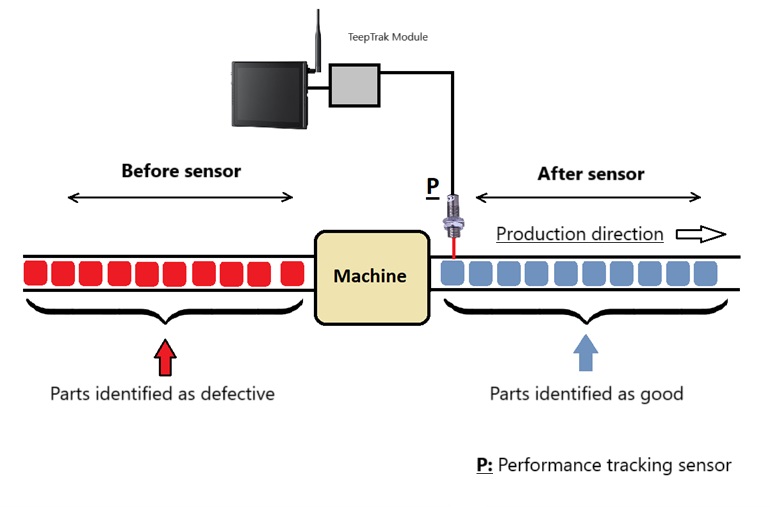
The third section lets you declare the scraps as occurring before or after the sensor:
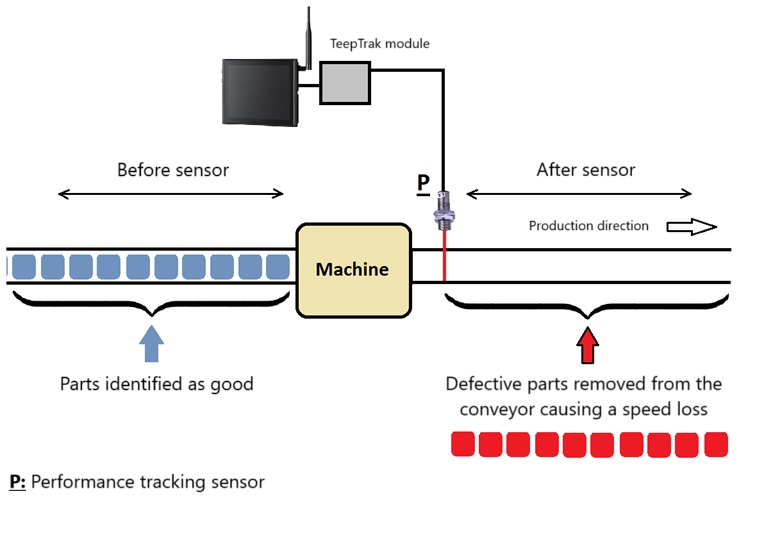
After the sensor — the status of the products already counted by the system changes from "good" to "scrap", based on the normal production time.
Before the sensor — a new product is added directly into the system as scrap, based on the available under-speed time.
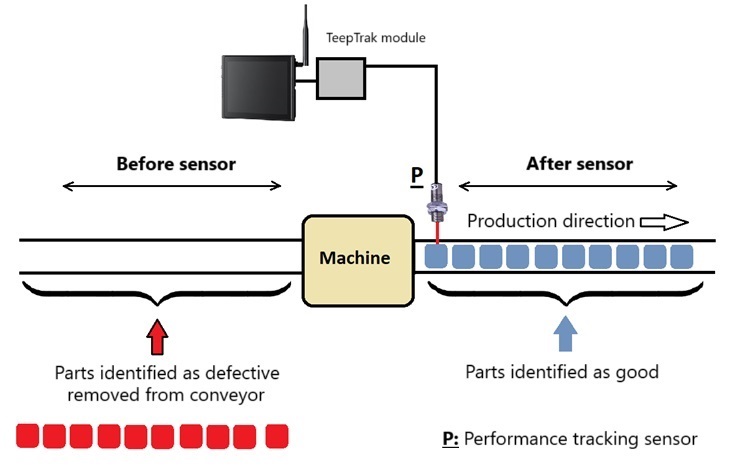
Why declare before the sensor? This feature lets you anticipate the classification of defective parts before the sensor detects them. When defective parts are identified and removed from the conveyor before passing in front of the performance sensor, their removal creates a gap in the product flow. The system interprets that gap as under-speed — a low signal recorded beyond the standard threshold.
To reclassify that time — normally identified as under-speed — into a quality loss, the feature lets you choose which type of time, normal production time or under-speed, to use for managing your scraps.
Declaring the good parts
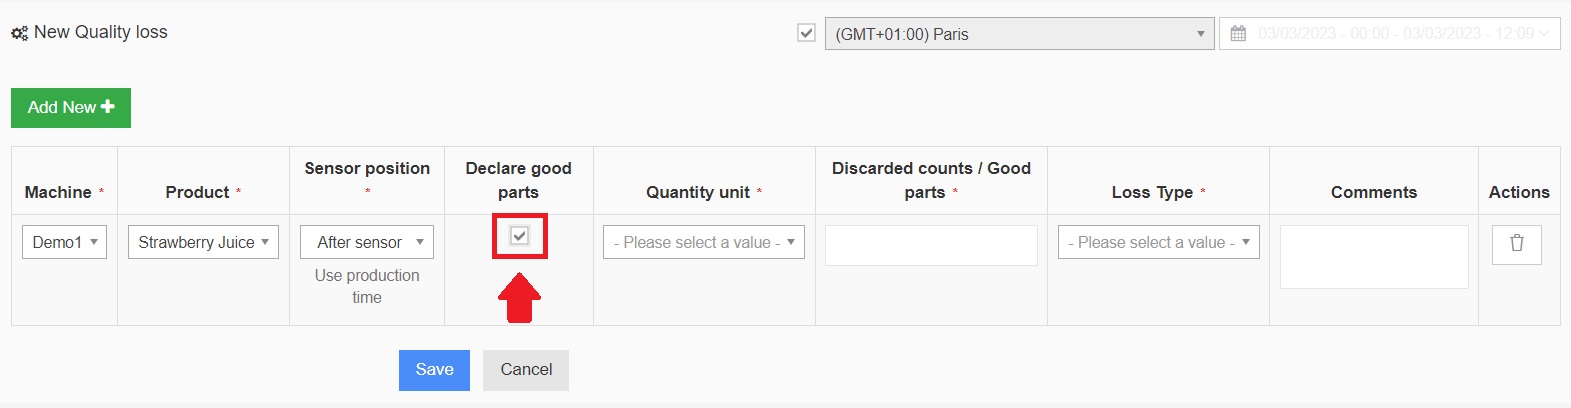
The fourth section, Declare good parts, lets you report the number of good parts instead of the defective ones. The system then computes:
Total parts produced − Number of good parts = Number of defective parts (scraps)
If your machine produces several products per pulse, you can choose whether to report in pulses or in individual products.
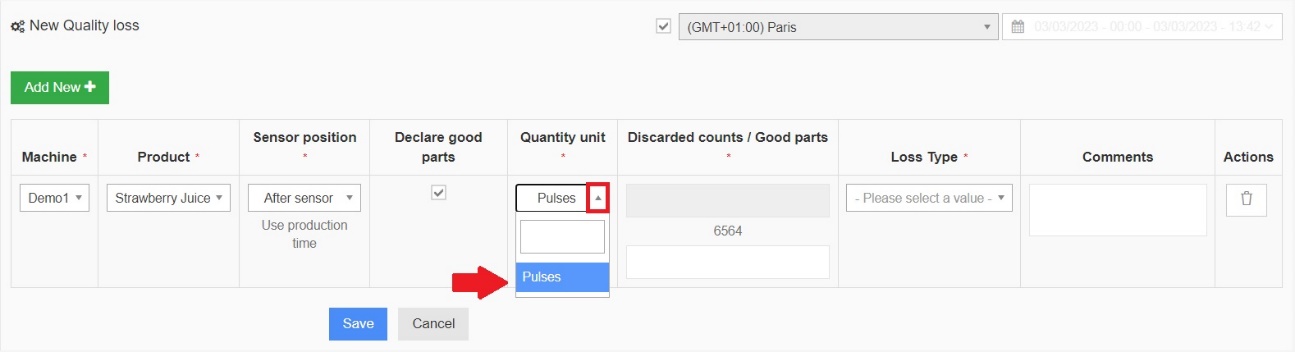
Enter the quantity of products you identify as good; the remaining ones are counted as scraps.
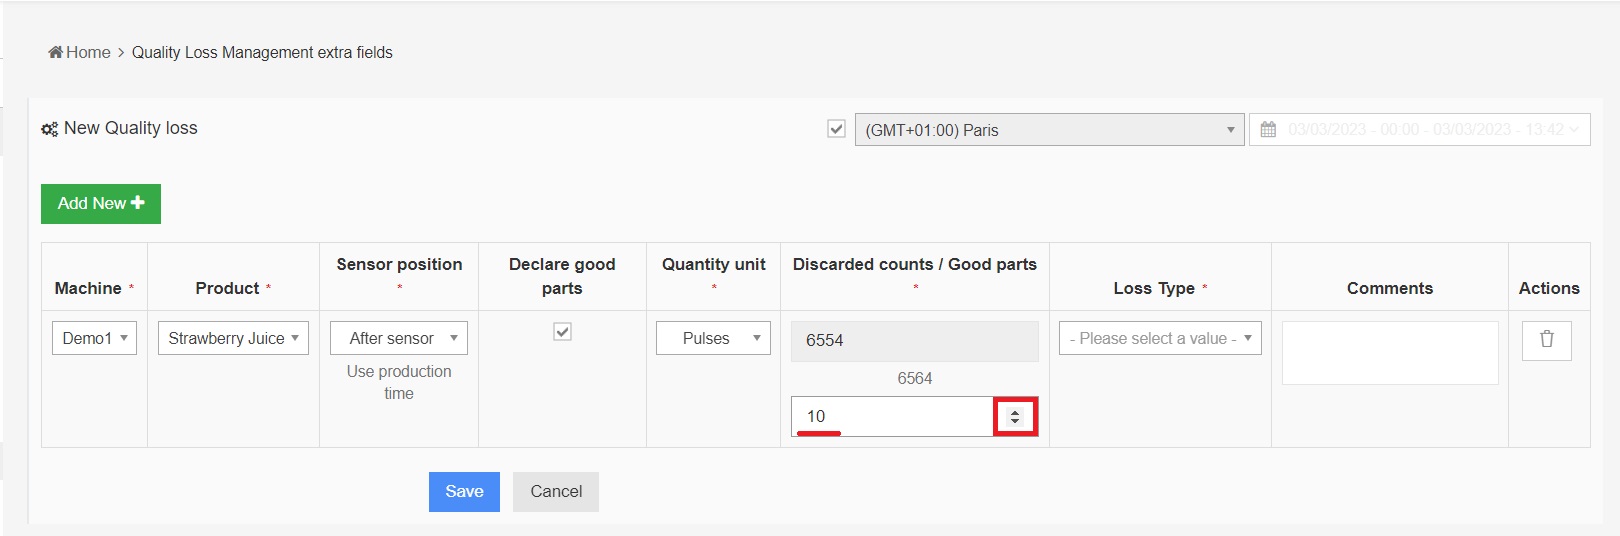
Finalising
Select the underlying cause of the scrap — the loss type associated with it.
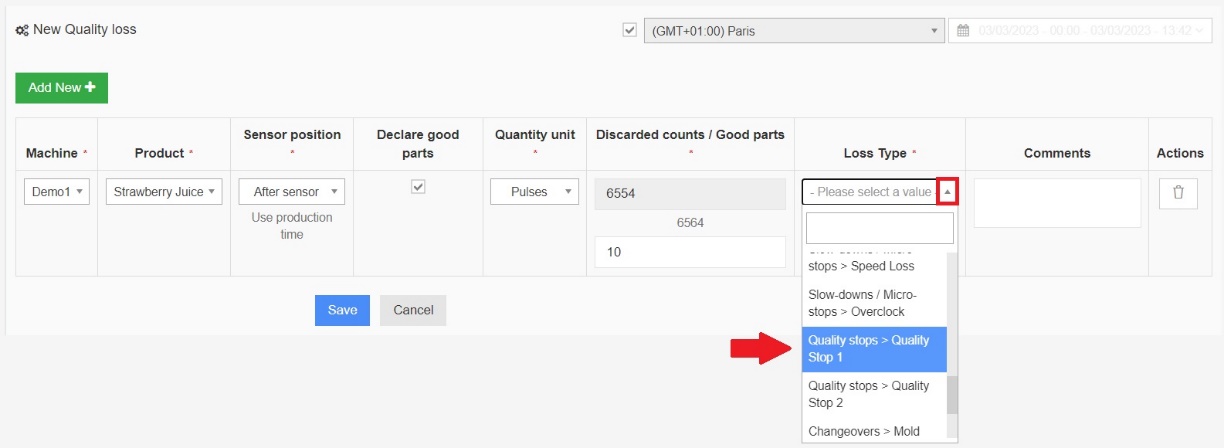
You can finally add a comment, then save.
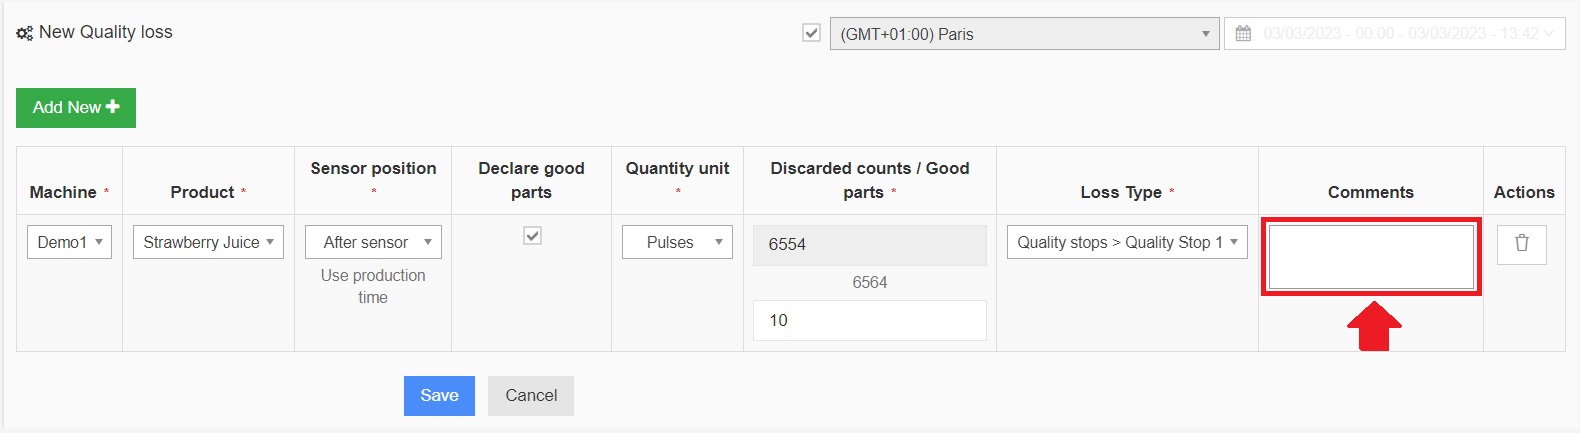
2. Scrap logic based on time
The portion of production identified as scrap is allocated to the beginning of the selected interval, not to the point where it was entered.
Practical example. A machine has operated for 4 hours, from 12 PM to 4 PM, without recording any loss — 100 % normal time. The operator assigns 1 hour of production as scrap: that hour is converted into a quality loss and allocated between 12 PM and 1 PM. The remaining three hours, from 1 PM to 4 PM, stay classified as normal time.
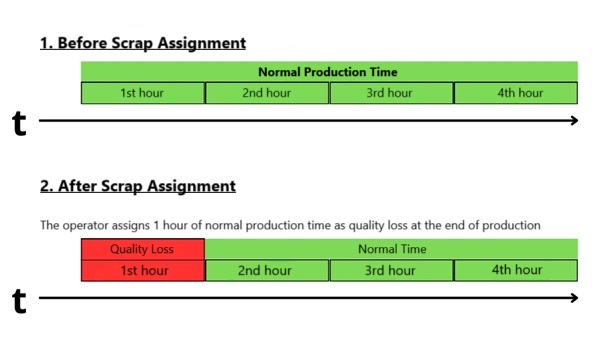
It is therefore the first hour of production that is affected, even though the scrap assignment occurred at the end of the interval.
3. Tablet configuration
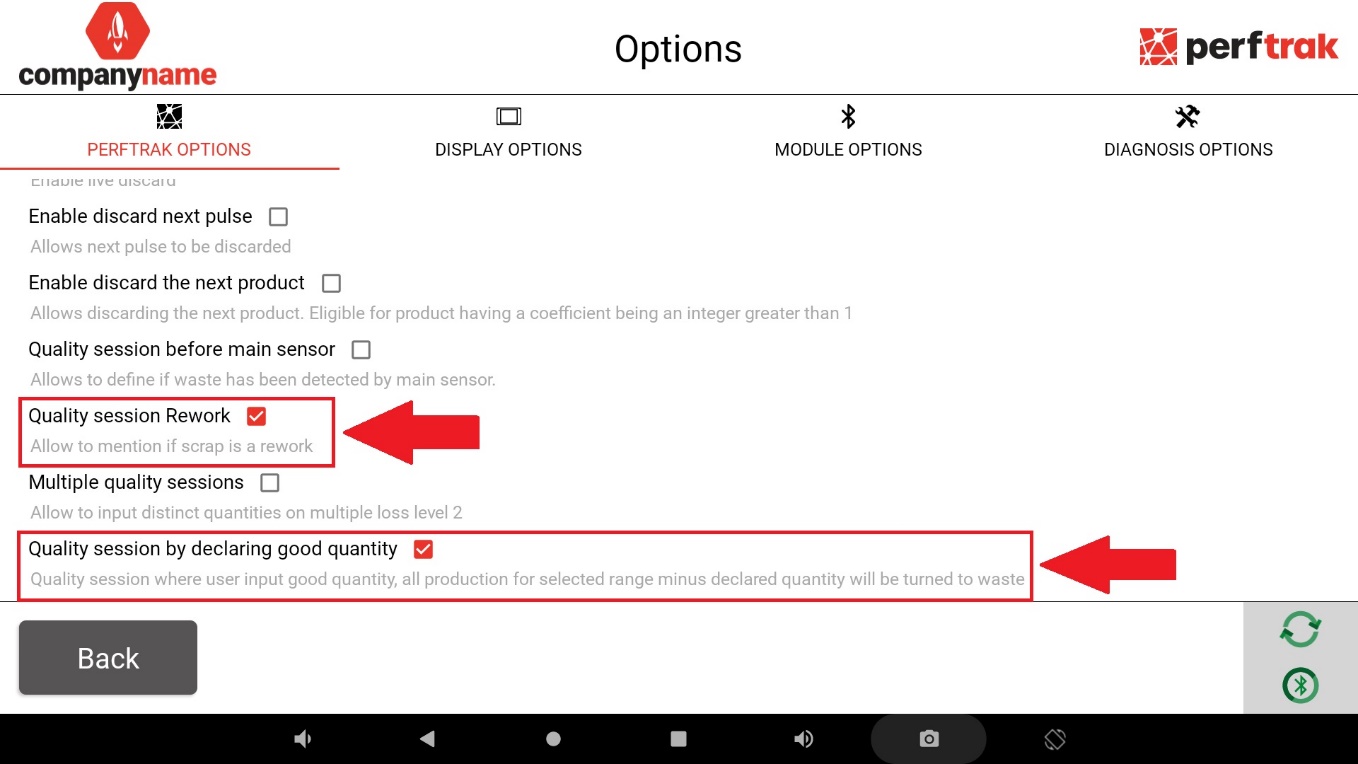
Once the platform is configured, activate the Quality session Rework and/or Quality session by declaring good quantity options in the PerfTrak settings of the tablet.
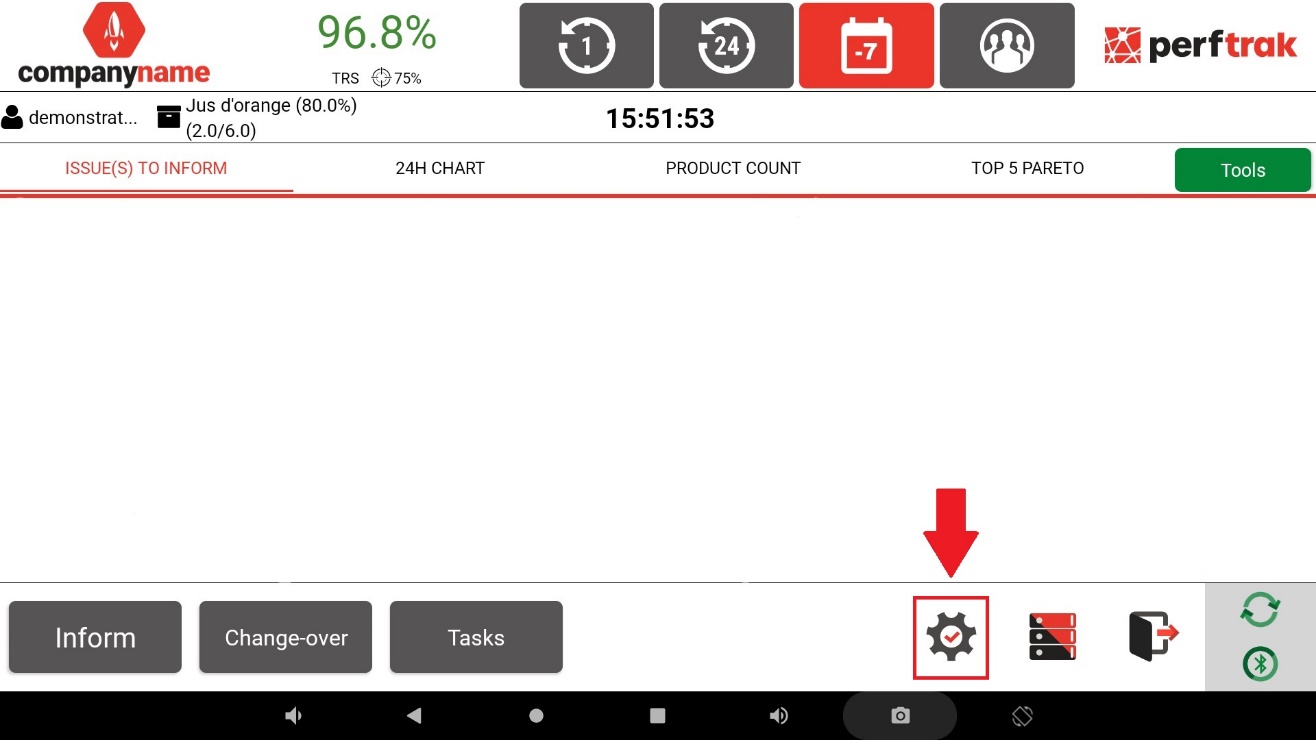
After entering your username and password, open the tablet settings with the gear icon at the bottom right of the screen.
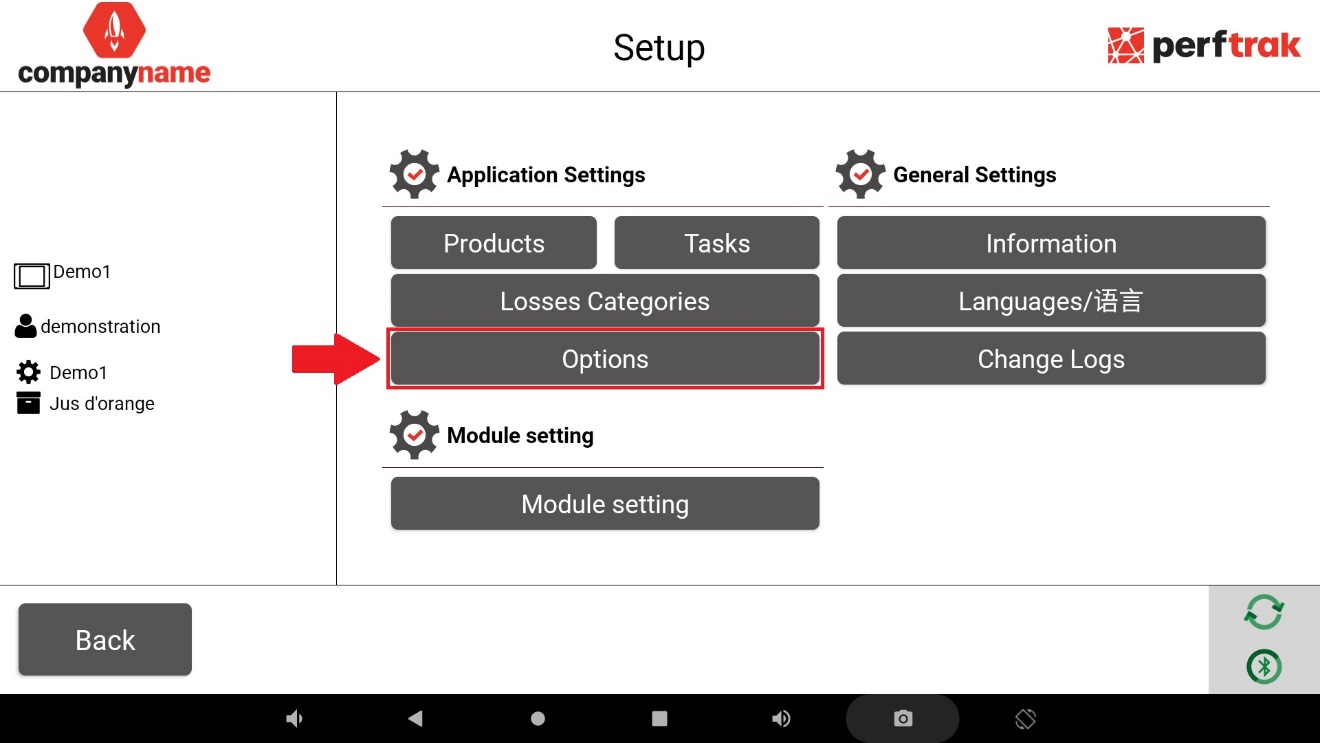
In the application settings, select Options.
Identify and tick the corresponding boxes.
4. Declaring scraps on the tablet
Return to the main page: the Tools tab appears at the top right of the screen. Click it, then select the Loss quality management sub-tab.
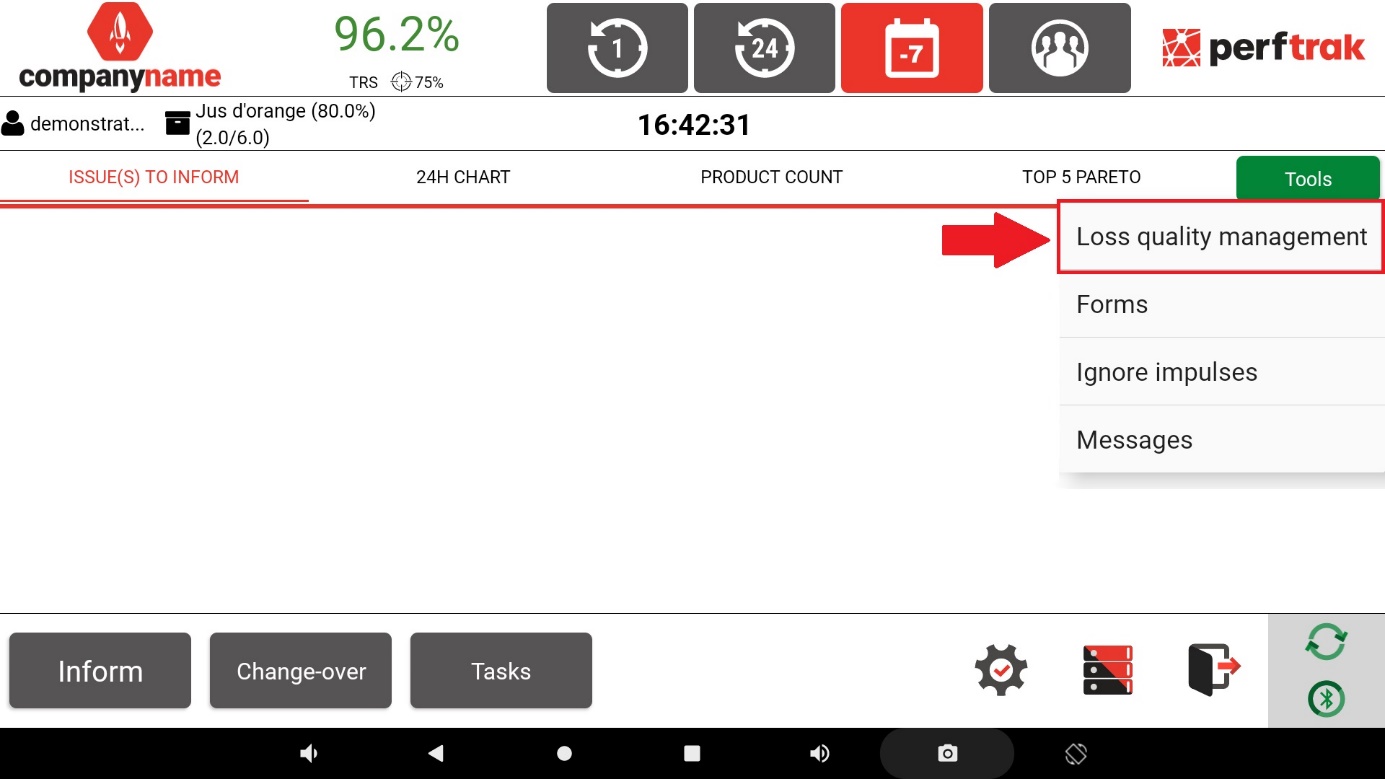
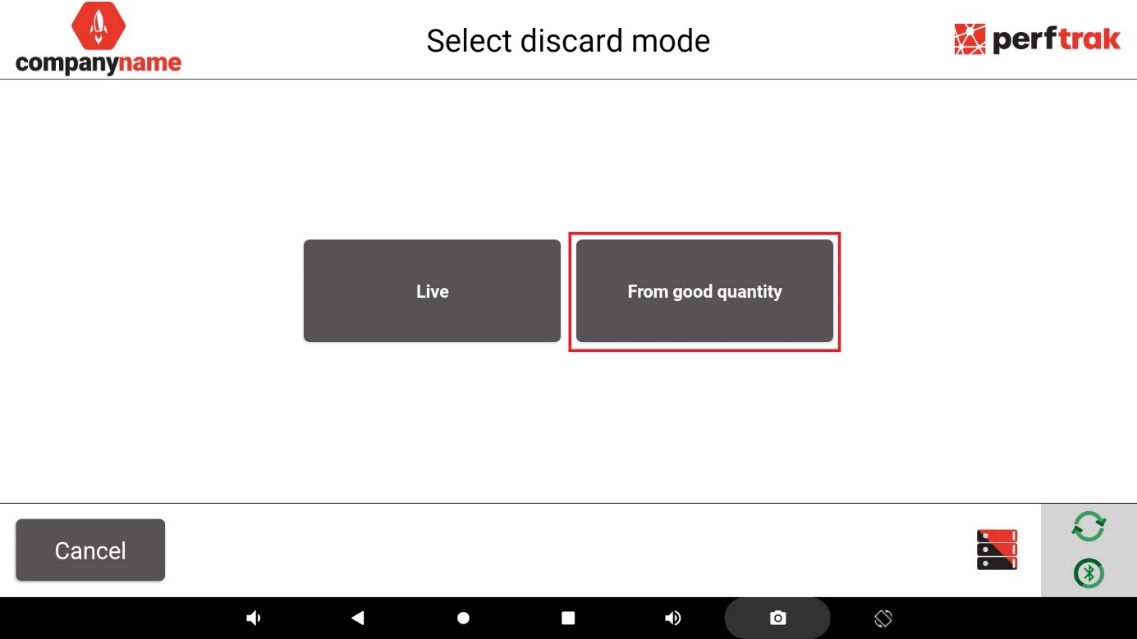
The menu displays the available quality loss management modes:
Live,
Past production,
From good quantity,
Next impulse,
Next product.
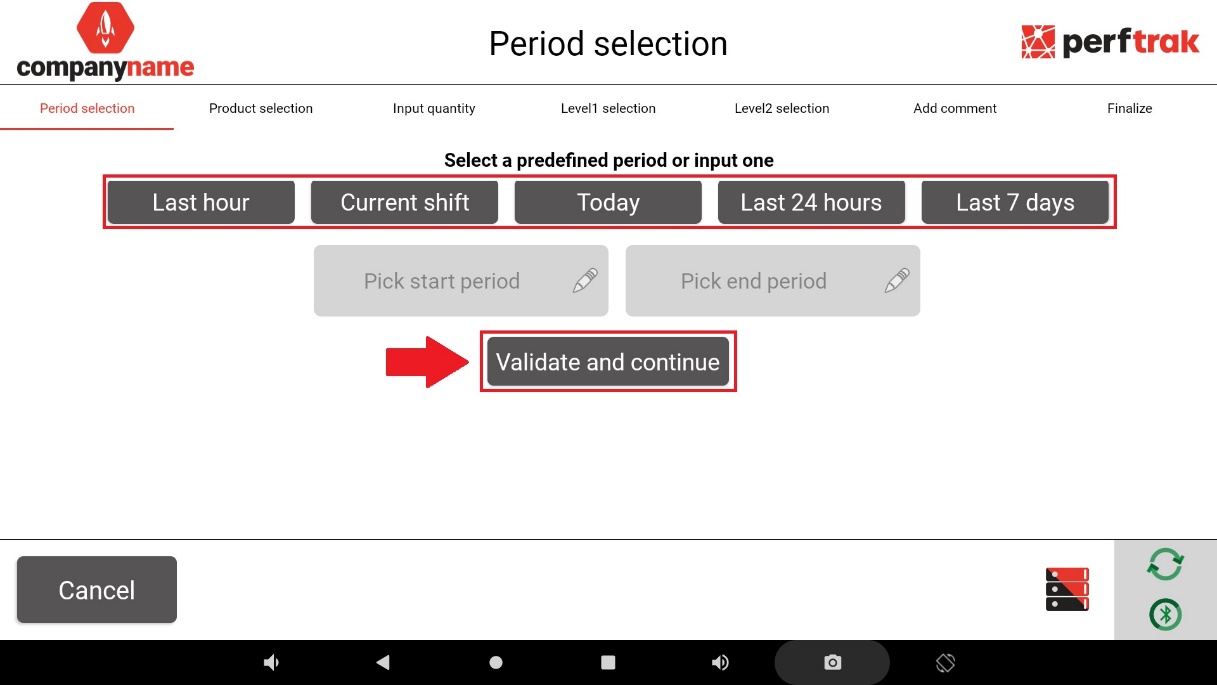
Choose the time period: last hour, current shift, today, last 24 hours or last 7 days.
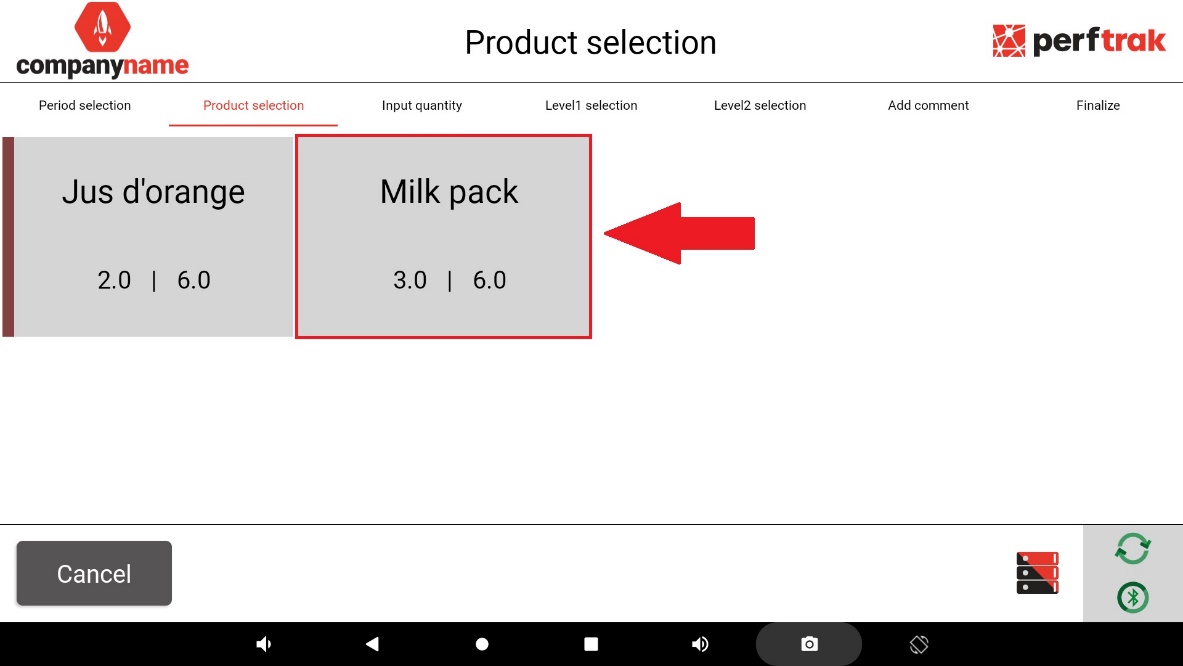
Then select the product for which you want to perform your scrap session.
Enter the quantity of parts to be declared as good for the selected period — in pulses, or using the coefficient associated with each pulse. As a reminder:
Total number of products (or pulses) − Good parts (or pulses) = Number of defective parts
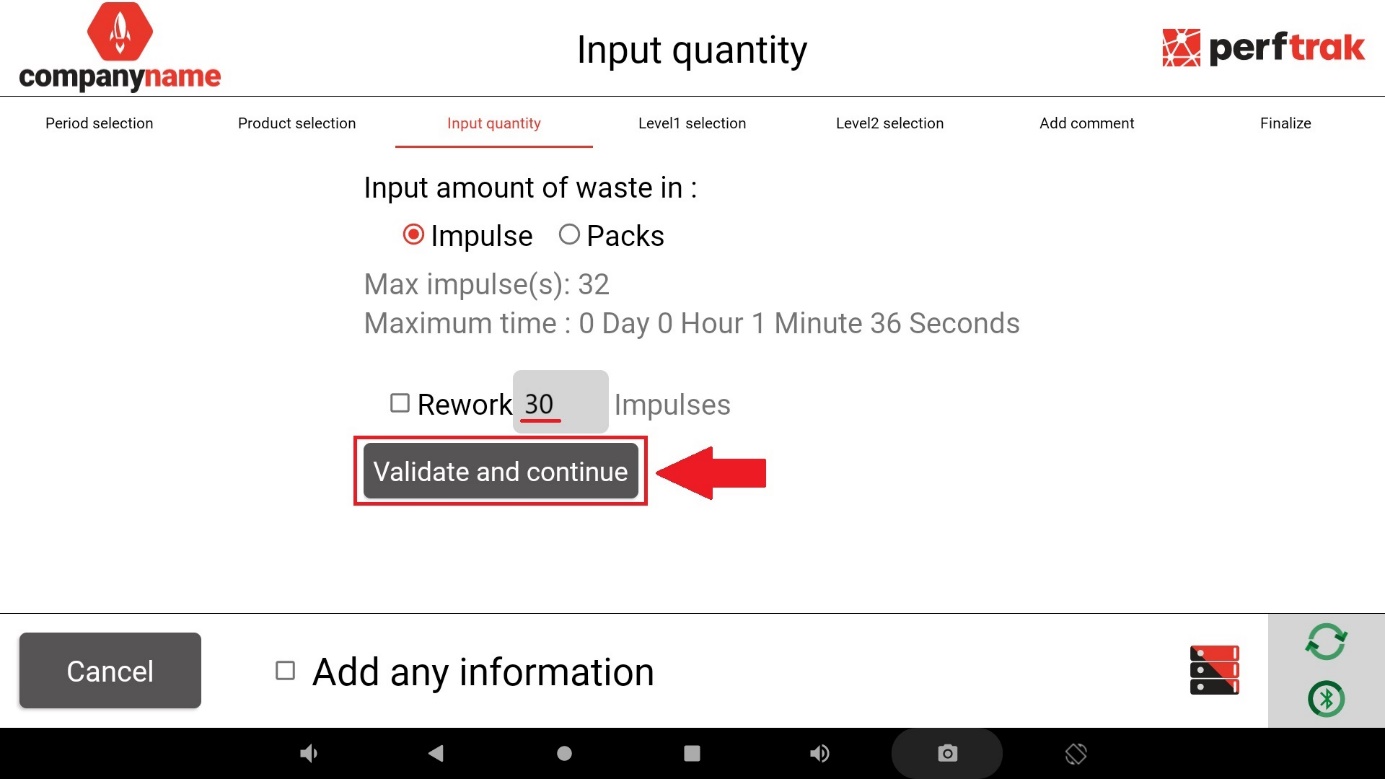
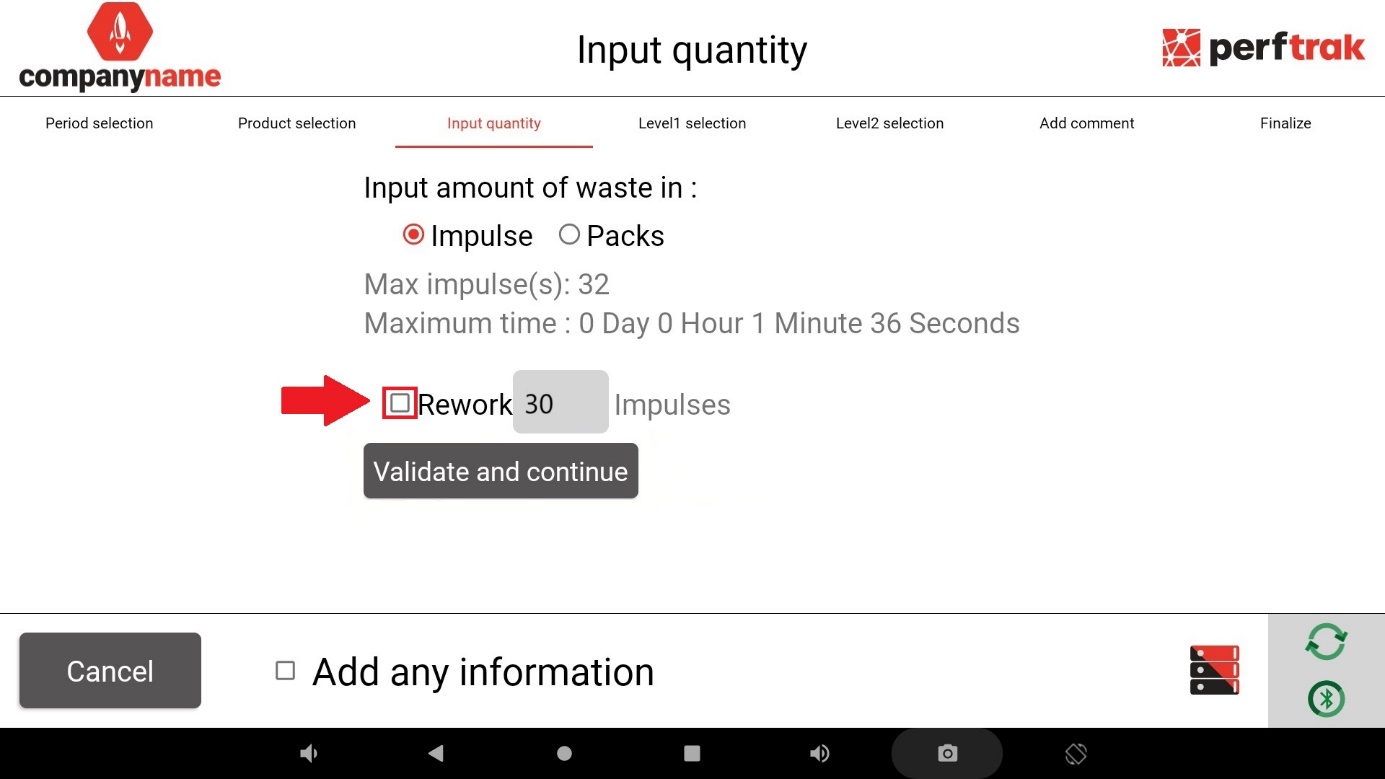
In the example above, 30 parts are declared good out of a total of 32: 32 − 30 = 2 defective parts.
5. Reworks
In the case of reworks, the parts are recorded in exactly the same way as for quality losses. You simply have to tick the Rework box.
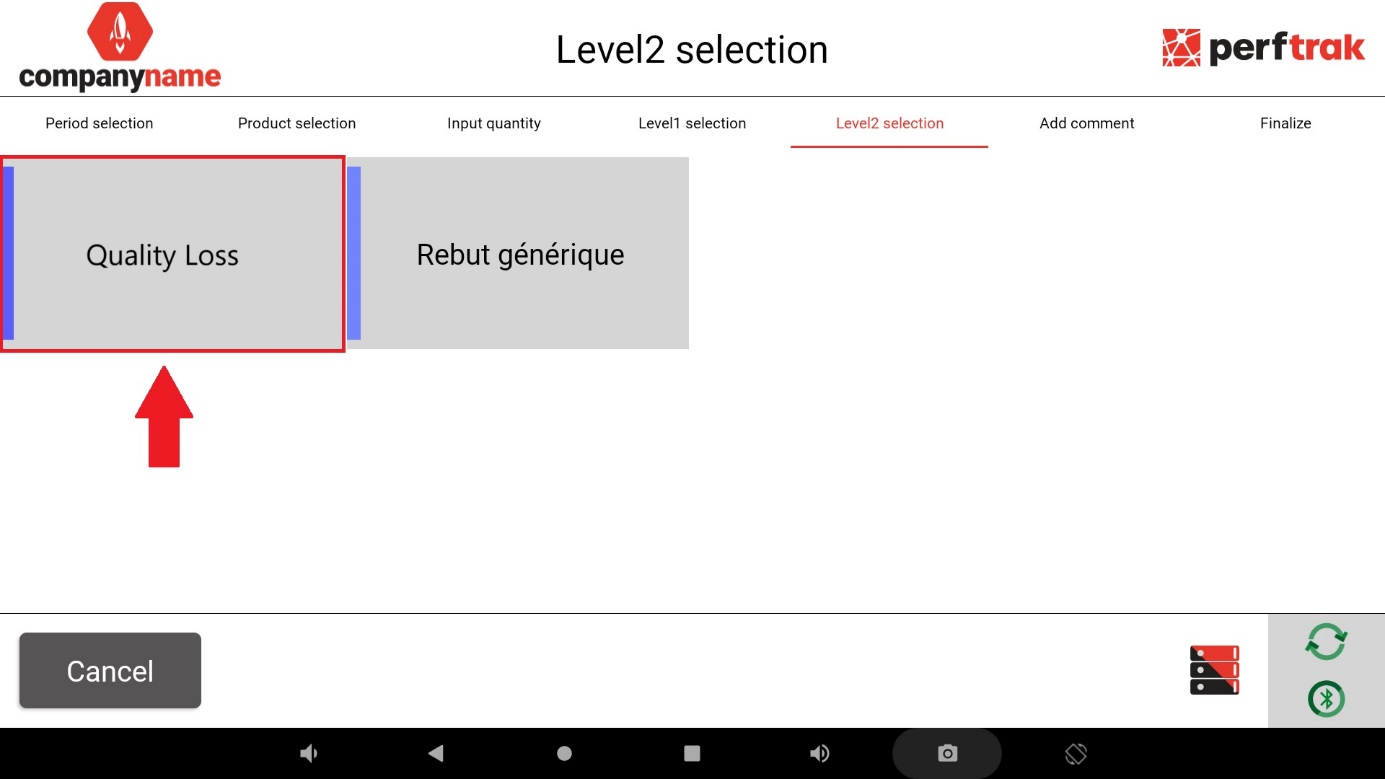
Select the level 1 and level 2 loss groups associated with the quality sessions.
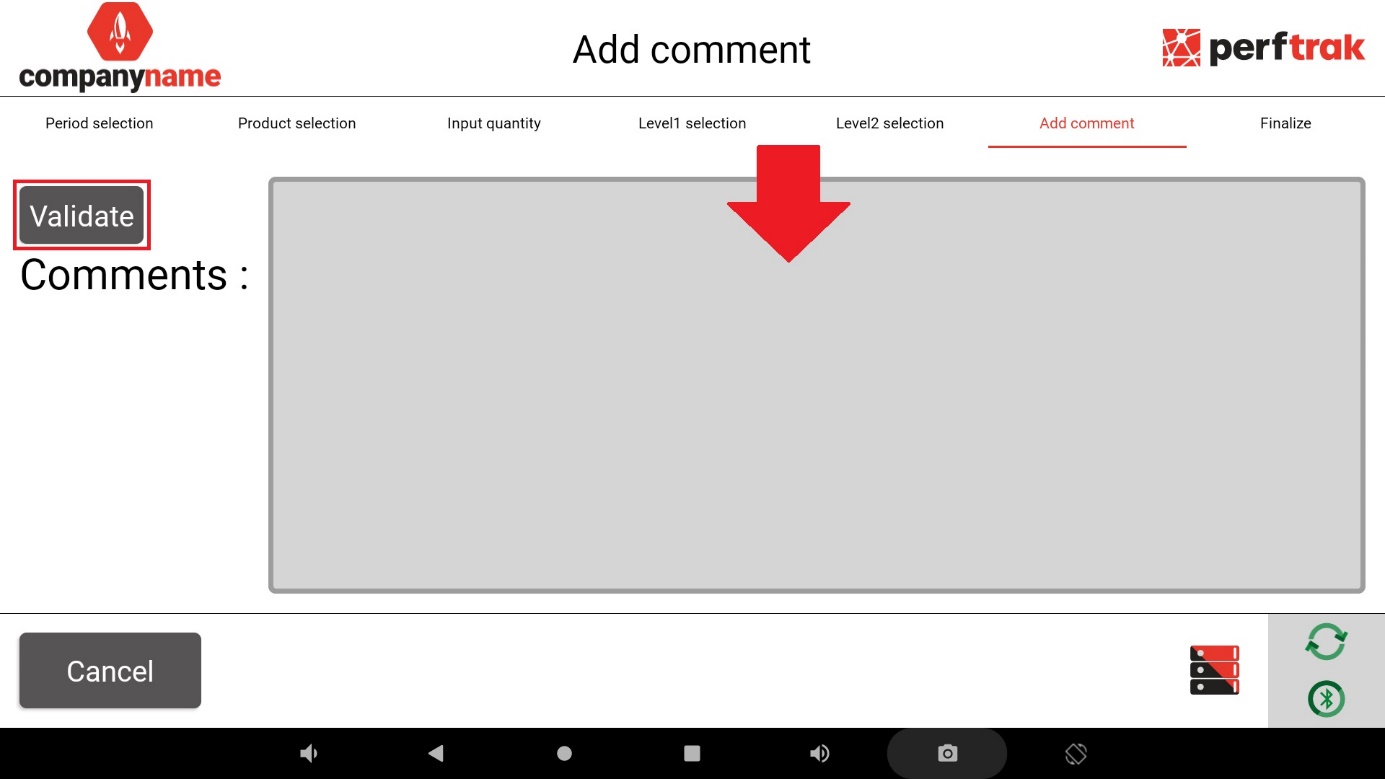
You can add a comment before finalising the transformation.
Confirm your selection once the displayed data meets your requirements, by clicking Transform.
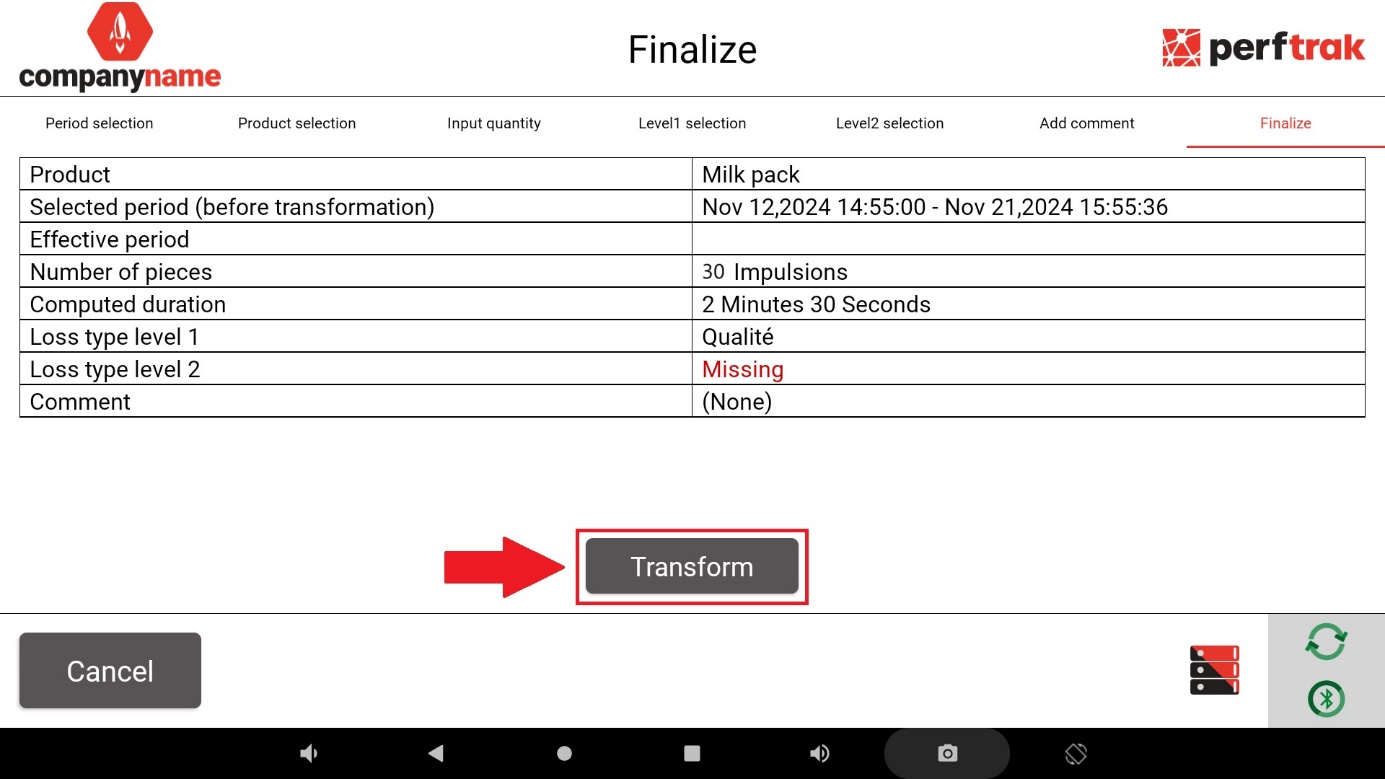
The number of reworks belongs to a separate category, independent of the good and the defective parts.